Categories
High Stakes Racing Philosophy Project Status

NFS3 multi road tracks

ever since nfs3 hot pursuit was out it was uncanny that all tracks in this game have a counterpart. Hometown <-> Country Woods, Redrock Ridge <-> Lost Canyons, Atlantica <-> Aquatica, Rocky Pass <-> The Summit and Empire City <-> Tr02b.

Fair enough, TR02B was canned and ist just a remain in the psx release, but it was planned.

So me, and maybe thousands of others were dreaming of having this tracks united. Some modders did it, or at least tried. (Aqualantica reference here).

I was always thinking that they modelled both tracks as one and then, for some reason, ripped them apart.

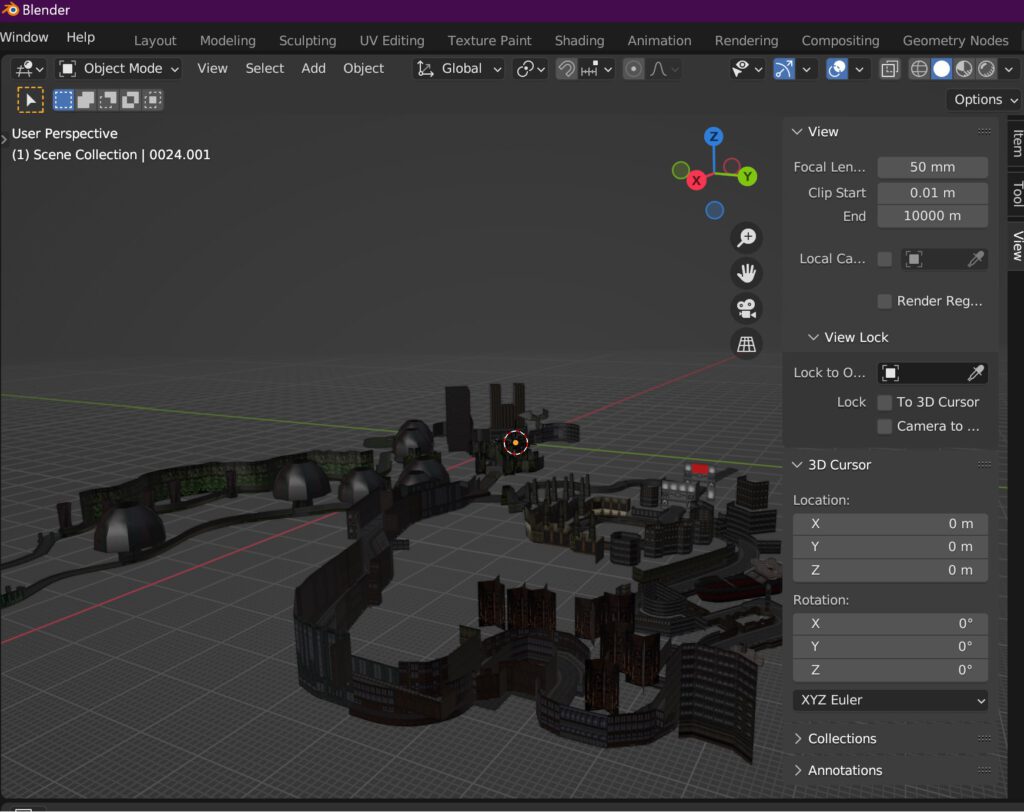
Afzer researching and reworking them for High Stakes Racing I united them finally easily in blender, and what do I say, I do think they were not modelled together. It more seems that version a being finished, half track was deleted and the other version b was modeled, because the both variants do overlap in strange ways, e.g. Redrock Ridge and Lost Canyons:

Although it looks quite messy, the needed adjustments would have been subtle.

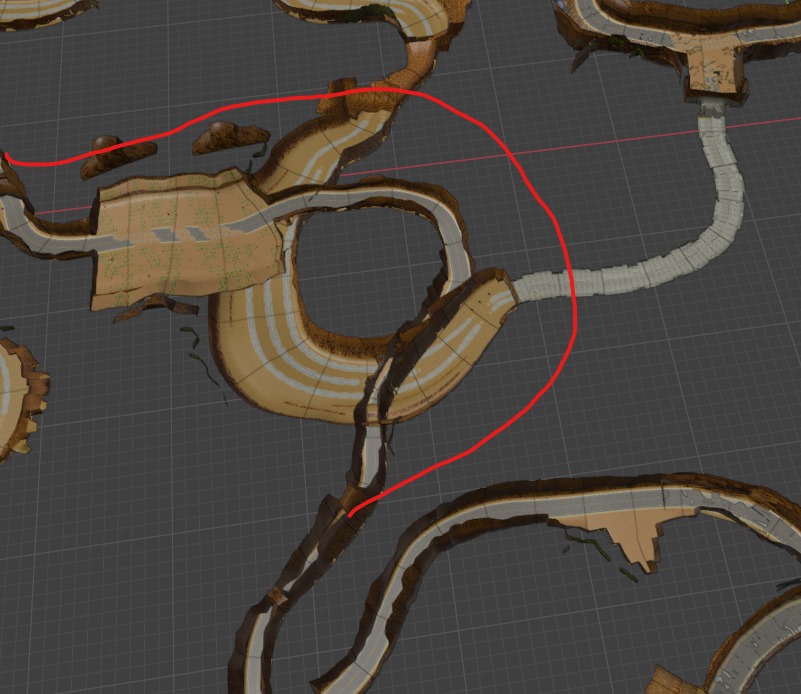
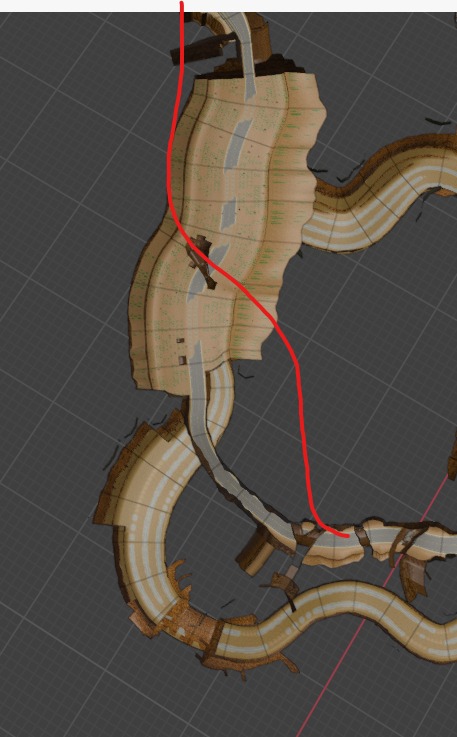
Adjusting the b-version along the red line with some height adjusting would lead to a working multiple road.

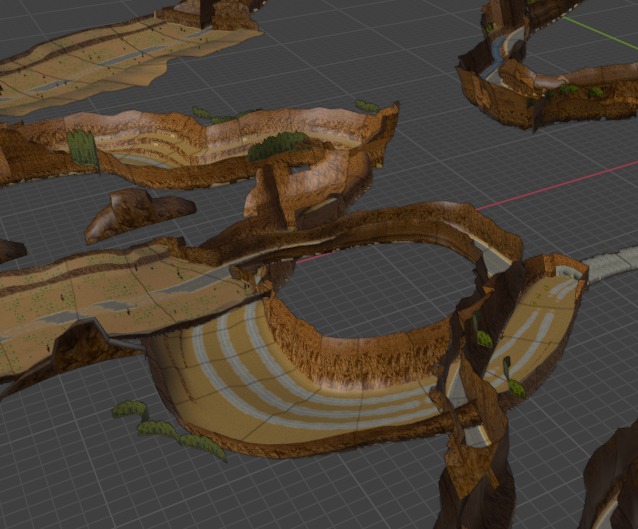
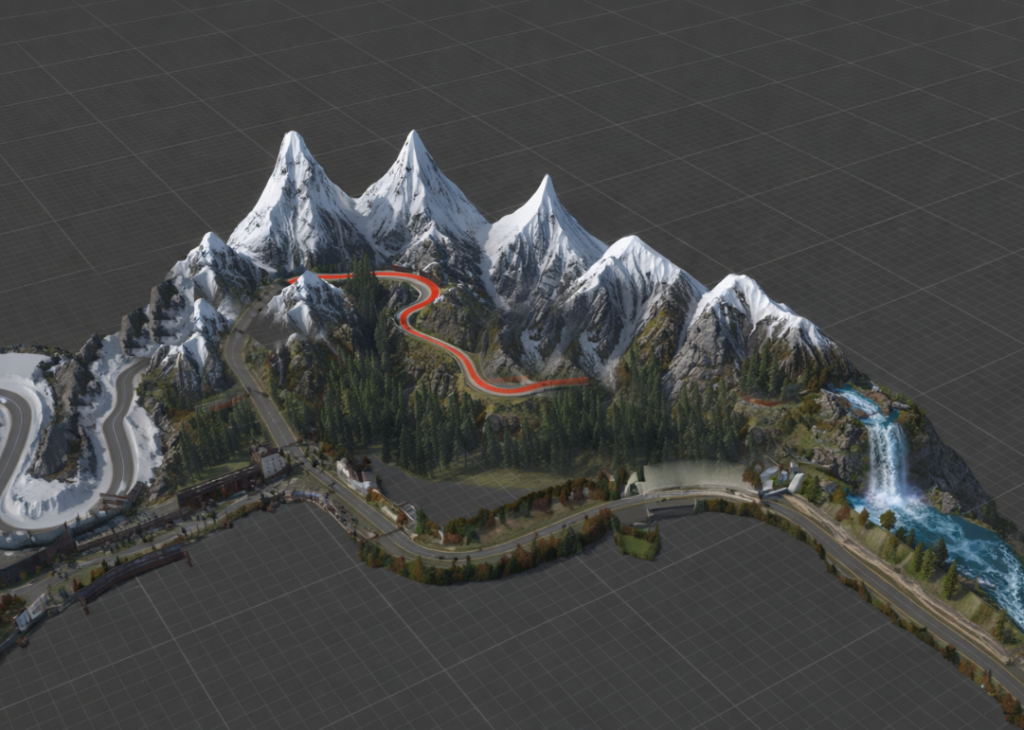
For The Summit / Rocky Pass it is more the same:

Gameplay wise I do not see any reason not to adjust that inches to have a working alternative route.

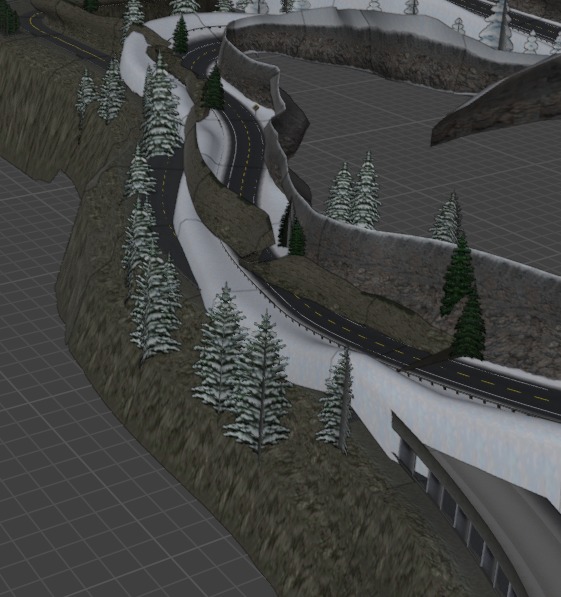
So I united them and fixed the routes to have both tracks finally united for the High Stakes Racing project:

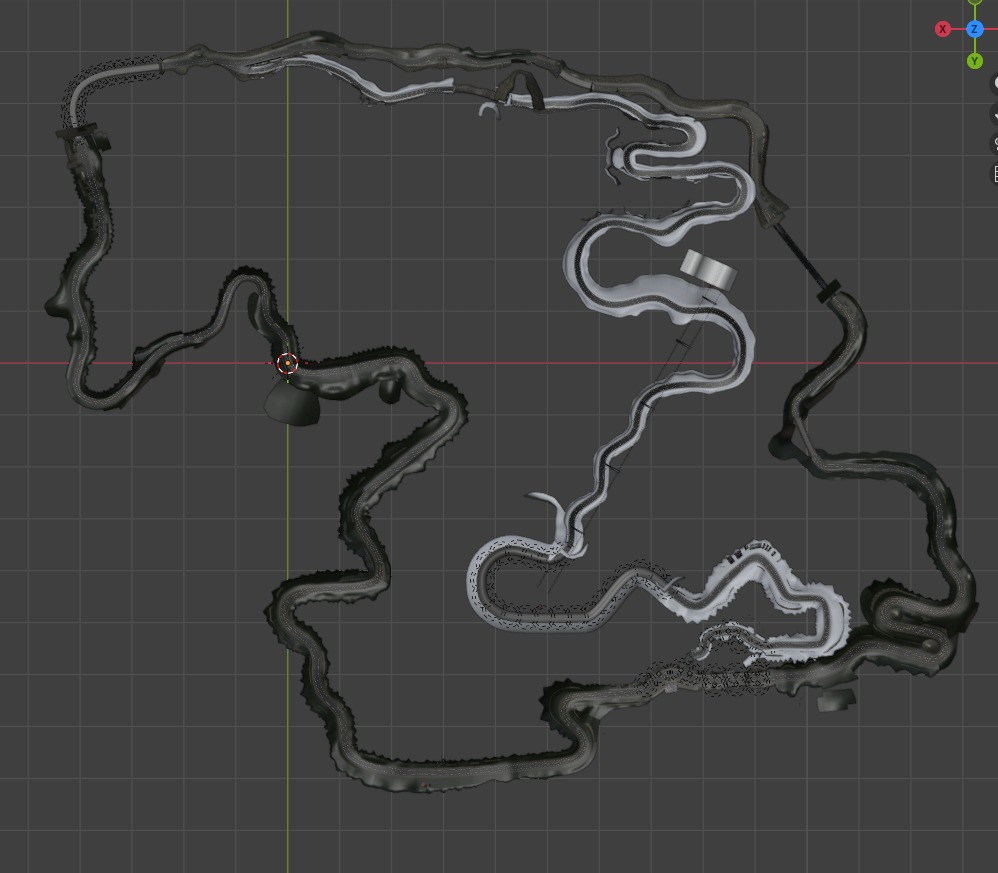
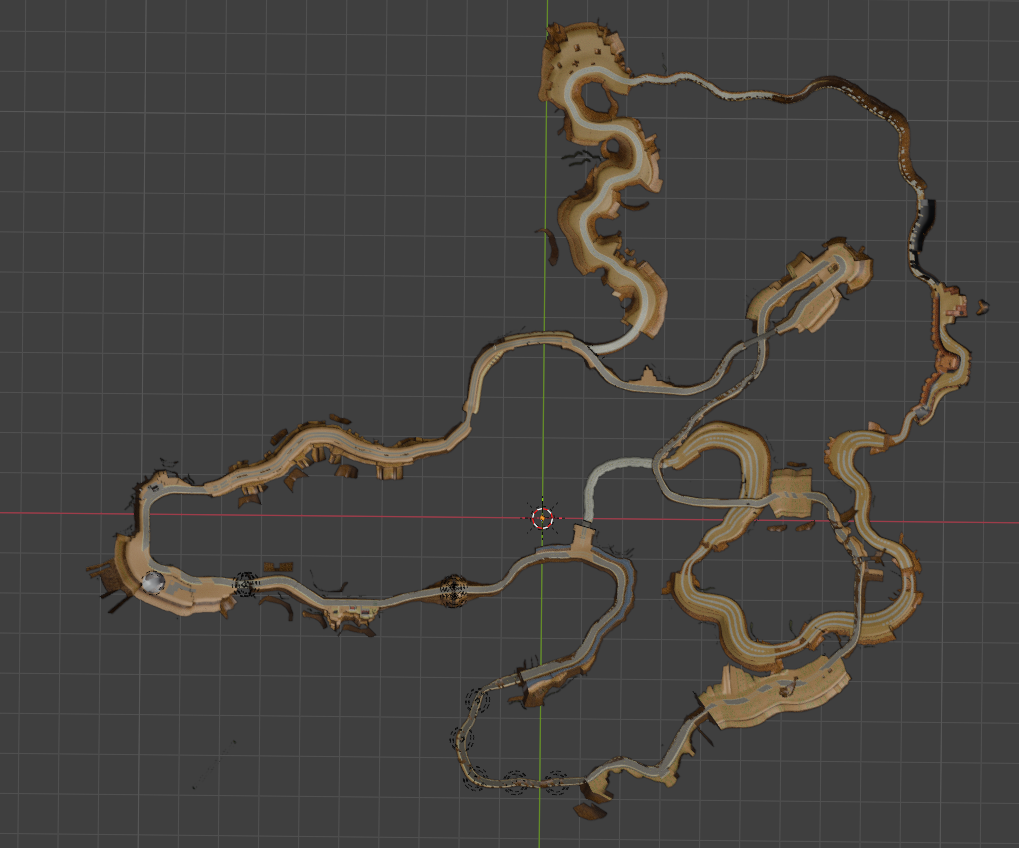
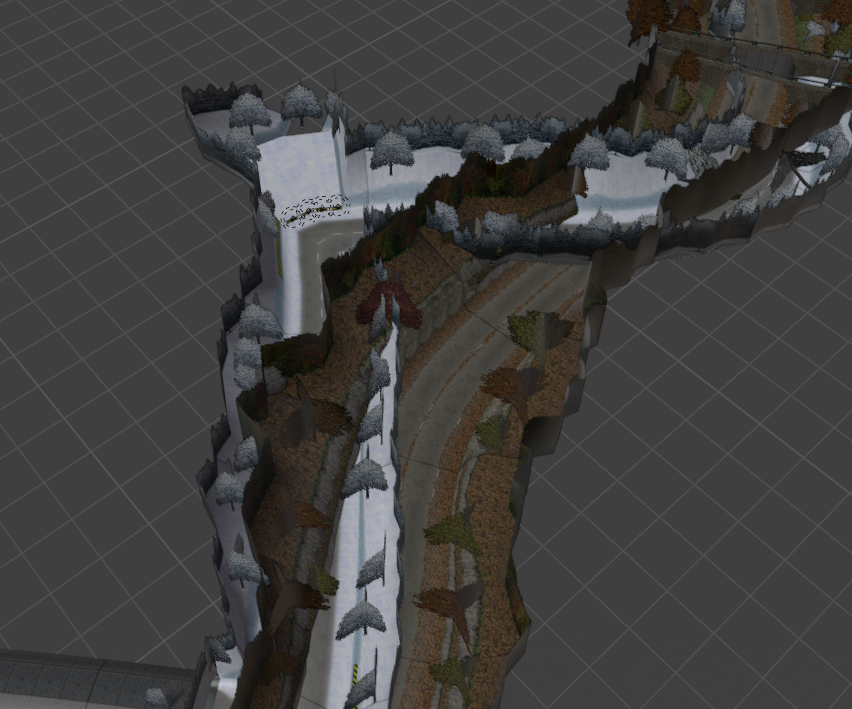
But when it comes to Redrock Ridge / Lost Canyons and Hometown / Country Woods things get very complicated:

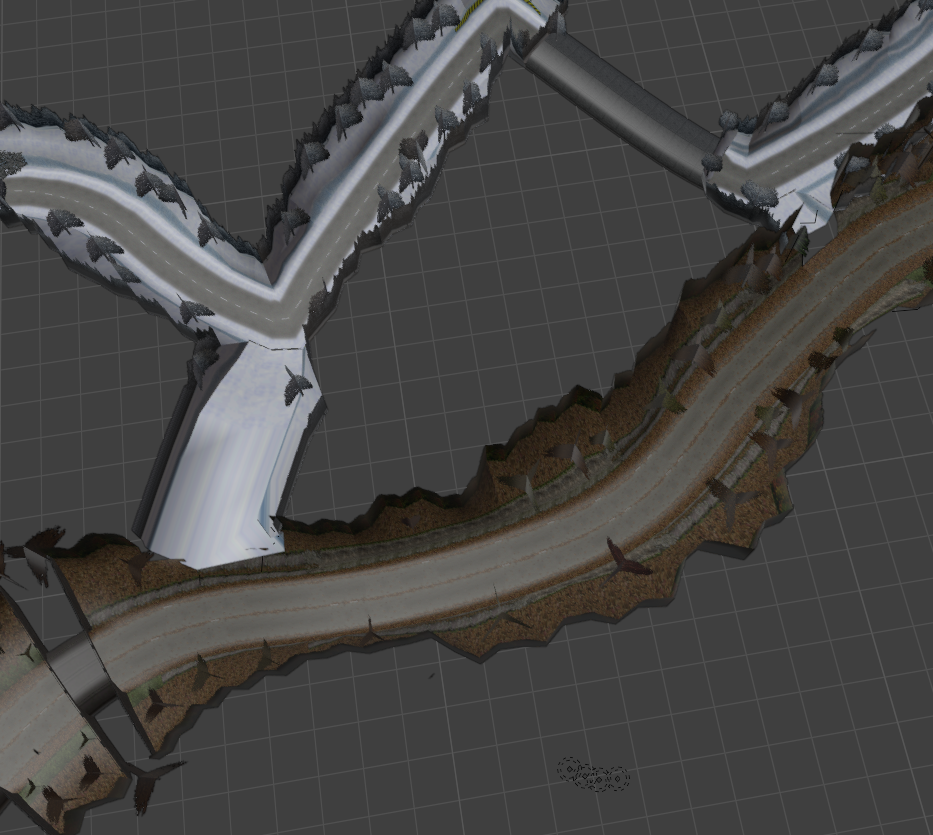
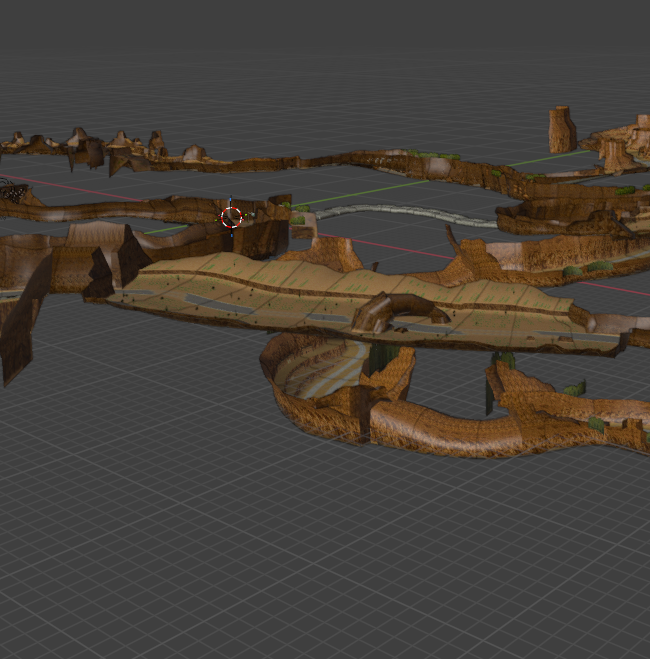
As you see both routes massively overlap each other, what interferes with my suggestion that both routes have co-existed and being separated later.

As you can see, there are multiple points where the tracks do overlap massively:

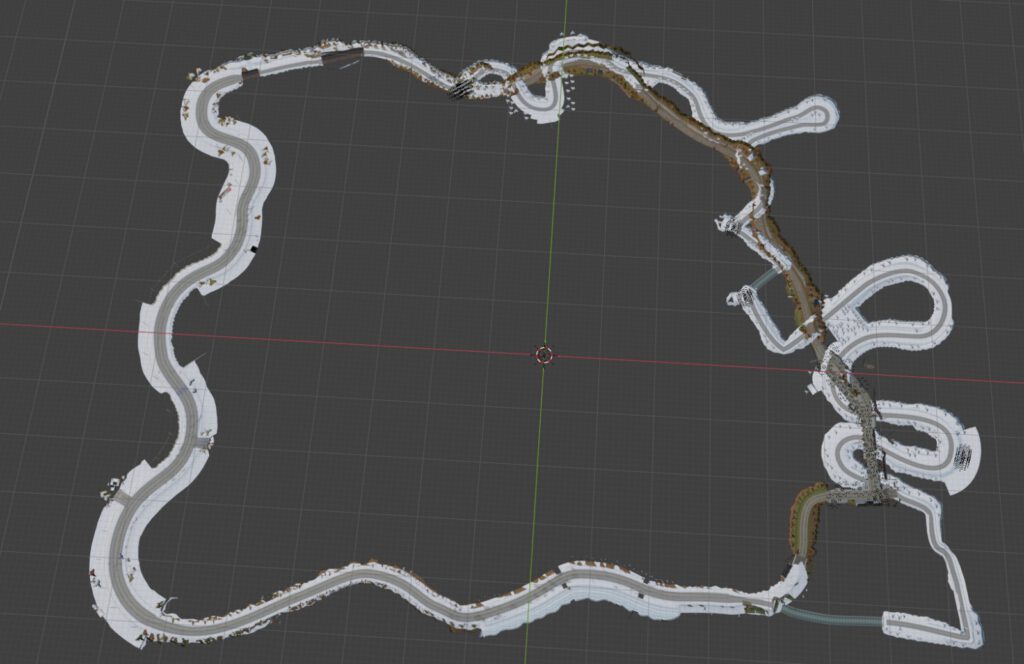
So – for me – there is a way to fix this, but it affects somewhat the track layout. After some editing, deleting, pushing and moving, this is a possible solution: I moved the overall Country Woods part a bit to the right direction of camera:

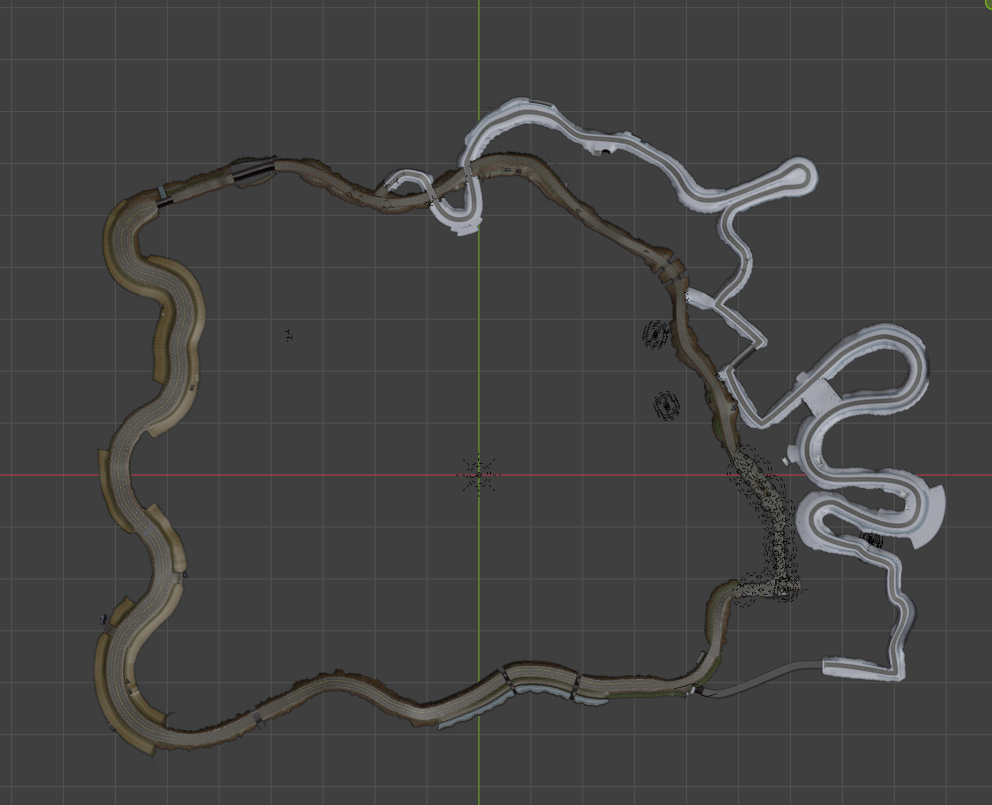
I added two bridges and moved the track a bit higher at the entry section:

And basically connected the two dead ends of country woods back to hometown:

Only thing to consider is where this missing link will lead to

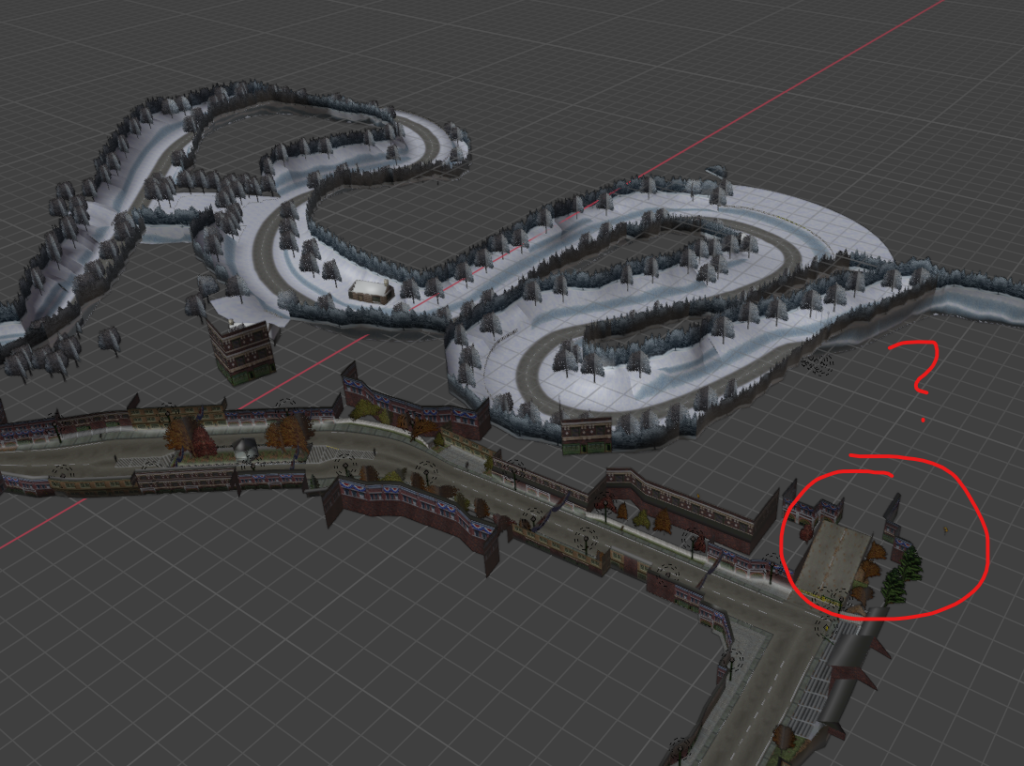
Maybe a steep section up the “mountain”? Suggesting the end tunnel of County Woods leads through a massive rock then.

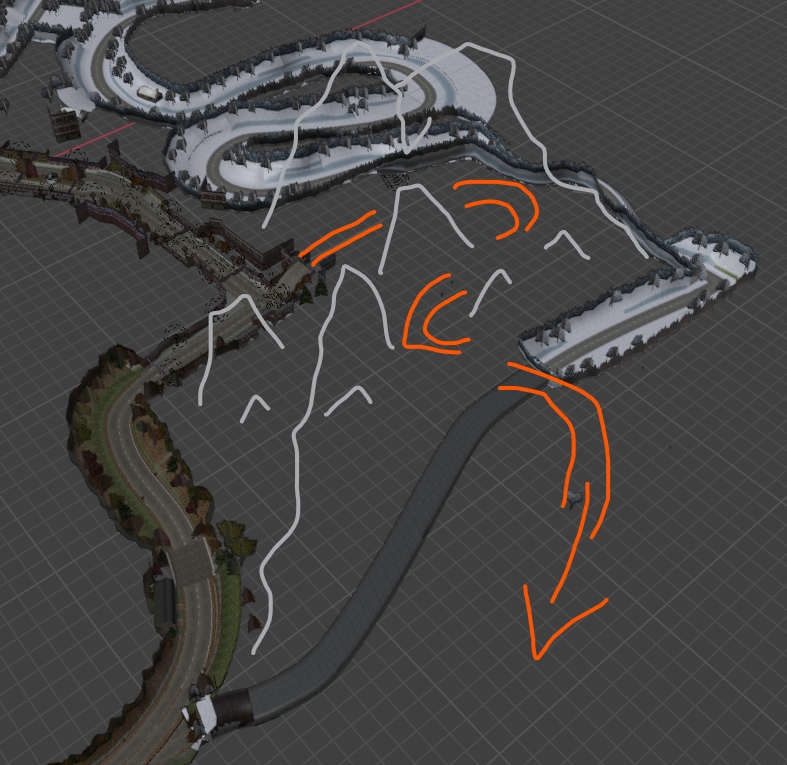
Would also be a nice transition to the river
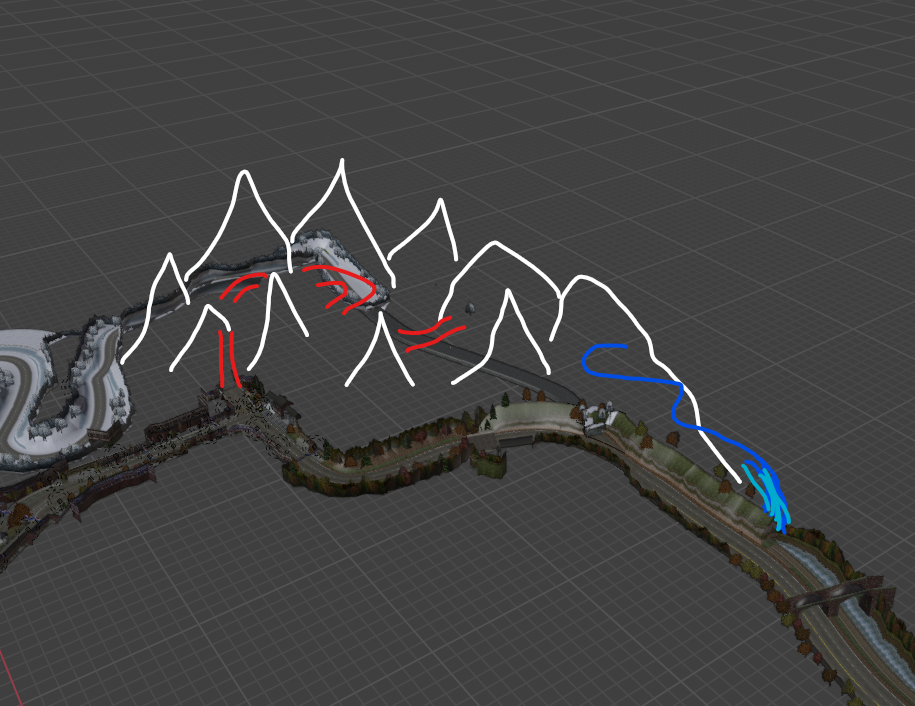
Maybe like this?

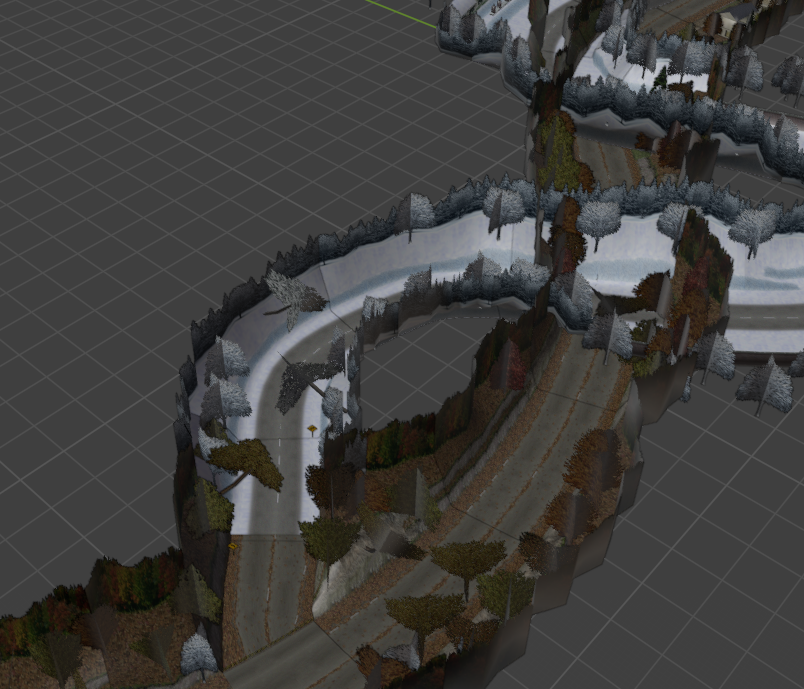
For Redrock Ridge / Lost Canyons the overlays are much more – let’s say – intense:

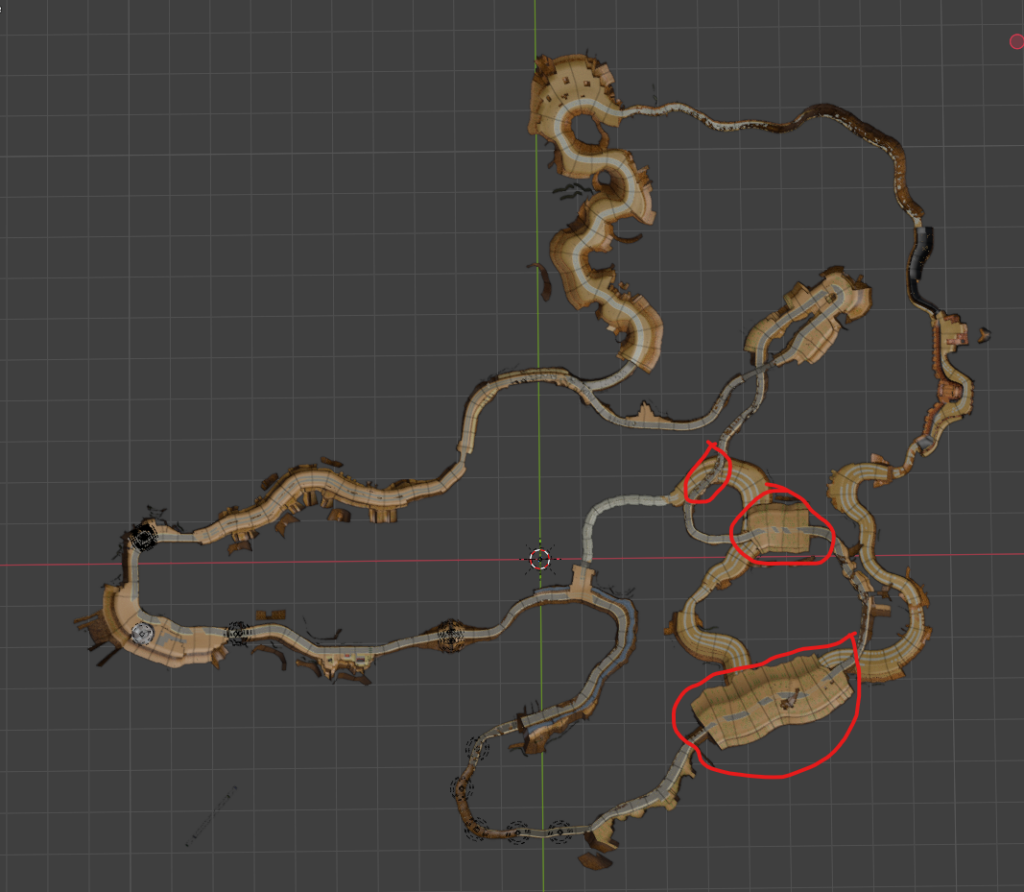
This entire section is overlapping a huge area on the bottom track:

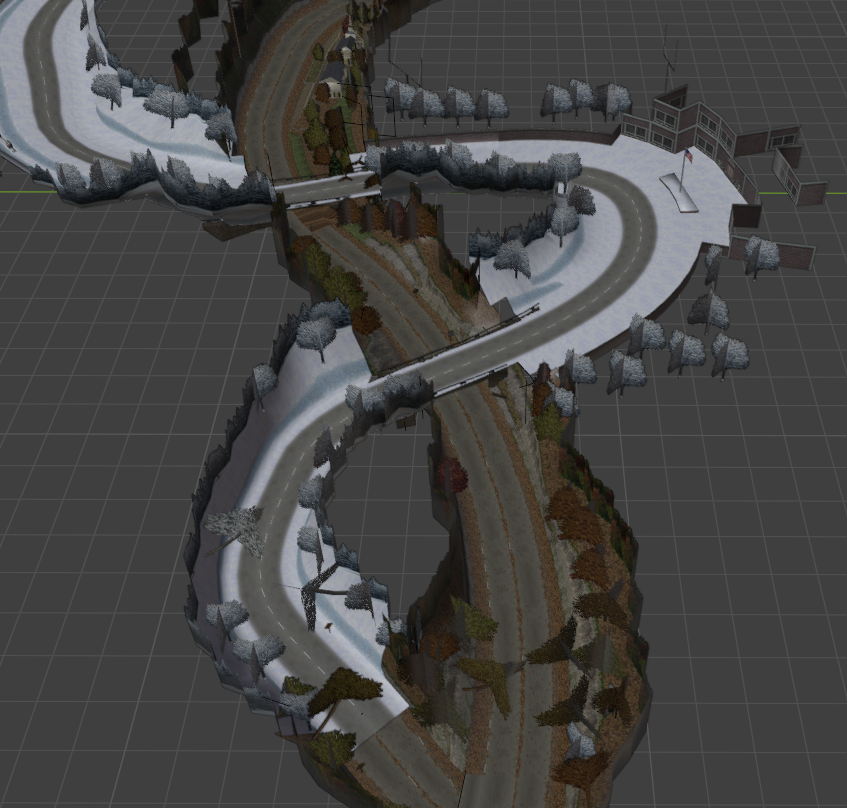
But after some adjustments there is finally together what always shoul’ve worked out of the box

Categories
Development General High Stakes Tutorials

Importing NFS3 PSX Tracks to Blender

If you want to import some or all Need For Speed III – Hot Pursuit PSX tracks to blender this short guide might help you.

I digged into it to get to the data of the Playstation-only Tracks Autocross, Caverns, Scorpio-7, Space Race and The Room, but also to finally see the legend TR02B myself.

Personal trivia: I knew that there needed to be some sort of hidden tracks and cars beside the ones that I could ever find as I can clearly remember as if it was yesterday when I read an article about the upcoming NFS3 game showing a screenshot of both track and car that I could never find in the (PC-)release version. Due to the fact that I never had a PSX myself but playing it on PC, I honestly never looked after it. Today I found out that the screenshot was representing the Autocross-Track with the PSX El Nino which has (for some reason) differences in it’s rear end textures.

Prequisites

  • Blender (download here)
  • The PC-Version of Need For Speed III*
  • The PSX-Release of Need For Speed III**
  • The Tool/Game OpenNFS (download here, mirror, mirror)
  • The Tool trk2blend (download here)
  • Adobe Photoshop (or any other tool with the ability to batch-convert BMP-files to PNG-files)

Setting up OpenNFS

This step might be optional as there could be other ways to get your hands on the texture of those tracks, but I found it the most easy way once you set up OpenNFS.

Once you have downloaded OpenNFS you may just want to extract the zipped folder to a location of your choice.

Following the original installation instruction (mirror) you then need to copy the whole NFSIII-PC files obtained from your original NFSIII-PC CD to resources/NFS_3 and the extracted files from your NFSIII-PSX CD to resouces/NFS_3_PS1, so that both folders look like the following screenhots show:

The following step with OpenNFS might be obsolete as there are other tools to convert the textures to BMP, PNG or whatever, but I personally found it the most easy way just to click through the dropdown in OpenNFS waiting for the tracks to load and have the textures all ready in each folder instead of working on a cli.

Starting OpenNFS

Once you started OpenNFS select TR02B (or any other track you like) from the track dropdown

In the cli window in the background you will notice some stuff going on, just be patient and wait for the track to load.

TR02B from NFS3 Hot Pursuit loaded in OpenNFS

Once the track is fully loaded you now may exit OpenNFS or take a lap around the track – your choice.

Afterwards you navigate to the installation directory of OpenNFS and jump to

/bin/assets/tracks/NFS_3_PS1/

In there you will find all track-folders you already opened in OpenNFS containing each track’s textures as BMP files.

e.g. ZZZTR02B

Converting the BMP files to PNGs

As there are many ways to achieve that I will leave that up to you, I used a simple photoshop action and batch-runned it to get them into PNGs.

I suggest to store the png files in new folder. Personally, I always create new folders like

ROOT/exports/nfs3/tracks/tr02b/png

Converting the TRK files to Blender with TRK2Blender

Open the tool “TRK2Blender”, navigate to the PSX-files-folder within your OpenNFS installation directory and select the corresponding trk file, e.g. ZZZTRK02B.

Afterwars you will see the conversion process running

Prompting “Conversion complete, please exit.” when the process is completed. Within the NFS3-PSX file folder in OpenNFS’s resources you then will find a new folder named after the track file you opened containing all .lwo files.

Note: At this step I suggest to copy all .lwo-files to the export-folder above just to keep an eye on the exported files for later use maybe.

ROOT/exports/nfs3/tracks/tr02b/

Make sure you copied the bmps converted to png in the subfolder (here “PNG”; but the name is up to you, e.g. “textures” or whatever).

Start Blender

Once you started blender I prefer to empty the scene to remove unused content.

Open scripting tab, click “new” and paste the following script.

import os
import bpy

# put the location to the folder where the objs are located here in this fashion
# this line will only work on windows ie C:\objects
path_to_obj_dir = os.path.join('C:\\', 'Users', 'USERNAME', 'PATH', 'TO', 'YOUR', 'FILES')

# get list of all files in directory
file_list = sorted(os.listdir(path_to_obj_dir))

# get a list of files ending in 'obj'
obj_list = [item for item in file_list if item.endswith('.lwo')]

# loop through the strings in obj_list and add the files to the scene
for item in obj_list:
    path_to_file = os.path.join(path_to_obj_dir, item)
    bpy.ops.import_scene.lwo(filepath = path_to_file)

Make sure to edit the “path_to_obj_dir” var to match your folder structure, e.g.

 path_to_obj_dir = os.path.join('D:\\', '_HighStakes', 'OpenNFS', 'OpenNFS.Pre-Alpha.v_03', 'resources', 'NFS_3_PS1', 'ZZZTR02B')

And hit the “play”-button in the scripting Tab. An error will occur.

Select the texture folder created, hit “Select Image Search…” and see imported track TR02B in blender.

TR02B – The hidden track from Need For Speed III – Hot Pursuit – imported to blender.

*, ** – Due to copyrights I cannot give you access to any of these original game data files, of course!