ever since nfs3 hot pursuit was out it was uncanny that all tracks in this game have a counterpart. Hometown <-> Country Woods, Redrock Ridge <-> Lost Canyons, Atlantica <-> Aquatica, Rocky Pass <-> The Summit and Empire City <-> Tr02b.
Fair enough, TR02B was canned and ist just a remain in the psx release, but it was planned.
So me, and maybe thousands of others were dreaming of having this tracks united. Some modders did it, or at least tried. (Aqualantica reference here).
I was always thinking that they modelled both tracks as one and then, for some reason, ripped them apart.
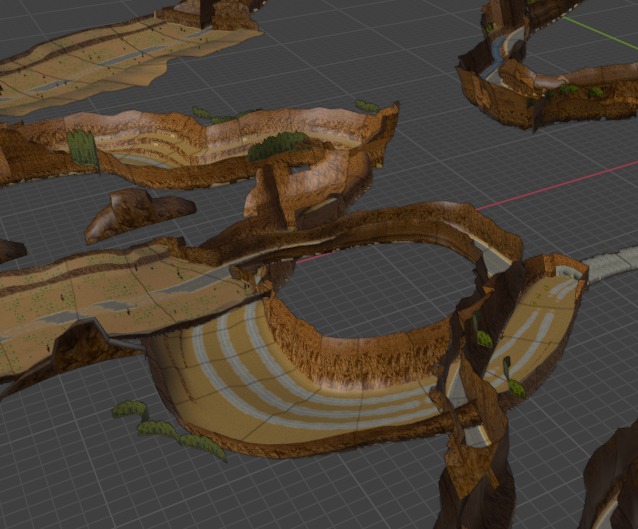
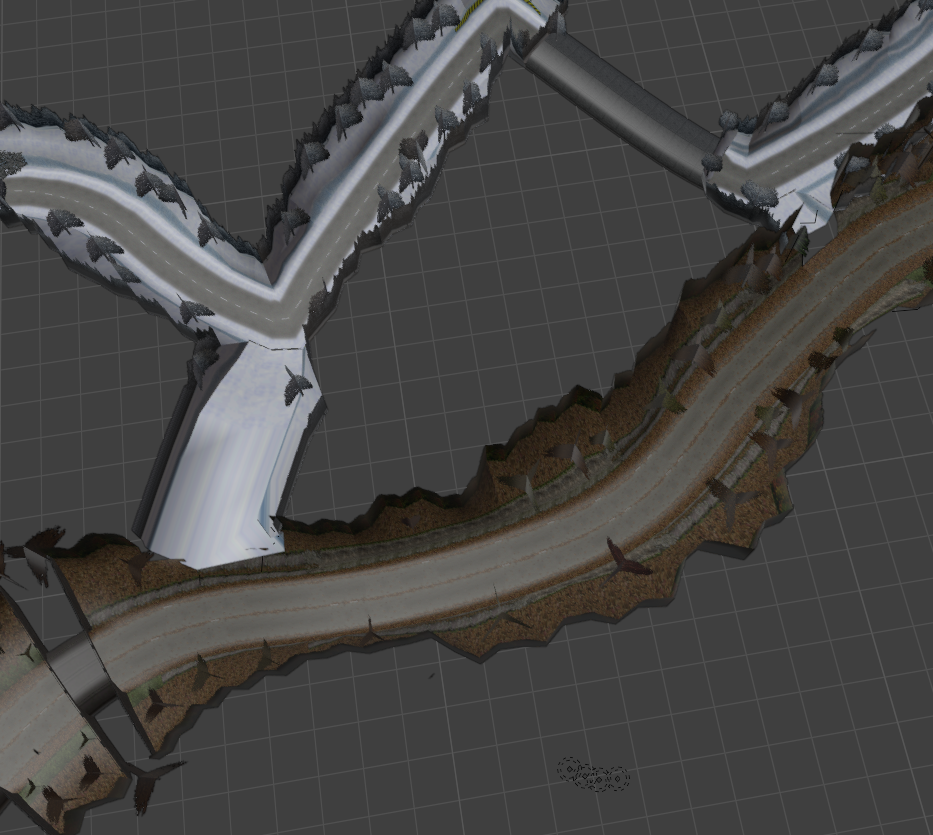
Afzer researching and reworking them for High Stakes Racing I united them finally easily in blender, and what do I say, I do think they were not modelled together. It more seems that version a being finished, half track was deleted and the other version b was modeled, because the both variants do overlap in strange ways, e.g. Redrock Ridge and Lost Canyons:
Although it looks quite messy, the needed adjustments would have been subtle.
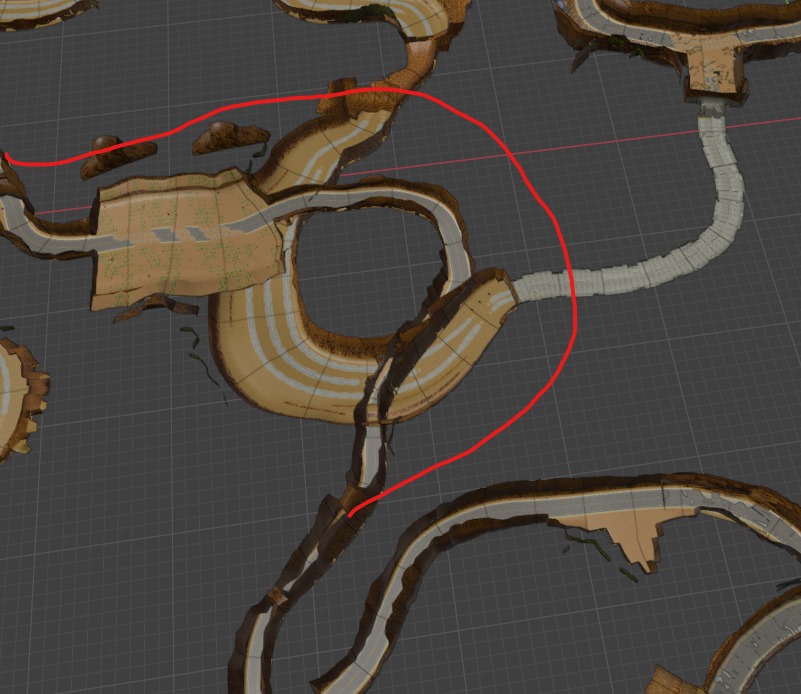
Adjusting the b-version along the red line with some height adjusting would lead to a working multiple road.
For The Summit / Rocky Pass it is more the same:
Gameplay wise I do not see any reason not to adjust that inches to have a working alternative route.
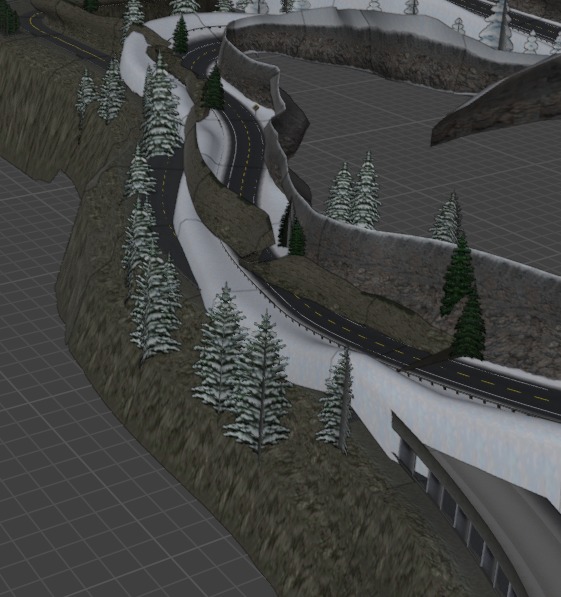
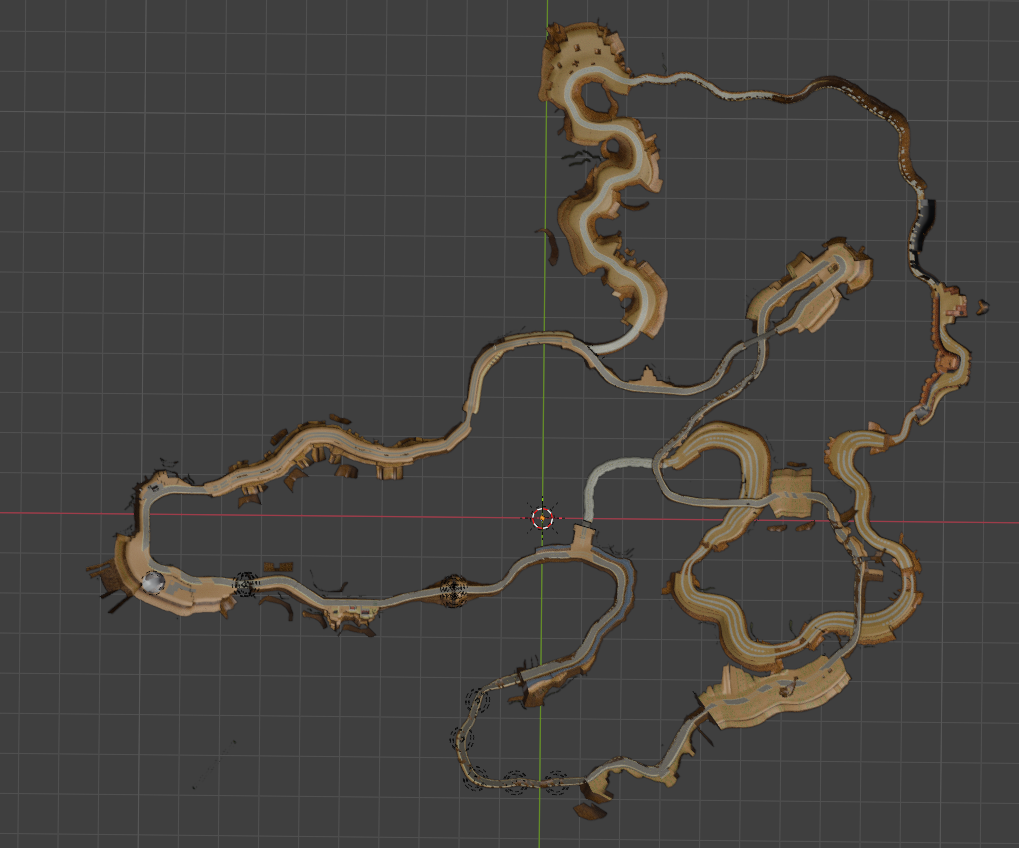
So I united them and fixed the routes to have both tracks finally united for the High Stakes Racing project:
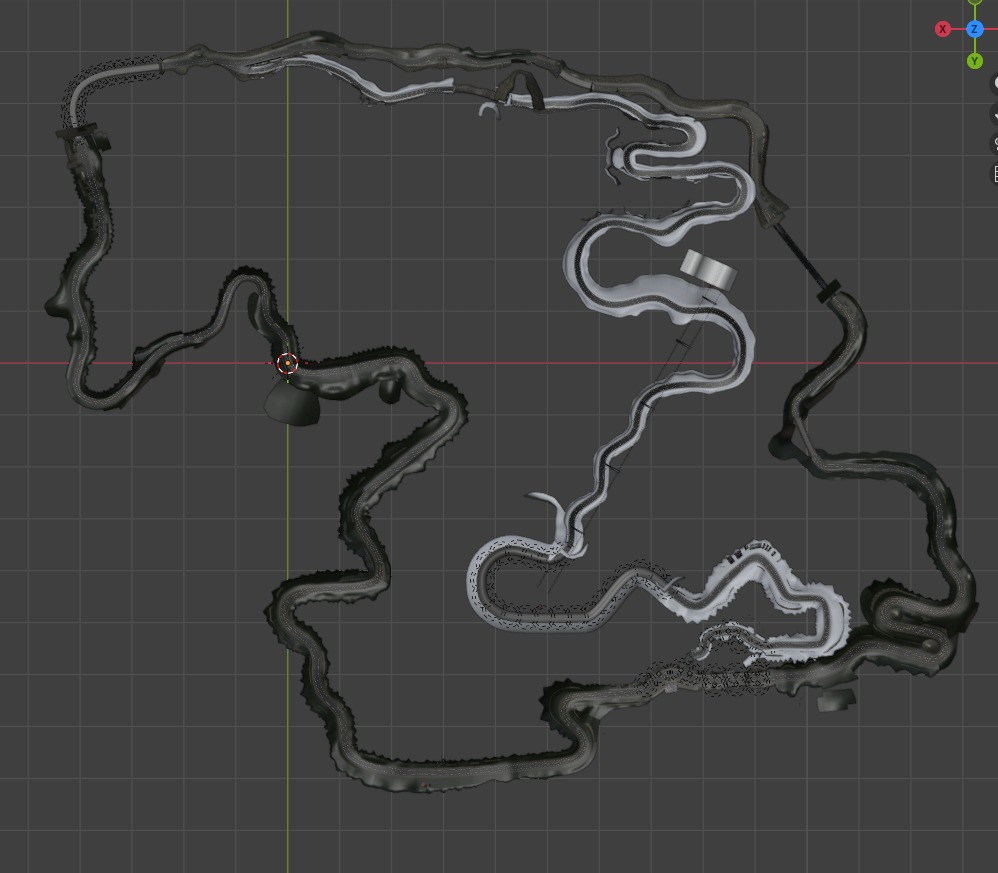
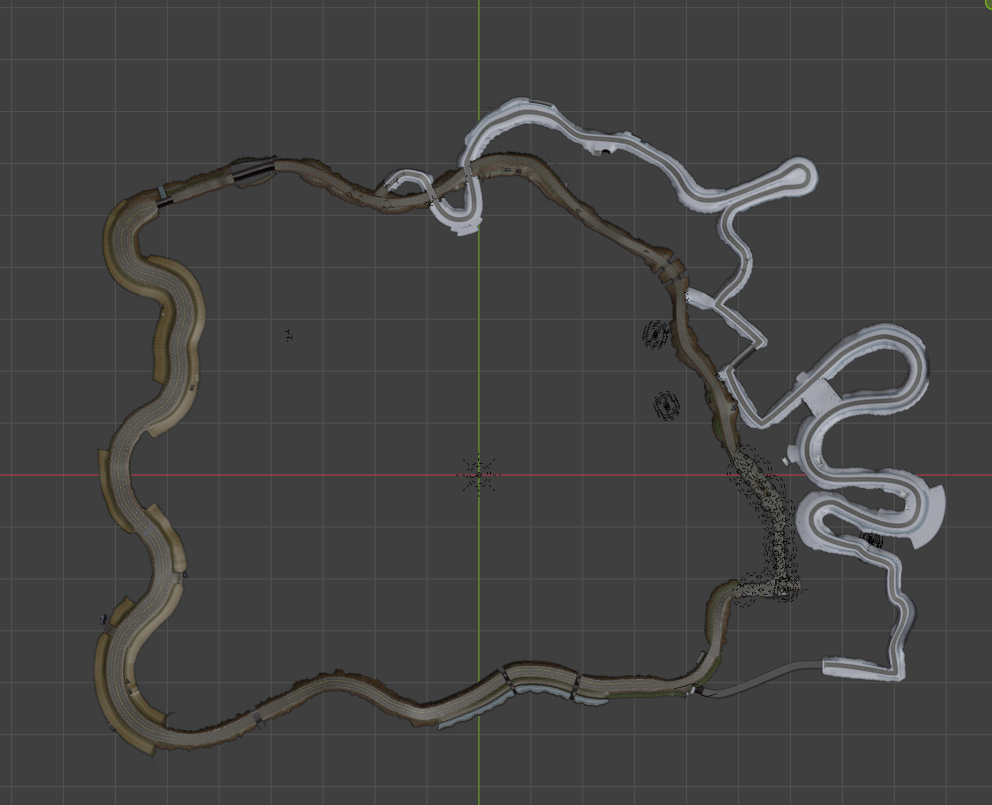
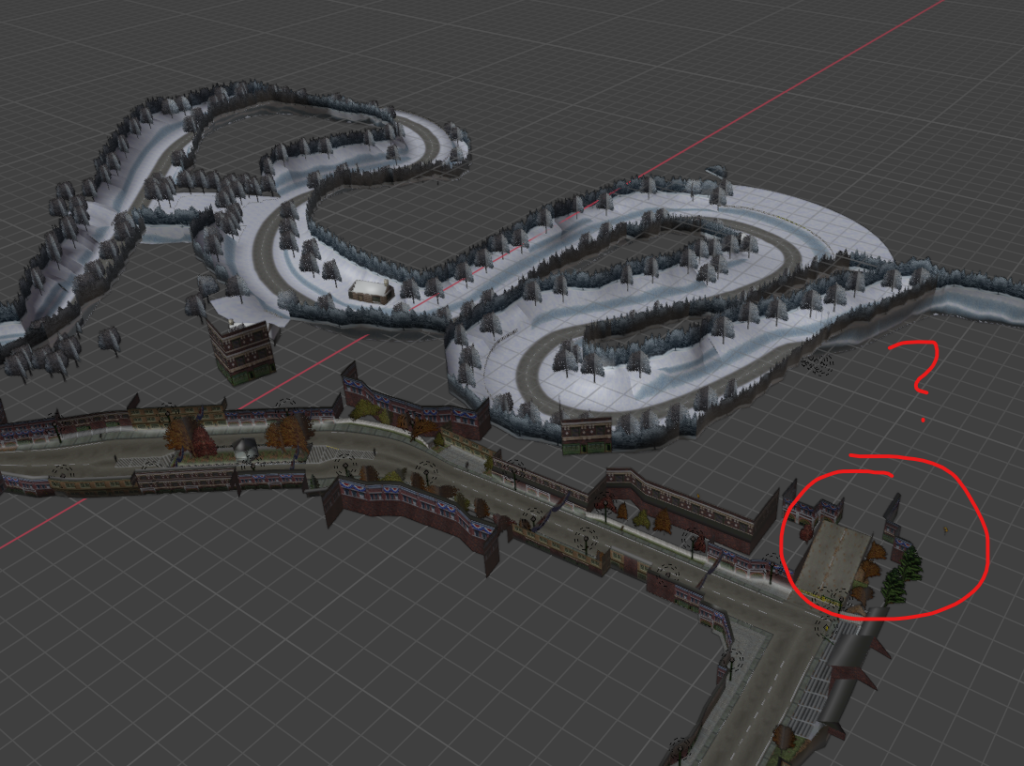
But when it comes to Redrock Ridge / Lost Canyons and Hometown / Country Woods things get very complicated:
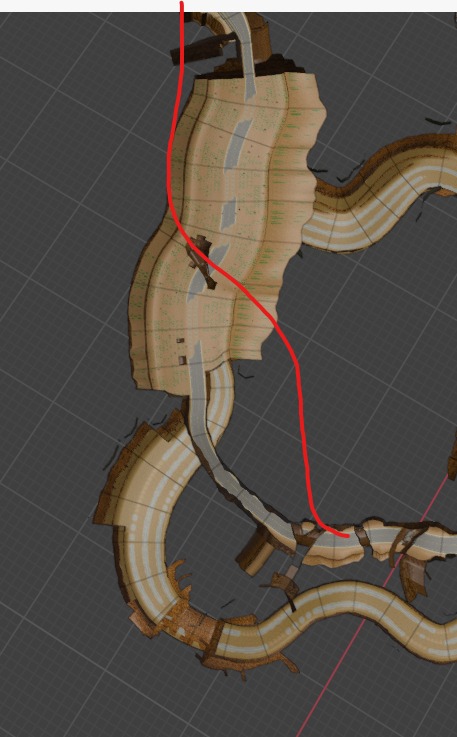
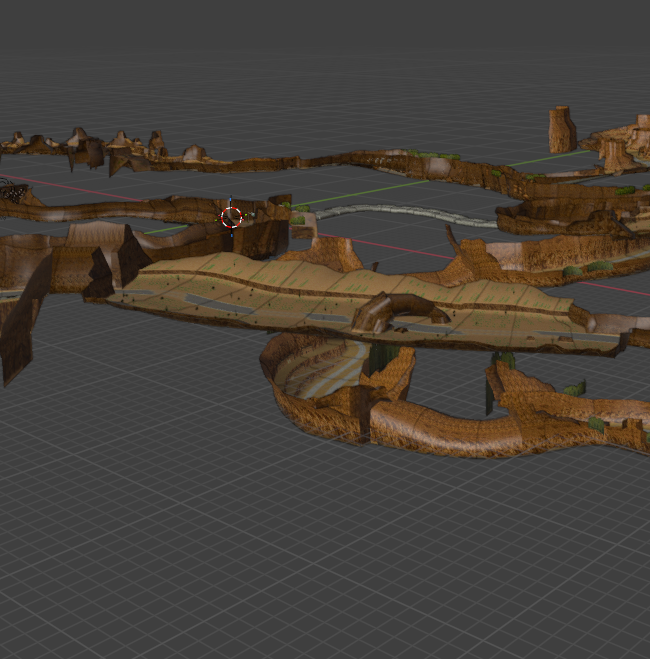
As you see both routes massively overlap each other, what interferes with my suggestion that both routes have co-existed and being separated later.
As you can see, there are multiple points where the tracks do overlap massively:
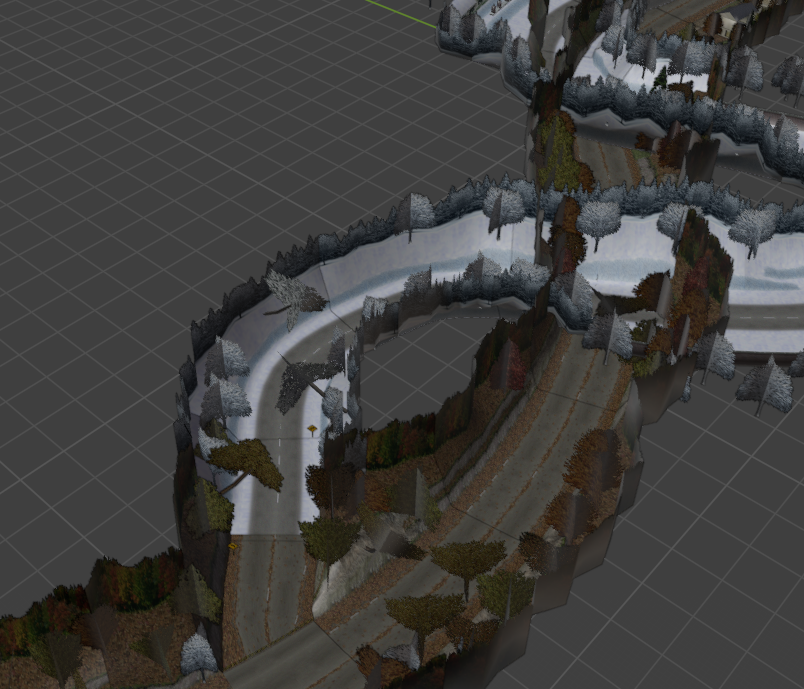
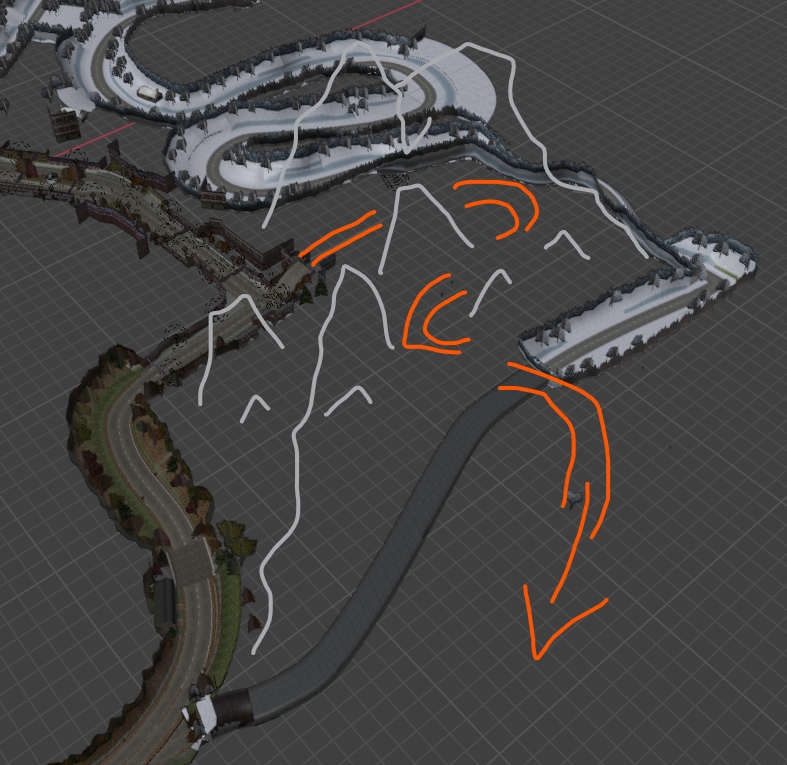
So – for me – there is a way to fix this, but it affects somewhat the track layout. After some editing, deleting, pushing and moving, this is a possible solution: I moved the overall Country Woods part a bit to the right direction of camera:
I added two bridges and moved the track a bit higher at the entry section:
And basically connected the two dead ends of country woods back to hometown:
Only thing to consider is where this missing link will lead to
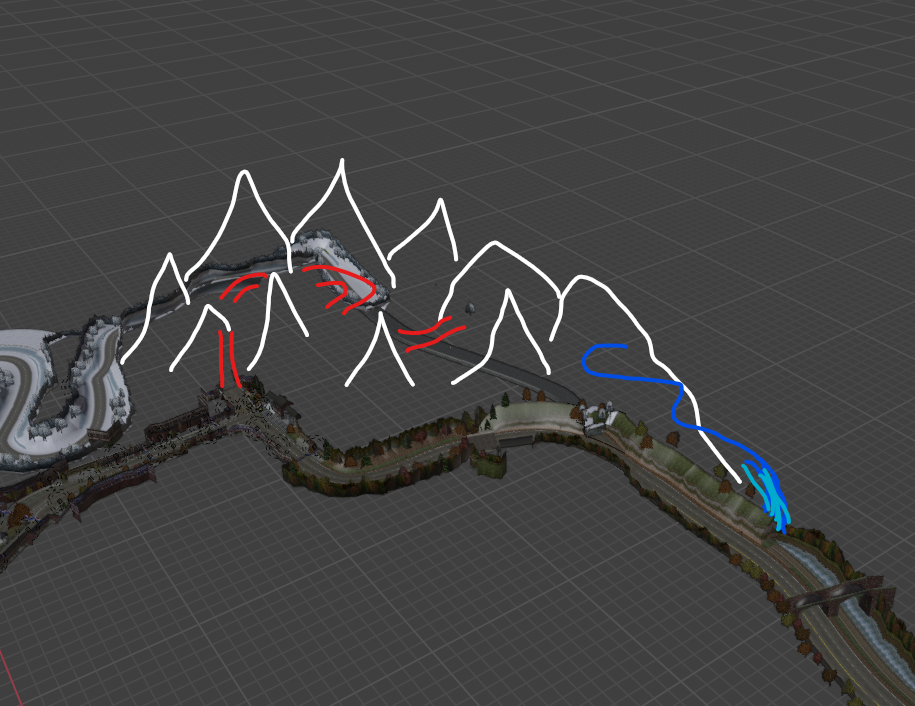
Maybe a steep section up the “mountain”? Suggesting the end tunnel of County Woods leads through a massive rock then.
Would also be a nice transition to the river
Maybe like this?
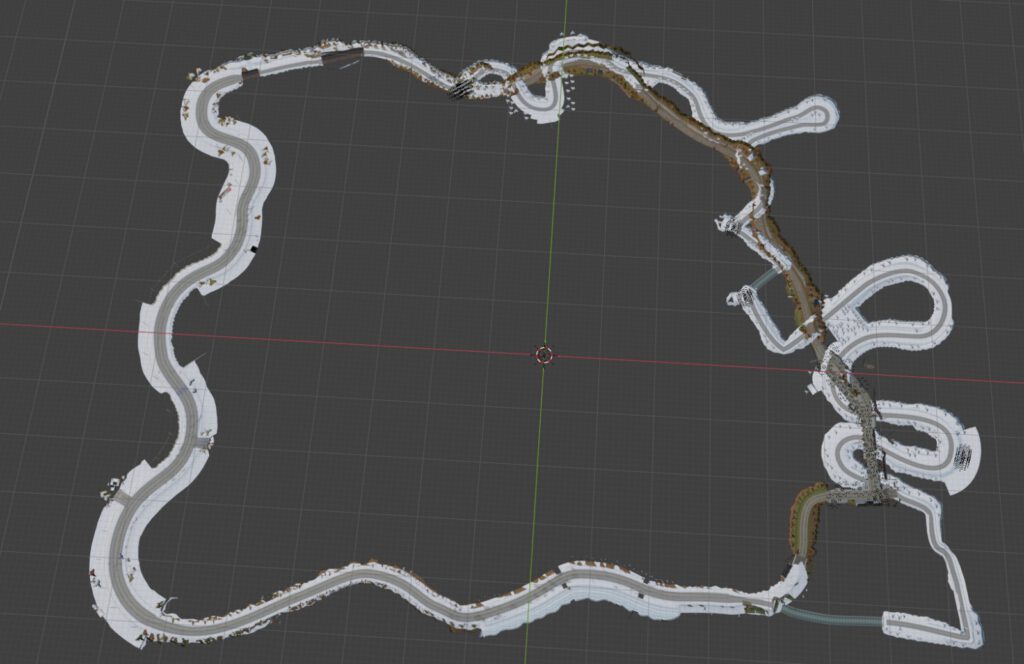
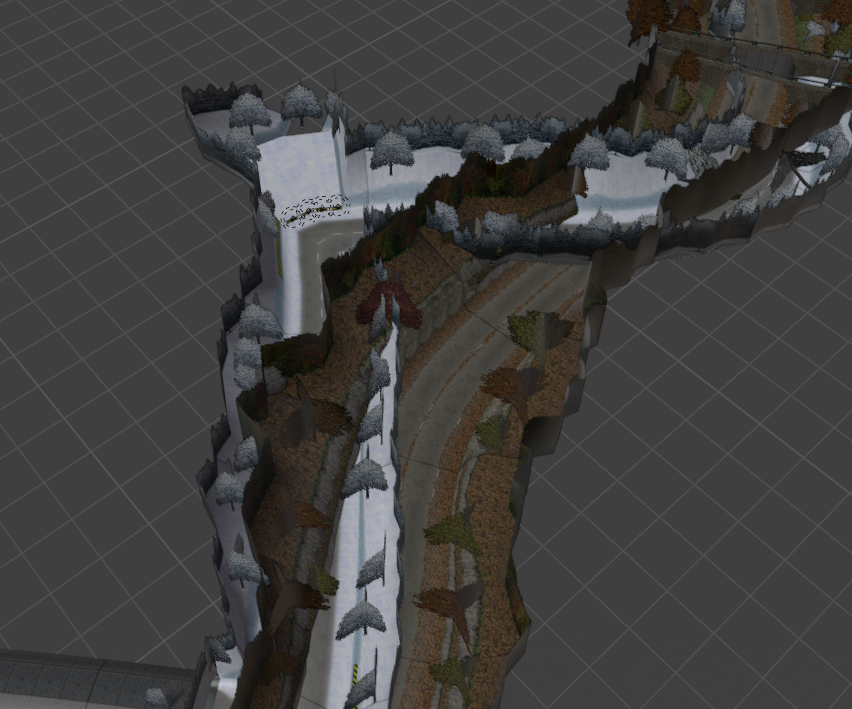
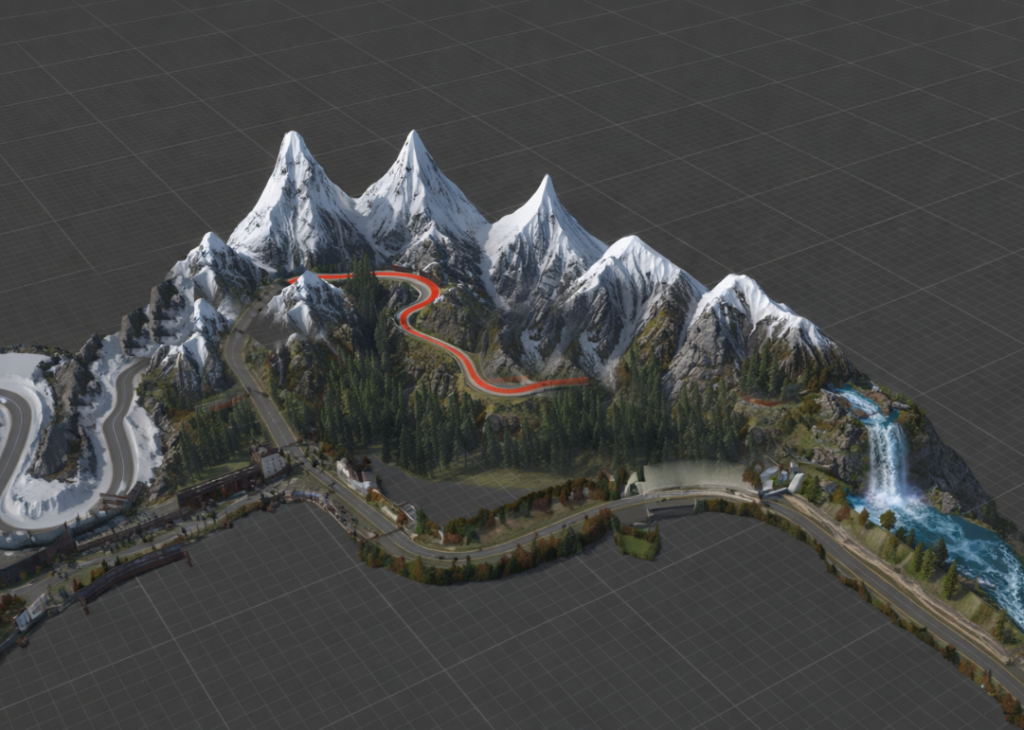
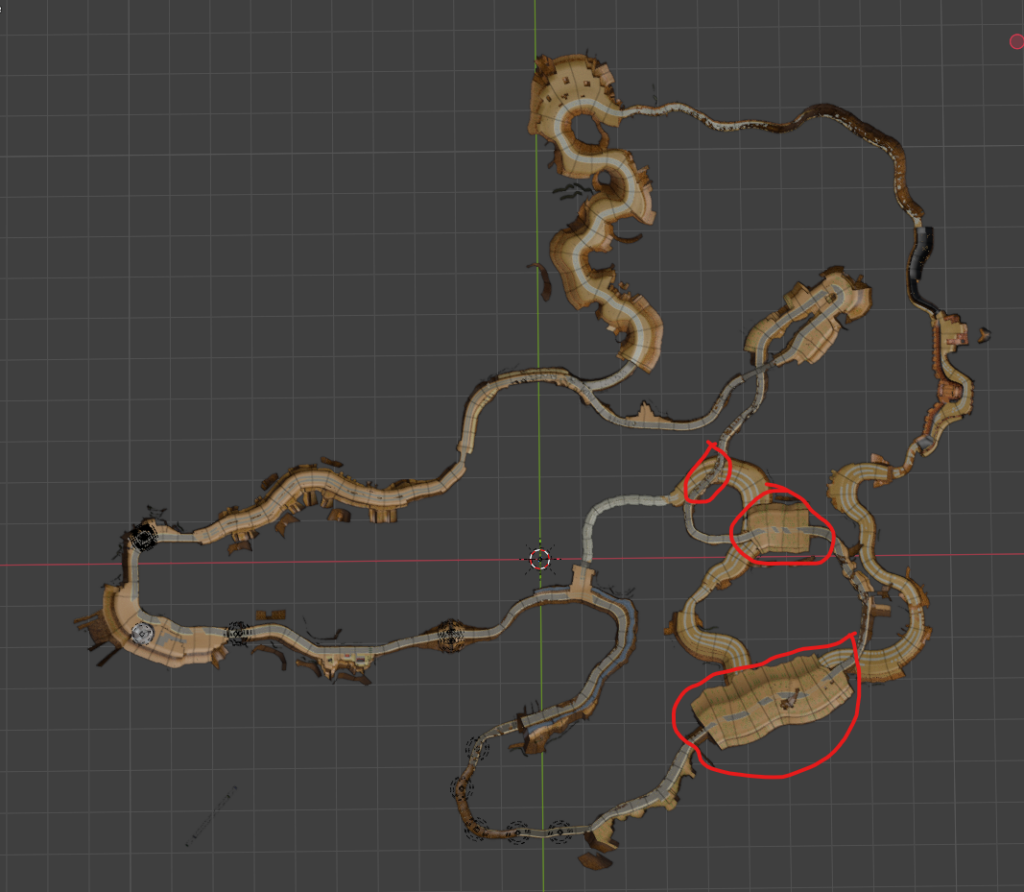
For Redrock Ridge / Lost Canyons the overlays are much more – let’s say – intense:
This entire section is overlapping a huge area on the bottom track:
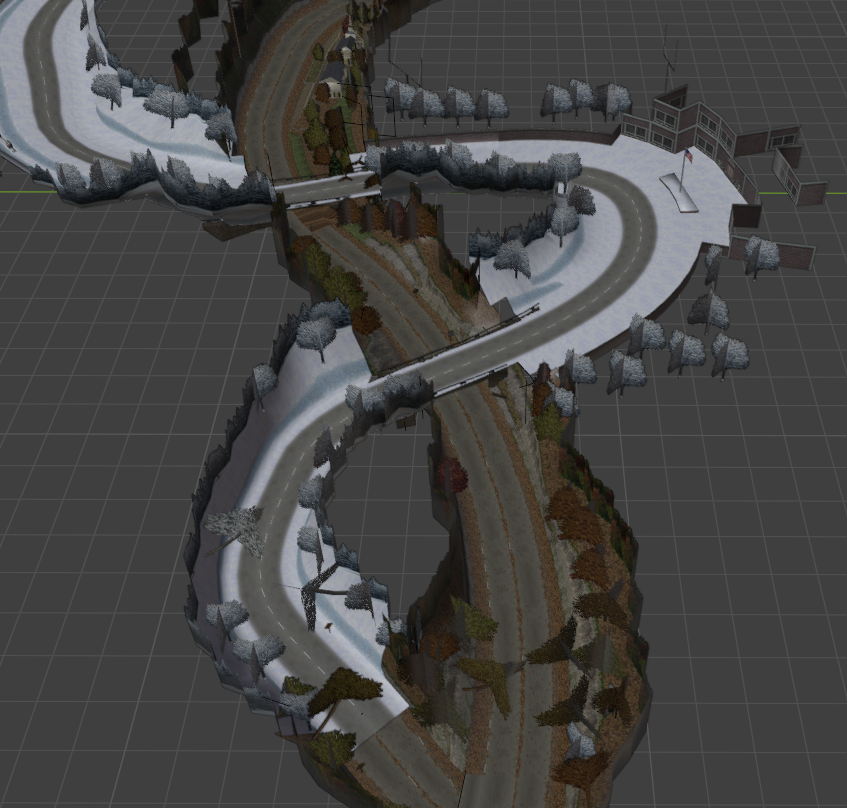
But after some adjustments there is finally together what always shoul’ve worked out of the box
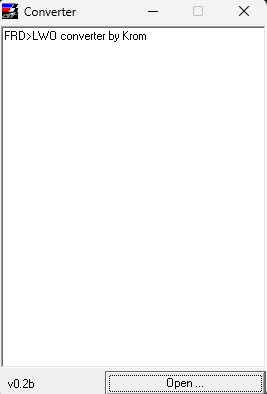
The first tool you need to use is “frd2lwo” – this is a light weight gui-based tool to convert frd-files (nfs3/nfs4 native track file format) to lwo (lightwave object).
The tool right after first start
As easy as it can be, click “open” and locate your .frd-file.
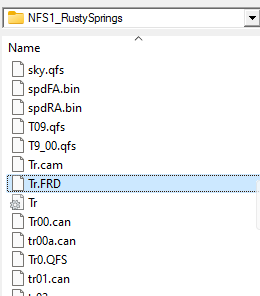
Select the Tr.FRD of the track you want to convert
Select the file and once again click “open”
Once the conversion process is completed, you will kindly be asked to exit the tool.
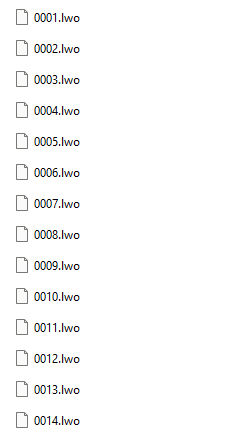
Now, if you browse to the source folder of your .frd-file you will now find a new folder “LWO” containing all the .lwo-converted files of the original track.
Just like in the original frd file each block has been converted to a single .lwo file.
Meaning: the longer the track (the more blocks it has) the more files you will get, yay.
Step 2 – preparing track textures
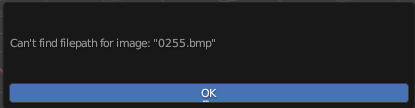
If you would like to skip this step – be warned, the LWO is always prompting an error for each missing texture piece.
Although we won’t be able to create all textures in the following process, we will reduce the amount of missing textures alot.
Reading this tutorial you might be into NFS-modding and maybe aware of where to get the textures from. If not, I will gladly tell you.
The textures of NFS3/NFS4 tracks are stored within the .qfs-file. QFS is a sort of container format containing all textures, really weird.
Step 2.1 – QFS2FSH
The first step is to convert the .qfs-file into a fsh-file. Therefor we need the tool qfs2fsh – this is a command line tool.
The basic syntax is
qfs2fsh source.qfs target.fsh
e.g. qfs2fsh tr0.qfs provinggrounds.fsh
You may want to copy the .qfs into the place of the binary, I think
Step 2.2 – FSH2BMP
The second step is to convert the .fsh-file into tga-files. Therefor we need the tool fsh2bmp – a part of the QFSSuite – this is a command line tool.
The basic syntax is
fsh2bmp source.fshTARGETFOLDER
e.g. fsh2bmp provinggrounds.fsh BMP
You may want to copy the .fsh into the place of the binary, I think.
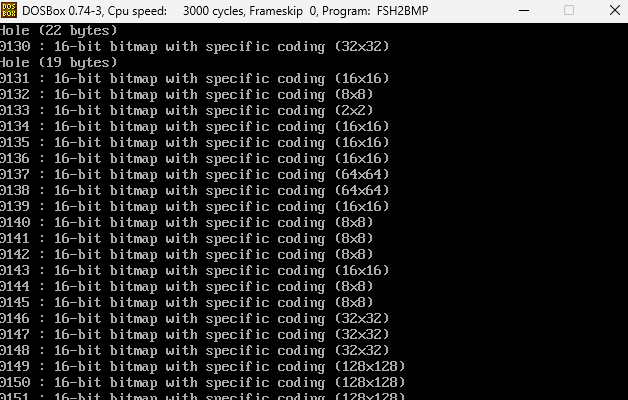
If you are using Windows in 64 bit version you might need to run qfssuite, at least for fsh2bmp in a dosbox or similar.
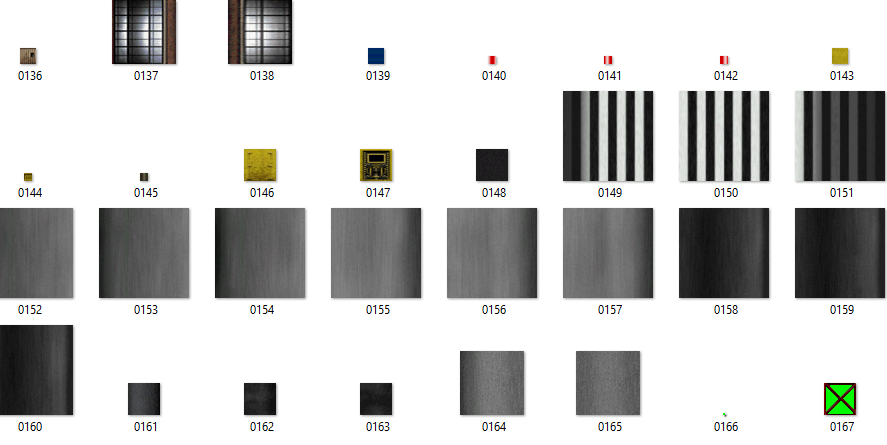
And you finally have all single textures as BMP
Step 3 – Getting the LWO-Files in blender
Once you have converted the track to LWO you want to start blender and activate the lwo-import plugin.
Now you could import one block after the other for the whole track..
Or you may use the lwo mass import script for blender
import os
import bpy

# put the location to the folder where the objs are located here in this fashion
# this line will only work on windows ie C:\objects
path_to_obj_dir = os.path.join('F:\\', 'test')

# get list of all files in directory
file_list = sorted(os.listdir(path_to_obj_dir))

# get a list of files ending in 'obj'
obj_list = [item for item in file_list if item.endswith('.lwo')]

# loop through the strings in obj_list and add the files to the scene
for item in obj_list:
    path_to_file = os.path.join(path_to_obj_dir, item)
    bpy.ops.import_scene.lwo(filepath = path_to_file)
Of course you need to adjust the path_to_obj_dir with your drive letter and folder structure, and bare in mind that you need to escape the “\”-character like \\this\\is\\a\\folder
And then, click “play” – this may take long and sometimes blender will crash, which can be related to a specific block. I could not find any reason, but I just try and error with removing files from the batch import folder until it is working.
You also may want to check if all blocks are imported correctly as there might be any gaps.
TIP: If you keep on encountering errors while importing or opening even one single .lwo file, try to get another version of the track you want to import as there may be faulty blocks.
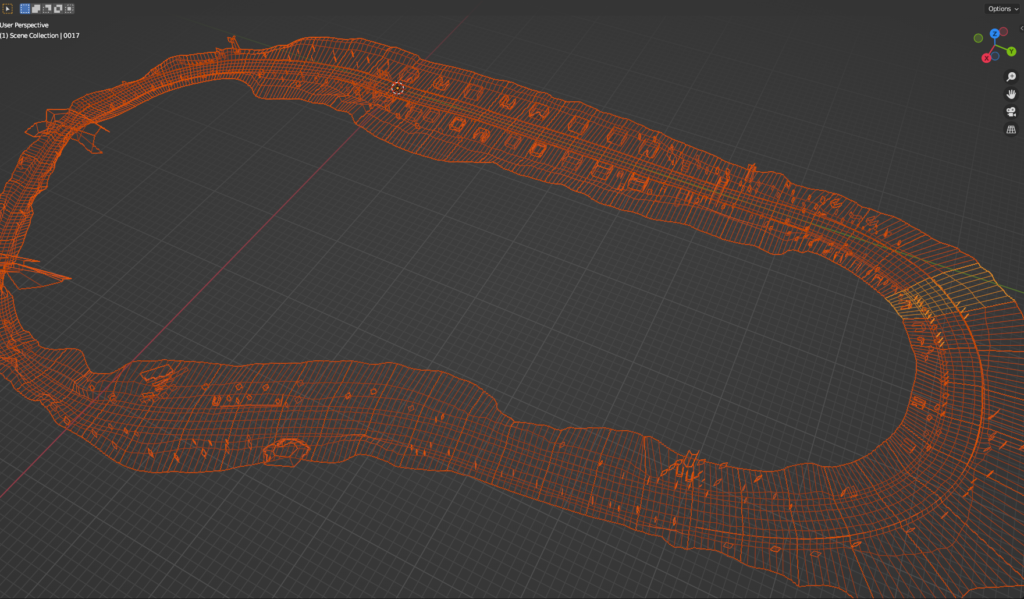
Finally, you have all the track data into blender – one step further of having the good old track information in somewhat up-to-date file format. I suggest to save the .blend project right now, just in case.
Looks familiar, huh?
Anyway – within the import process – I would suggest to save the blender project each time possible, as using all this tools is very fragile.
But, where is my textures?
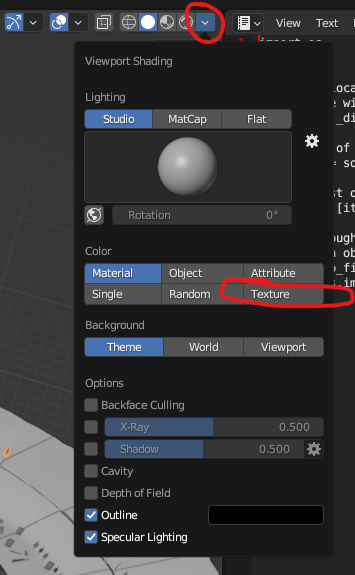
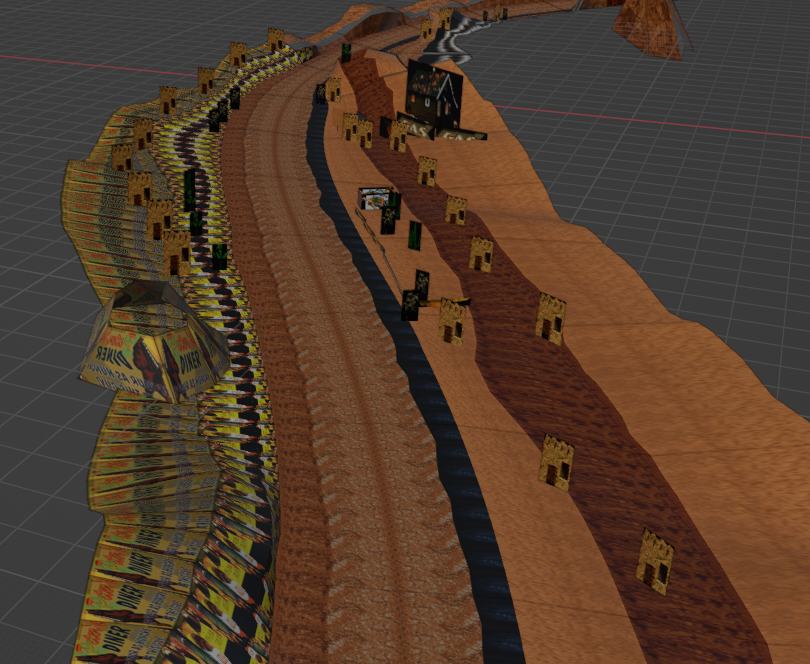
Well, at first, they are there! At second, you have to enable the viewport texture mode
Third, they will look odd, or I totally cannot remember the rusty springs scenery decorated in tons of advertising papers
I think that is due to an offset between the numbers in the original QFS file and the export process, but till now I was not able to figure that out.
Anyway, for my personal futher process, the original texture are not really mattering.
So, for me, the next step is uniting the single blocks to one single mesh, in blender you can just press the A-key, and then CTRL+J, and you got one single mesh.
By the way, you can downlod the Rusty Springs blend-files (blocks and united) right here, together with the exported LWO and BMP textures as a zip-package.
Step 4 – Export the Mesh
Right now it is time to export the mesh – for me, I choose the .fbx file for further usage, but your choice might be different depending on what you want to do next.
Step 5 – Further processing
This step is totally individual – I will process the file I created within the unreal engine, you keep reading here.
Manage Consent
To provide the best experiences, we use technologies like cookies to store and/or access device information. Consenting to these technologies will allow us to process data such as browsing behavior or unique IDs on this site. Not consenting or withdrawing consent, may adversely affect certain features and functions.
Functional
Always active
The technical storage or access is strictly necessary for the legitimate purpose of enabling the use of a specific service explicitly requested by the subscriber or user, or for the sole purpose of carrying out the transmission of a communication over an electronic communications network.
Preferences
The technical storage or access is necessary for the legitimate purpose of storing preferences that are not requested by the subscriber or user.
Statistics
The technical storage or access that is used exclusively for statistical purposes.The technical storage or access that is used exclusively for anonymous statistical purposes. Without a subpoena, voluntary compliance on the part of your Internet Service Provider, or additional records from a third party, information stored or retrieved for this purpose alone cannot usually be used to identify you.
Marketing
The technical storage or access is required to create user profiles to send advertising, or to track the user on a website or across several websites for similar marketing purposes.