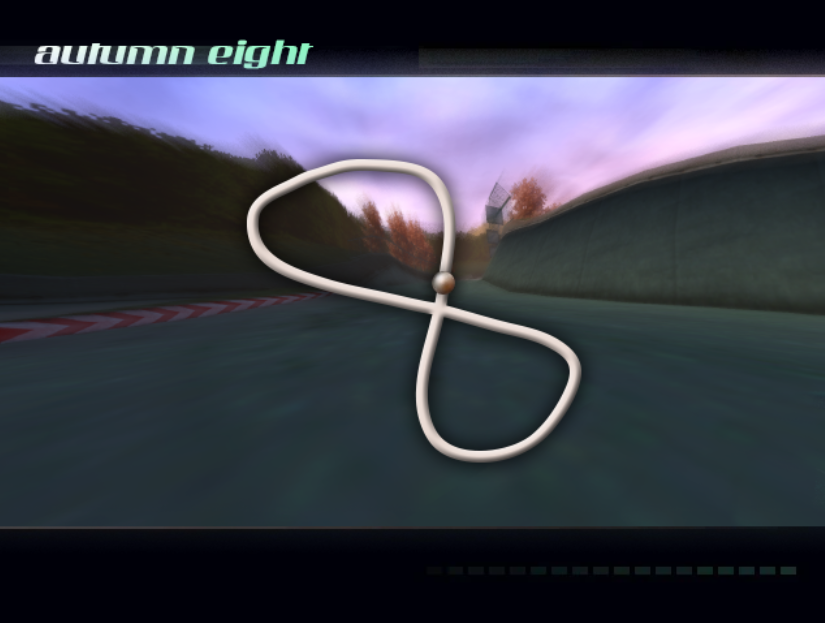
The concept of this track is as old as nfs3, at least for me. Since I discovered the possibility to mod tracks I always wanted to have a pretty short eight-shaped track.
But as the tools when I stopped modding nfs years ago where not able to achieve this, I recently gave my old idea a “go” and tried this – and it worked pretty well.
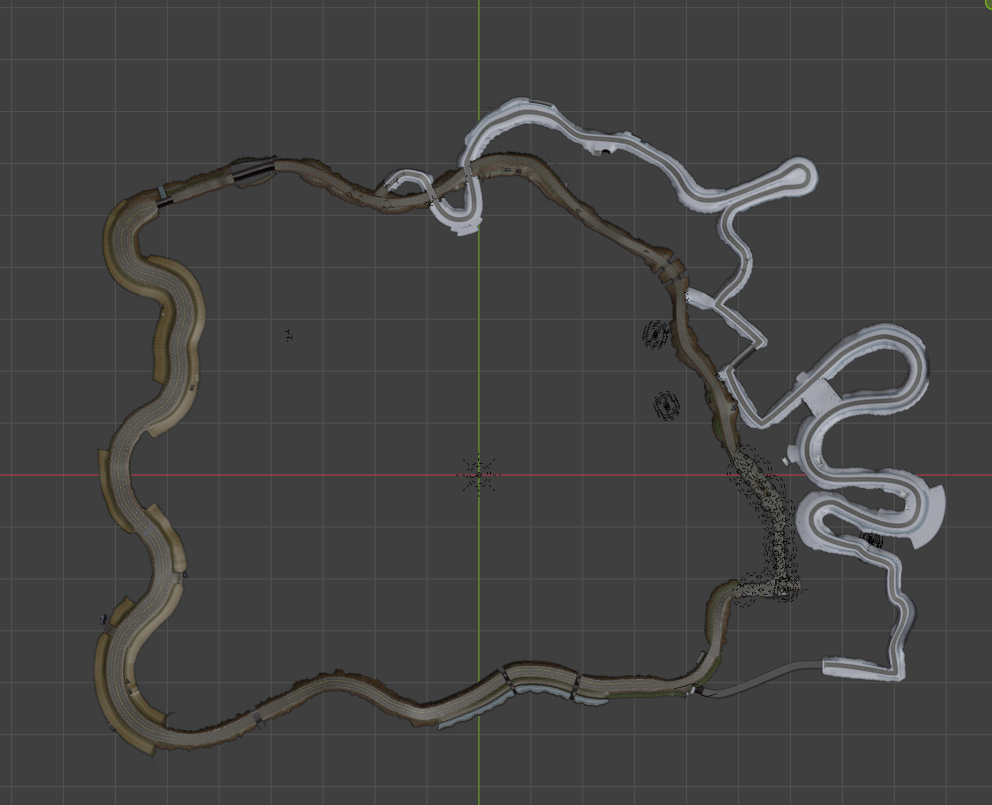
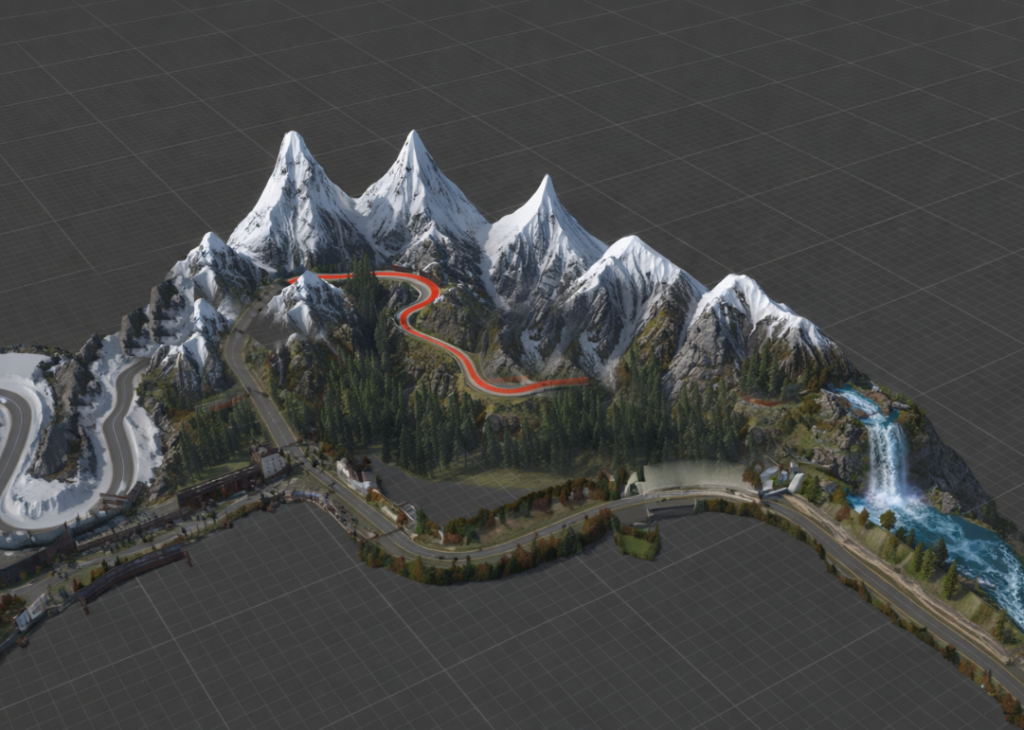
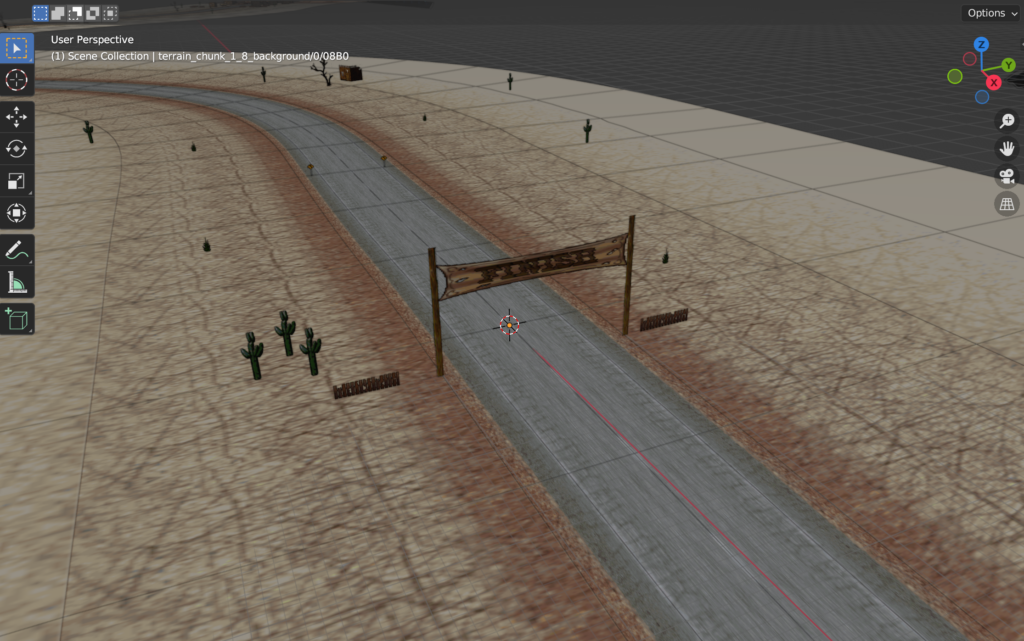
Autumn Eight is a short version of the GT3-track, minor texture mods and a basic eight shape.
The track itself is not yet released and I am continuously working on it, but – the more interesting thing on this track might be something else.
The real secret of this track lies in it’s detail, or better: It’s night version.
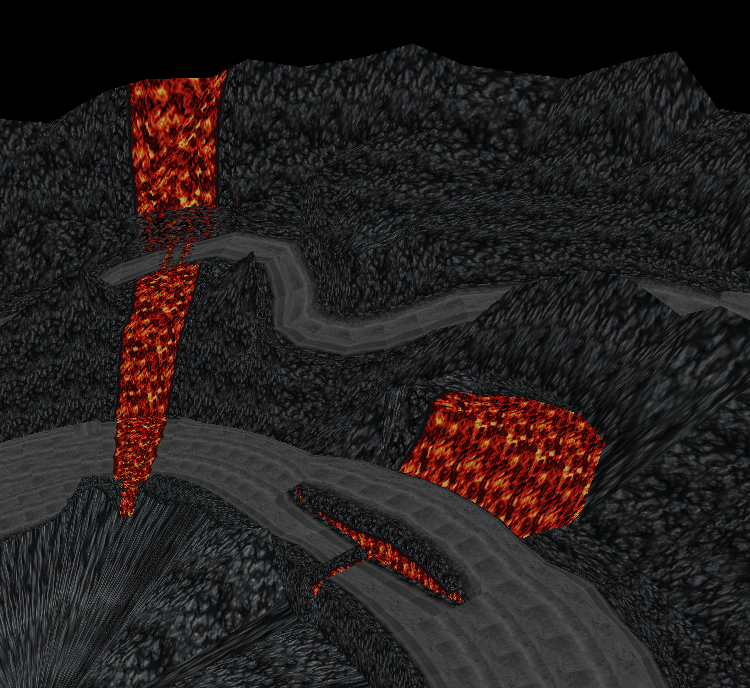
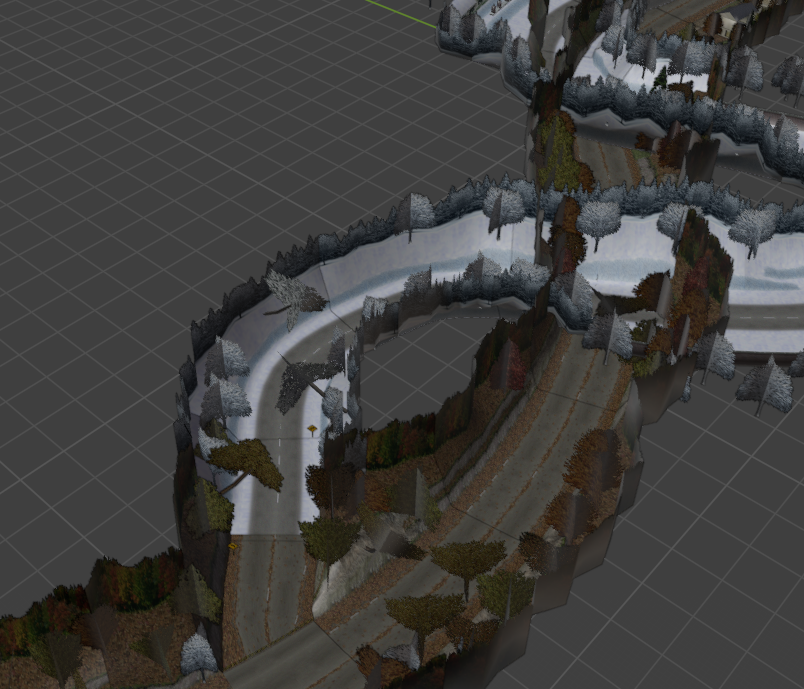
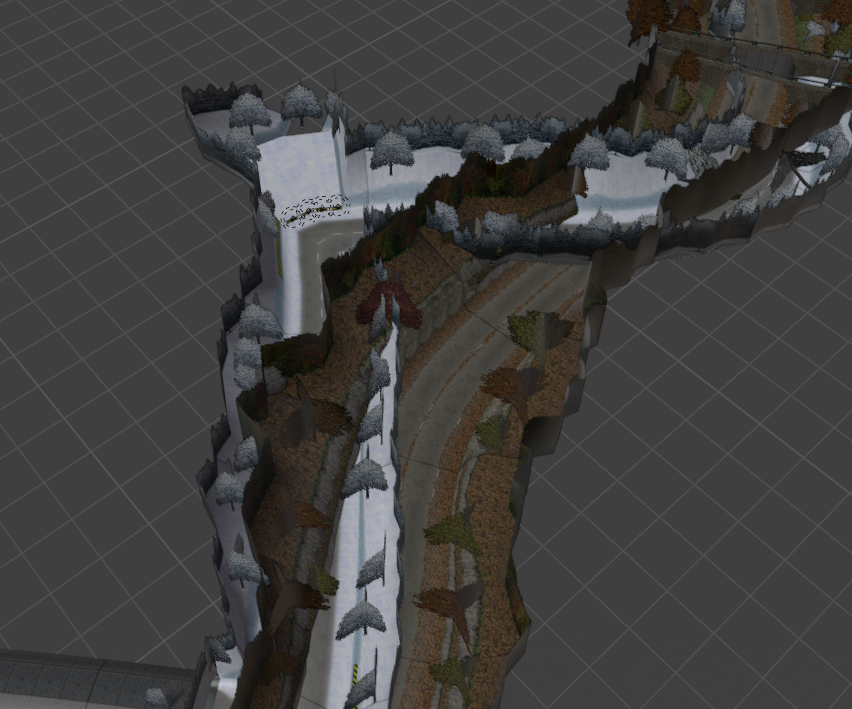
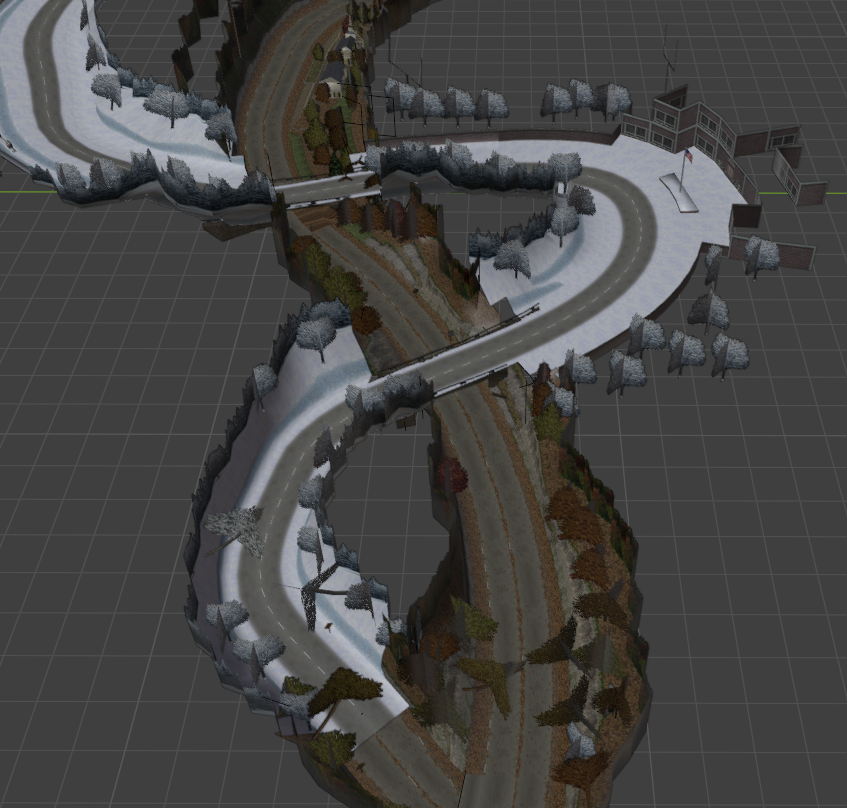
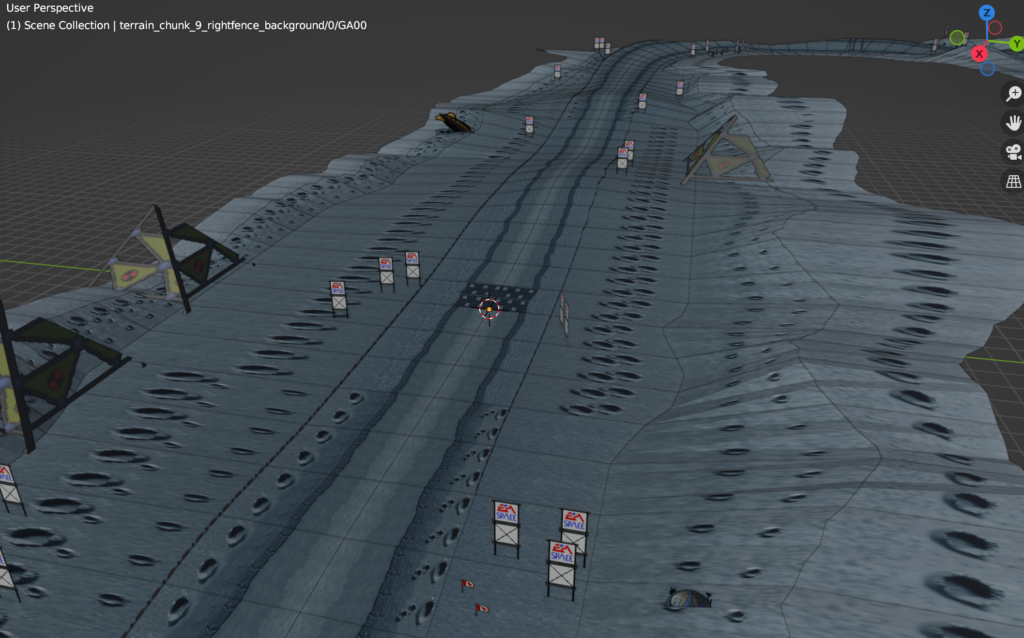
Based on this basic eight shape I did what I originally wanted to do: A multi route eight shape track where the crossroads can collide.
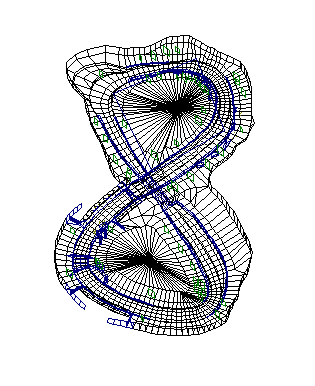
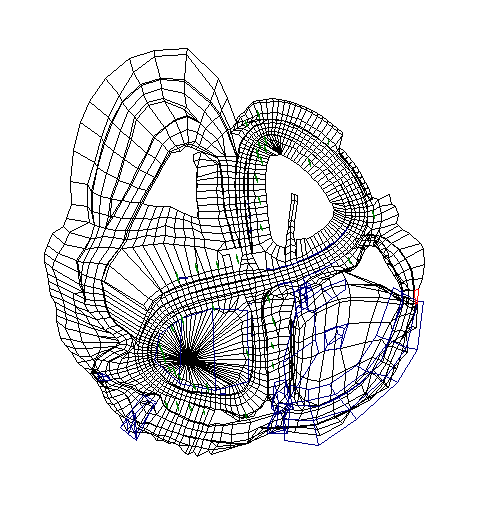
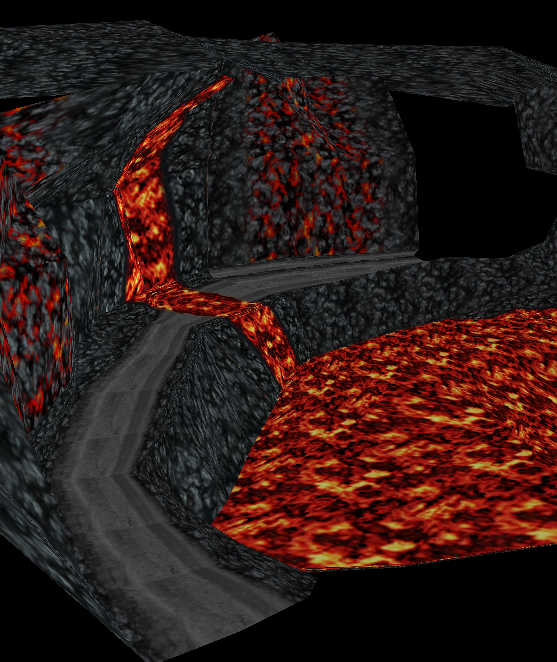
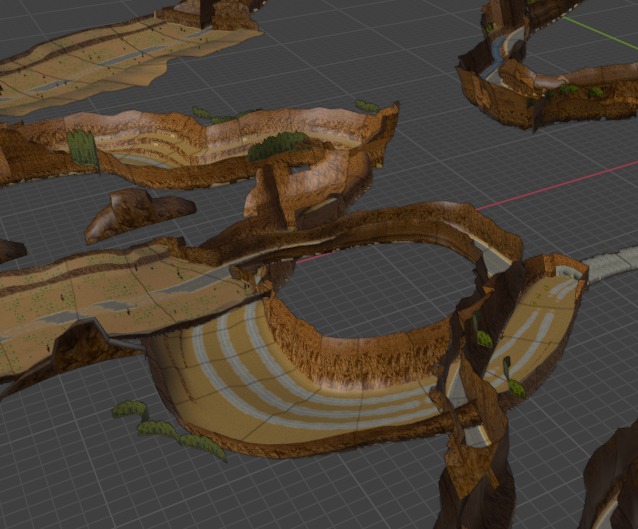
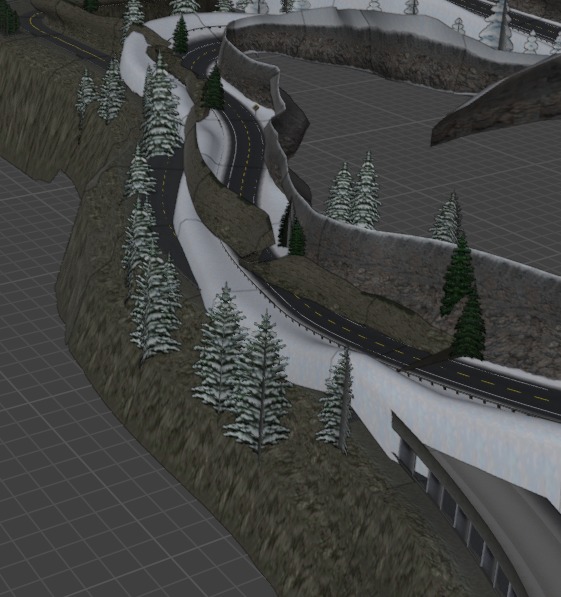
Yet, the image above still shows alpha state, the setting itself will be a full magma themed volcano valley with numerous of ways and things to discover, below you find some preview images from the editor:
ever since nfs3 hot pursuit was out it was uncanny that all tracks in this game have a counterpart. Hometown <-> Country Woods, Redrock Ridge <-> Lost Canyons, Atlantica <-> Aquatica, Rocky Pass <-> The Summit and Empire City <-> Tr02b.
Fair enough, TR02B was canned and ist just a remain in the psx release, but it was planned.
So me, and maybe thousands of others were dreaming of having this tracks united. Some modders did it, or at least tried. (Aqualantica reference here).
I was always thinking that they modelled both tracks as one and then, for some reason, ripped them apart.
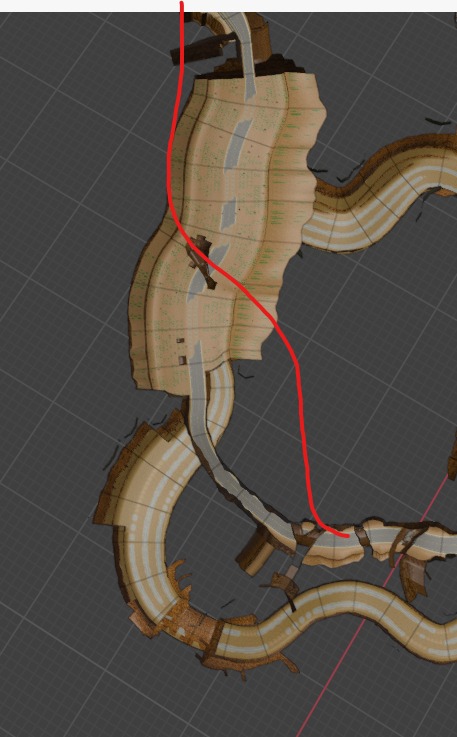
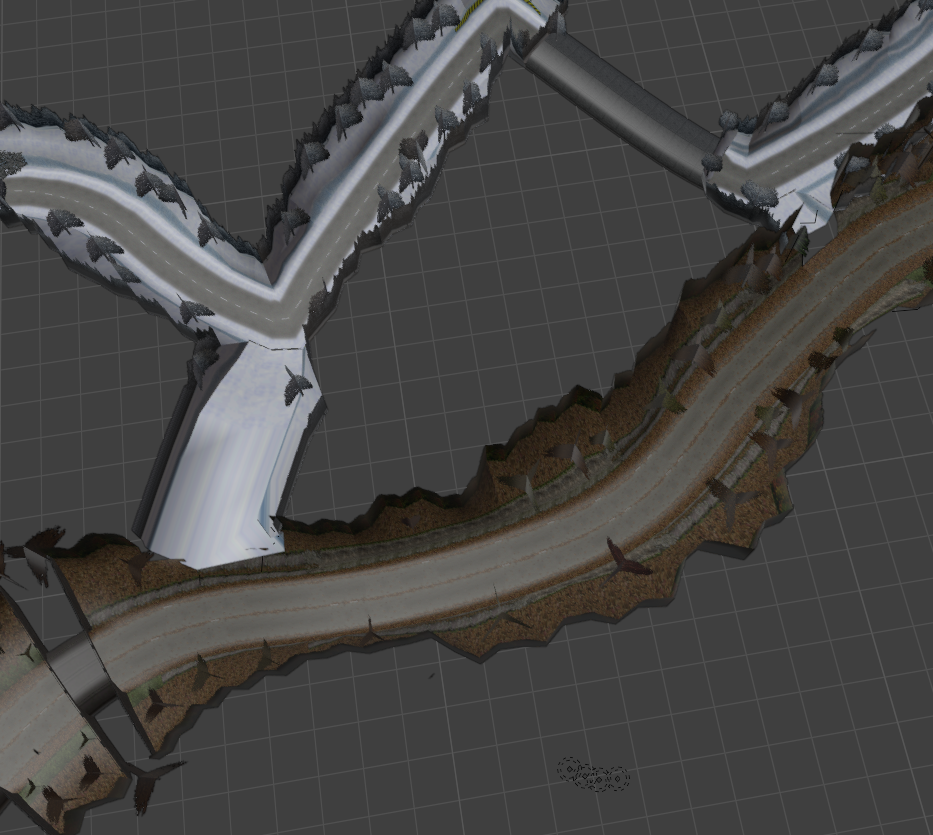
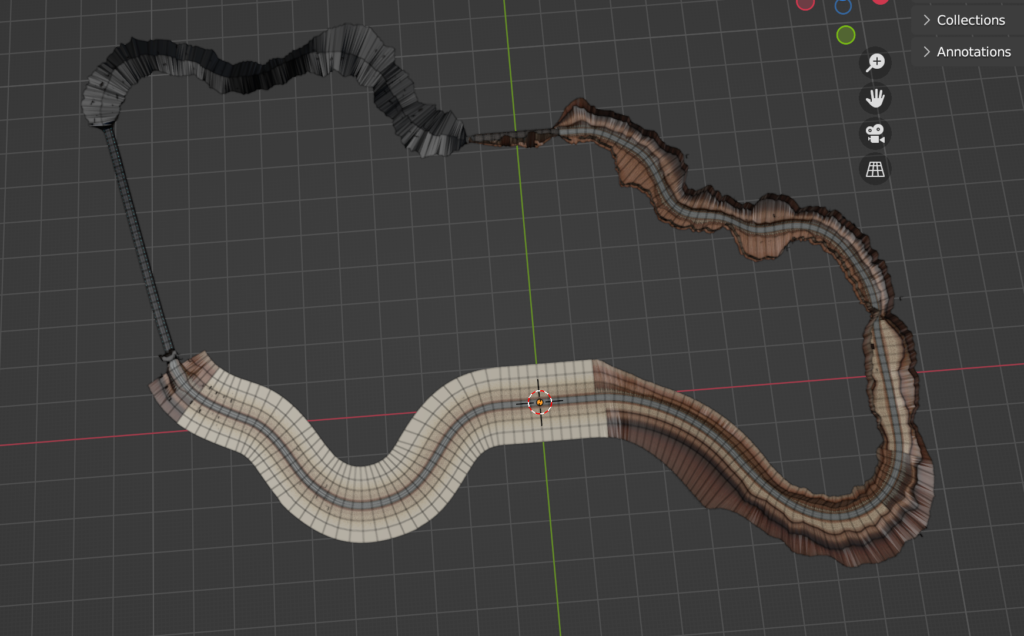
Afzer researching and reworking them for High Stakes Racing I united them finally easily in blender, and what do I say, I do think they were not modelled together. It more seems that version a being finished, half track was deleted and the other version b was modeled, because the both variants do overlap in strange ways, e.g. Redrock Ridge and Lost Canyons:
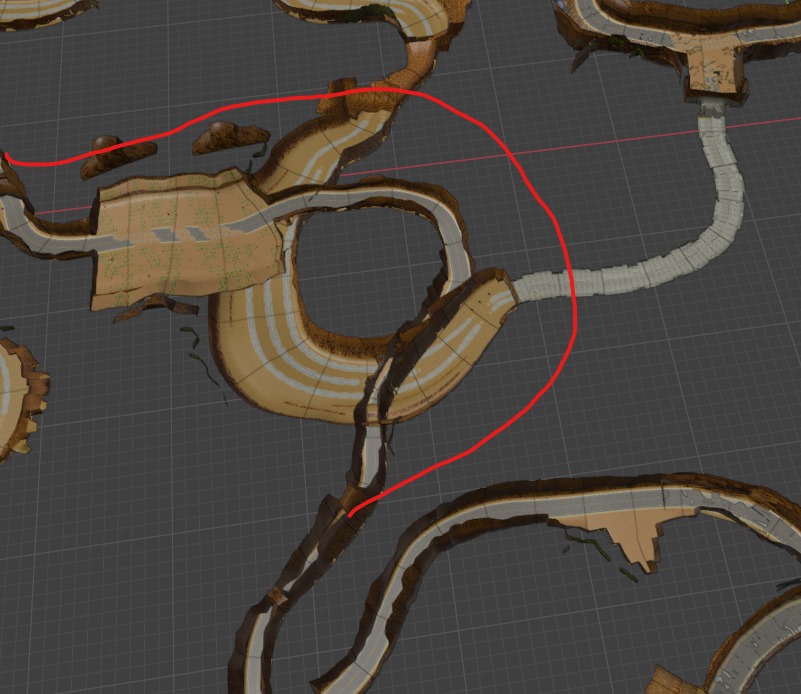
Although it looks quite messy, the needed adjustments would have been subtle.
Adjusting the b-version along the red line with some height adjusting would lead to a working multiple road.
For The Summit / Rocky Pass it is more the same:
Gameplay wise I do not see any reason not to adjust that inches to have a working alternative route.
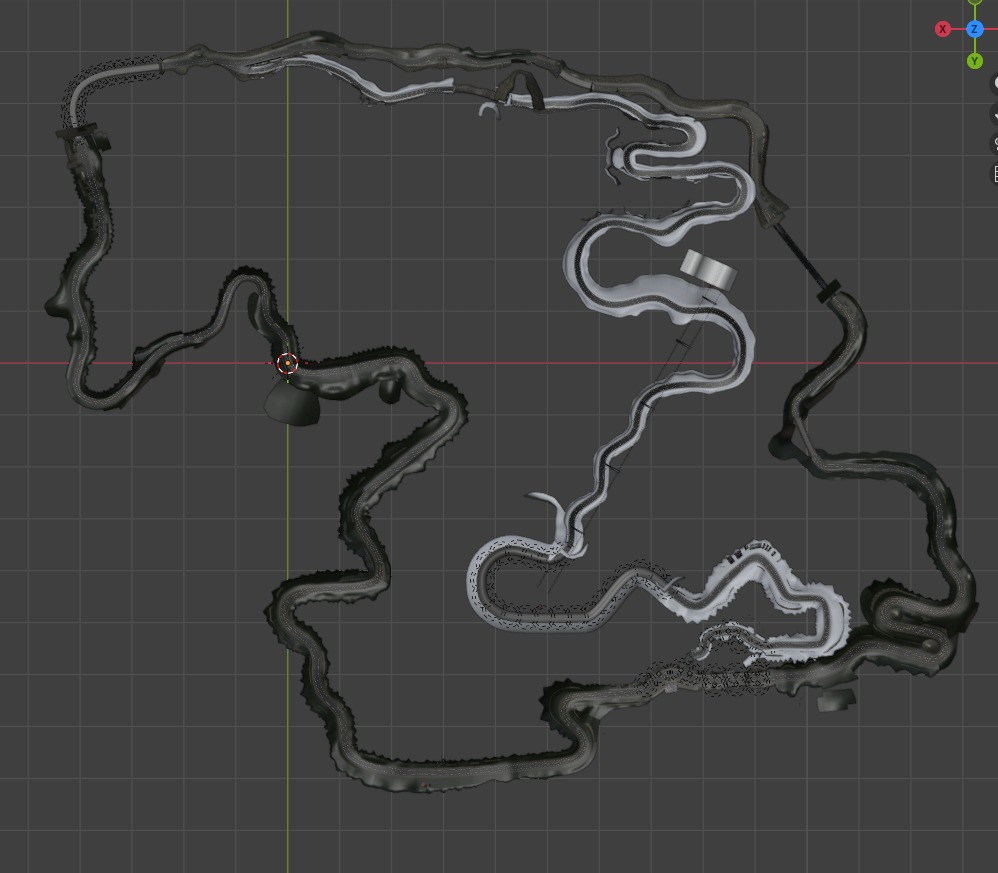
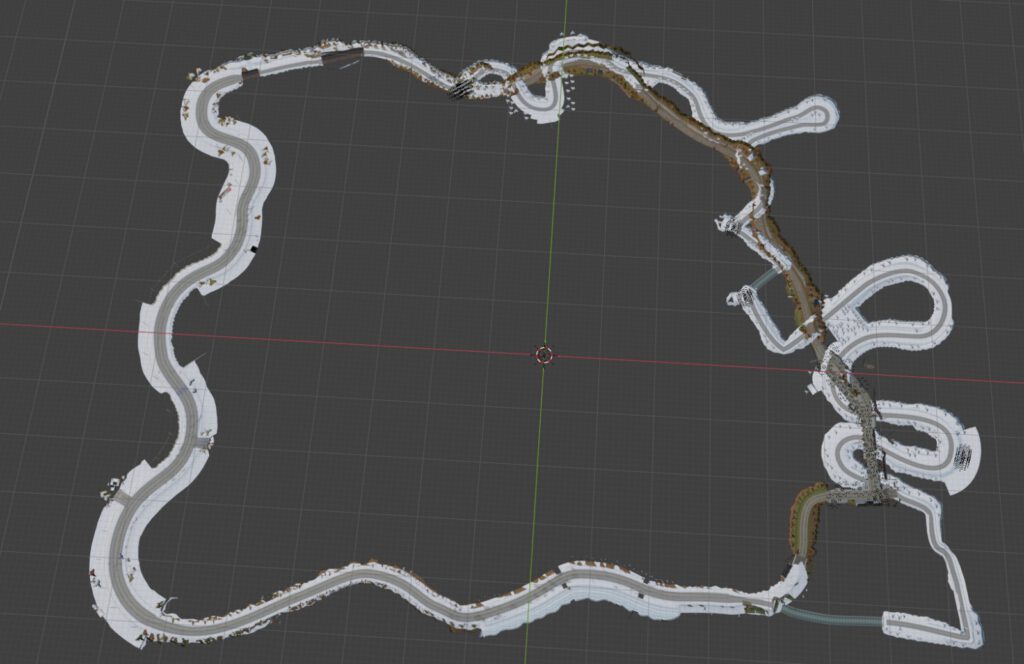
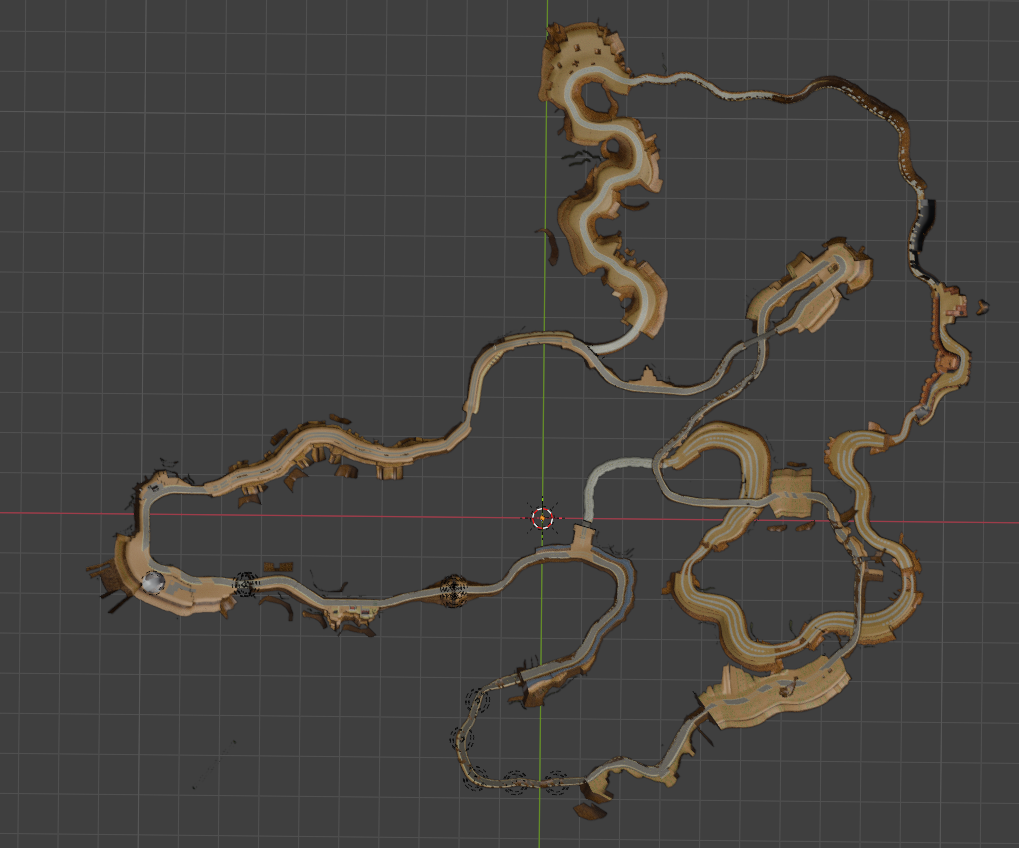
So I united them and fixed the routes to have both tracks finally united for the High Stakes Racing project:
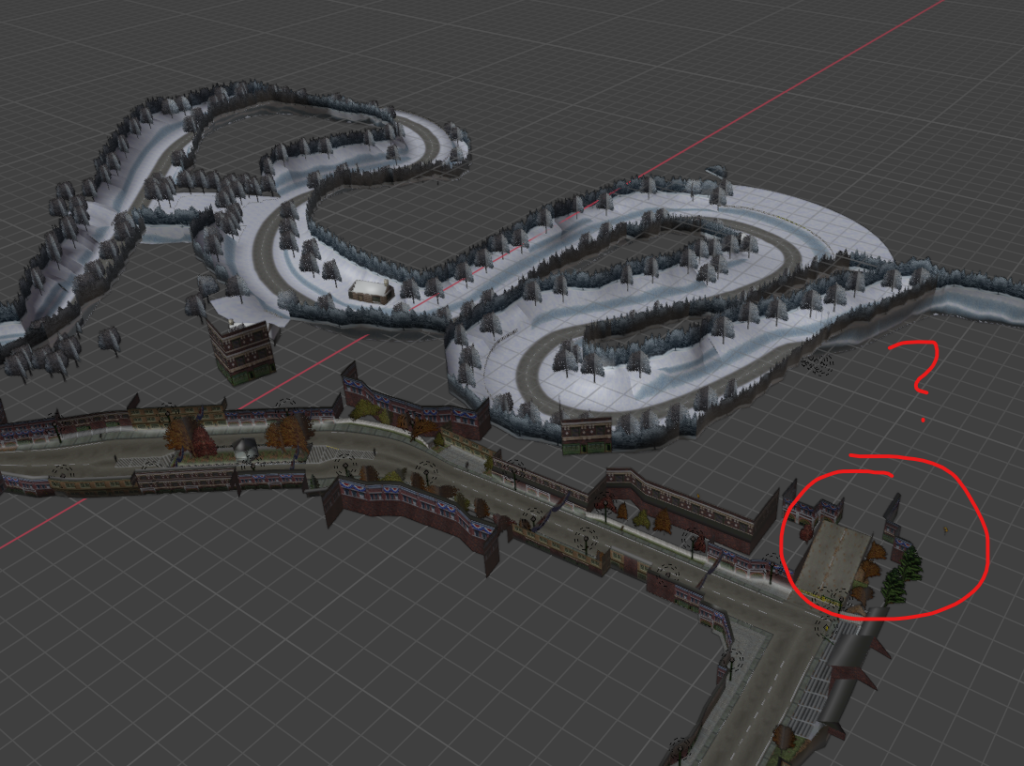
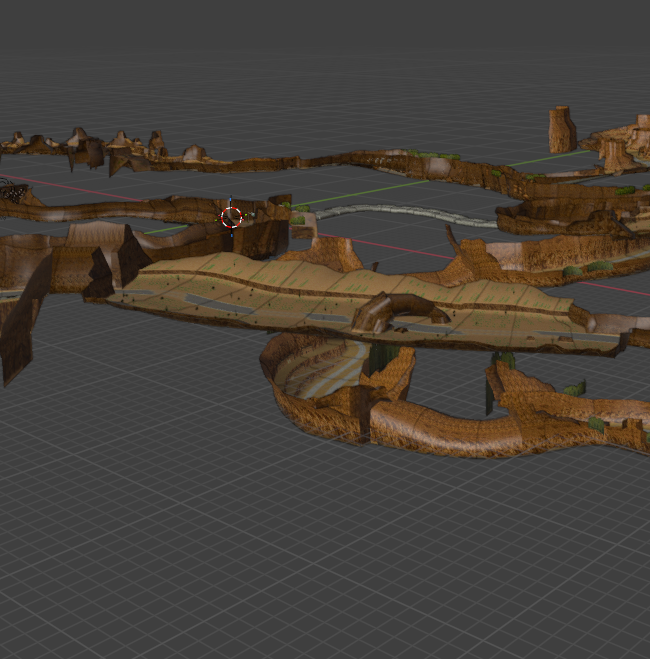
But when it comes to Redrock Ridge / Lost Canyons and Hometown / Country Woods things get very complicated:
As you see both routes massively overlap each other, what interferes with my suggestion that both routes have co-existed and being separated later.
As you can see, there are multiple points where the tracks do overlap massively:
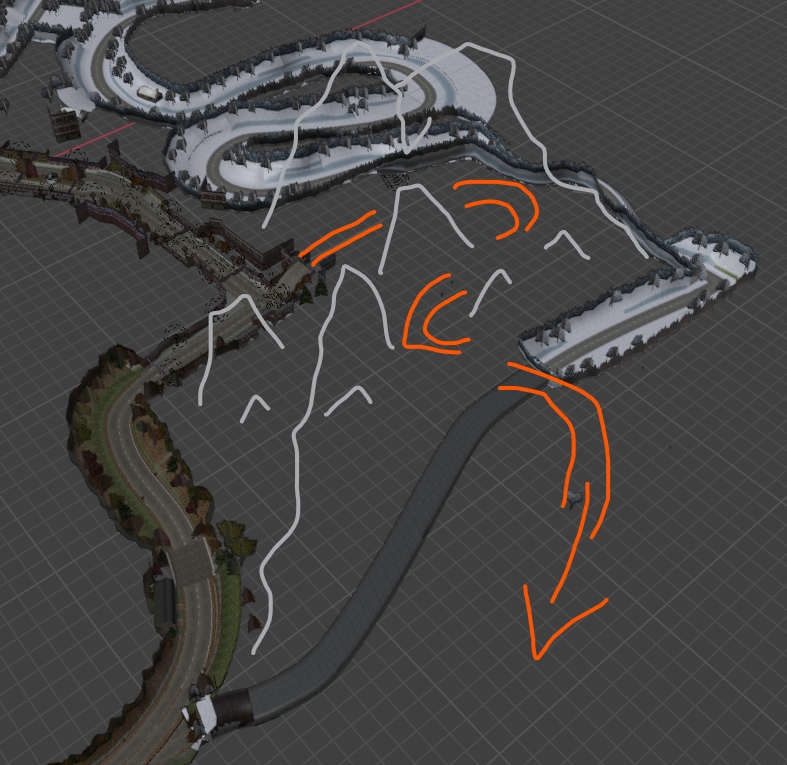
So – for me – there is a way to fix this, but it affects somewhat the track layout. After some editing, deleting, pushing and moving, this is a possible solution: I moved the overall Country Woods part a bit to the right direction of camera:
I added two bridges and moved the track a bit higher at the entry section:
And basically connected the two dead ends of country woods back to hometown:
Only thing to consider is where this missing link will lead to
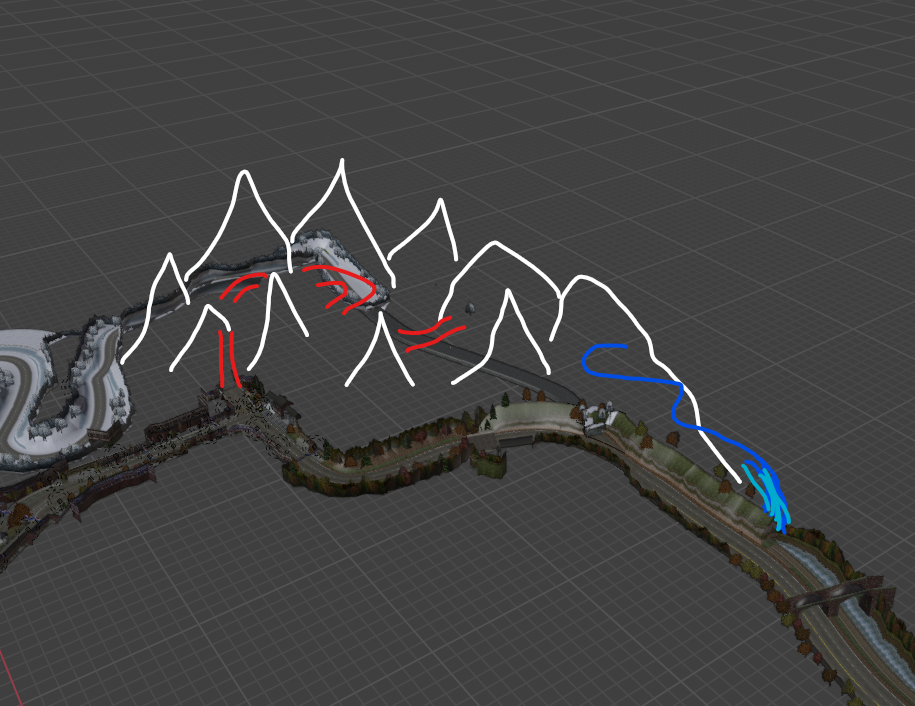
Maybe a steep section up the “mountain”? Suggesting the end tunnel of County Woods leads through a massive rock then.
Would also be a nice transition to the river
Maybe like this?
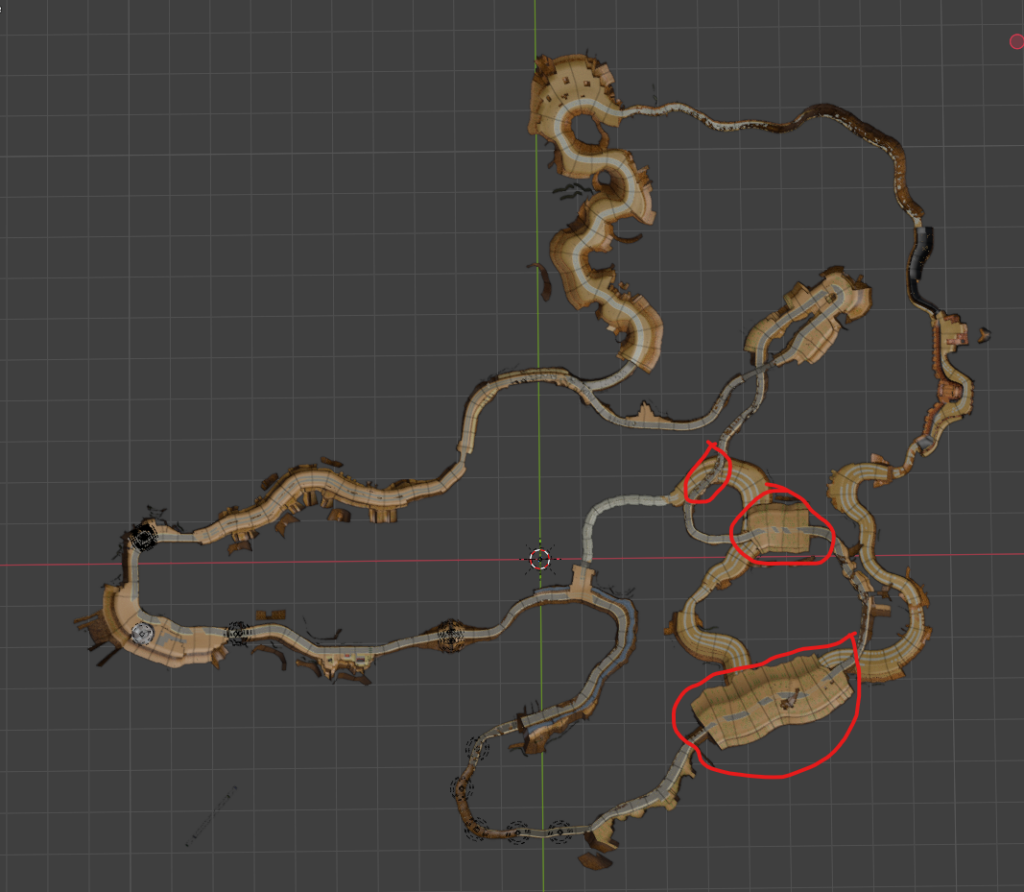
For Redrock Ridge / Lost Canyons the overlays are much more – let’s say – intense:
This entire section is overlapping a huge area on the bottom track:
But after some adjustments there is finally together what always shoul’ve worked out of the box
Regarding my long term deep hearted project “High Stakes Racing” I simply cannot decide which road I gonna take.
On the one hand I “just” want a – more or less – classic racing game combining all cars and tracks from NFS1 to NFS6 in more modern graphics with additional features, on the other hand I would like to see it as an mmo-game with 100+ players.
As both directions need a totally different approach I am lost which way to go.
In case you run into a scenario where you have multiple faces flipped and do not issue the lowering of the performance, as in my case just for reworking imported assets, you might find this UE5 python script helpful:
import unreal

def make_selected_materials_two_sided(save=True, recompile=True):
    selected = unreal.EditorUtilityLibrary.get_selected_assets()
    if not selected:
        unreal.log_warning("No assets selected.")
        return

    changed_paths = []
    skipped = 0

    for asset in selected:
        if isinstance(asset, unreal.Material):
            mat = asset
            path = mat.get_path_name()

            if mat.get_editor_property("two_sided"):
                unreal.log(f"[OK] Already TwoSided: {path}")
                continue

            # Set Two Sided flag
            mat.set_editor_property("two_sided", True)

            # Recompile / "Apply"
            if recompile:
                try:
                    unreal.MaterialEditingLibrary.recompile_material(mat)
                except Exception as e:
                    unreal.log_warning(f"[WARN] Recompile failed for {path}: {e}")

            unreal.log(f"[CHANGED] TwoSided enabled: {path}")
            changed_paths.append(path)

        elif isinstance(asset, unreal.MaterialInstanceConstant):
            unreal.log_warning(
                f"[SKIP] MaterialInstanceConstant has no TwoSided flag: {asset.get_path_name()} "
                f"(change the parent material instead)"
            )
            skipped += 1
        else:
            unreal.log_warning(f"[SKIP] Asset is not a Material: {asset.get_path_name()}")
            skipped += 1

    # Save modified assets
    if save and changed_paths:
        saved = 0
        for path in changed_paths:
            try:
                if unreal.EditorAssetLibrary.save_asset(path, only_if_is_dirty=False):
                    saved += 1
            except Exception as e:
                unreal.log_warning(f"[WARN] Failed to save asset {path}: {e}")

        unreal.log(f"[SAVE] Saved {saved}/{len(changed_paths)} material assets.")

    unreal.log(f"Done. Modified: {len(changed_paths)}, Skipped: {skipped}")

# Run:
make_selected_materials_two_sided(save=True, recompile=True)
When my home’s gas heater throws a fault, a tiny red LED lights up — and nothing else happens until I press the reset button. Since this can happen while I’m away, I wanted a small system that notices that red light, notifies me, and (eventually) presses the button automatically.
Enter RedWatch — a simple, Python-based monitoring setup that uses a USB webcam and a Raspberry Pi 3 Model B to detect that LED in real time.
💡 Concept
The idea is straightforward:
A USB camera points at the heater’s control panel.
OpenCV analyzes each frame for red pixels in a given HSV color range.
When the red LED appears, the Pi:
logs the event,
takes a snapshot,
sends an email or push notification to my phone.
Later I’ll add a small servo actuator to physically press the reset/acknowledge button once I confirm the alarm remotely.
🧠 Tech Overview
Hardware: Raspberry Pi 3 Model B, any USB webcam, stable 5 V power.
Software: Python 3, OpenCV, NumPy, tmux, and systemd.
Notifications: SMTP (email) or ntfy.sh push messages.
Display: A dedicated fullscreen dashboard on tty8 showing current IP addresses and live logs.
The entire setup runs automatically on boot — no desktop required.
🧰 Implementation Highlights
The Python script continuously monitors for red hue clusters (two HSV bands to cover both ends of the red spectrum).
A debounce timer filters out flicker or reflections.
Snapshots and timestamps are stored in /home/heater/redwatch/capture/.
All messages go into redwatch.log.
Two systemd services manage startup:
redwatch.service runs the OpenCV monitor.
redwatch-dashboard.service launches a tmux session on TTY 8 with:
a dynamic banner (hostname, timestamp, IP addresses),
live log streaming via journalctl -fu redwatch.service.
You can return to your normal KDE desktop with Ctrl + Alt + F2, and back to the RedWatch dashboard with Ctrl + Alt + F8.
🧩 Typical Use Case
Whenever the heater locks out, the LED lights up — RedWatch detects it within a second or two, sends me an email like:
“Red light detected on heater – 2025-10-16 15:42:21”
…and saves a photo of the panel. From there I can confirm remotely and, in the next phase, trigger a small stepper or servo motor wired to the heater’s reset switch.
🚀 Results
Reliable detection even under variable lighting.
No false alarms after HSV tuning.
Email alerts arrive in < 2 s.
Dashboard visible on HDMI monitor for local diagnostics.
It’s a surprisingly robust little IoT maintenance sentinel — and the groundwork for a fully automated recovery loop.
🔧 Next Steps
Add servo/solenoid actuator to press the reset button.
Optional: MQTT integration for home-automation systems (e.g. Home Assistant).
Log heater uptime, restart counts, and runtime temperatures.
🏁 TL;DR
RedWatch is a Raspberry Pi-based vision sensor that watches a heater’s fault LED, logs it, alerts you, and can later clear the error automatically.
Source code and setup guide are available in the project’s README (includes full Python, systemd units, and dashboard scripts).
Sometimes you just need a simple way to send a keypress from one computer to another over your local network. Full remote desktop solutions (RDP, VNC, TeamViewer) are overkill when all you want is: “press a key on one machine → OBS on the streaming PC reacts as if the key was pressed locally”.
That’s exactly what this little Python tool does. It consists of two scripts:
client_keypress.py → runs on a remote computer, listens for a specific key and transmits its state (“pressed” / “released”) over the network.
server_keypress.py → runs on the target PC, receives the key state and emulates a real keyboard event so that OBS (or any software) can register it as a hotkey.
This allows you to, for example, hold Right Ctrl on one computer and have it act like F13 on your streaming PC, which you can then bind in OBS as a hotkey.
On Windows: run scripts as Administrator (otherwise key hooks and injections won’t work).
Setup
On the Server (Streaming PC)
Edit server_keypress.py and set: PORT = 45987 VIRTUAL_KEY = "f13" # the key OBS will see SECRET = "OBS1" ALLOWED_CLIENT_IP = "192.168.2.161" # your remote computer’s IP (optional)
Run the script as Administrator: python server_keypress.py
In OBS → Settings → Hotkeys, bind your action (e.g. “Switch to Scene 2”) to F13.
On the Remote Computer
Edit client_keypress.py and set: SERVER_IP = "192.168.2.100" # IP of your streaming PC SERVER_PORT = 45987 SECRET = "OBS1" LOCAL_KEY = "strg-rechts" # or "right ctrl" depending on your layout
Run the script as Administrator: python client_keypress.py
Hold the chosen key (e.g. Right Ctrl). OBS on the server reacts instantly as if you pressed F13 locally.
Example Use Case
Imagine you’re performing or presenting with two machines:
🎛 A remote computer in front of you
🖥 A dedicated streaming PC running OBS in the background
You want to hold a key on the remote machine to trigger a special effect, switch a camera, or mute/unmute a source in OBS. Instead of buying a Stream Deck, this script turns any key into a remote trigger.
Security Notes
Always set a secret string so random LAN noise is ignored.
Use a dedicated port (e.g. 45987).
Optionally restrict to your remote computer’s IP address.
Packets are plain UDP, so don’t expose this directly to the internet without tunneling (e.g. VPN).
Conclusion
With client_keypress.py and server_keypress.py, you now have a minimal but powerful way to send a single key (or multiple keys) across the network. OBS, games, or any desktop application will see them as local input.
It’s lightweight, extensible, and a fun DIY alternative to commercial hardware buttons.
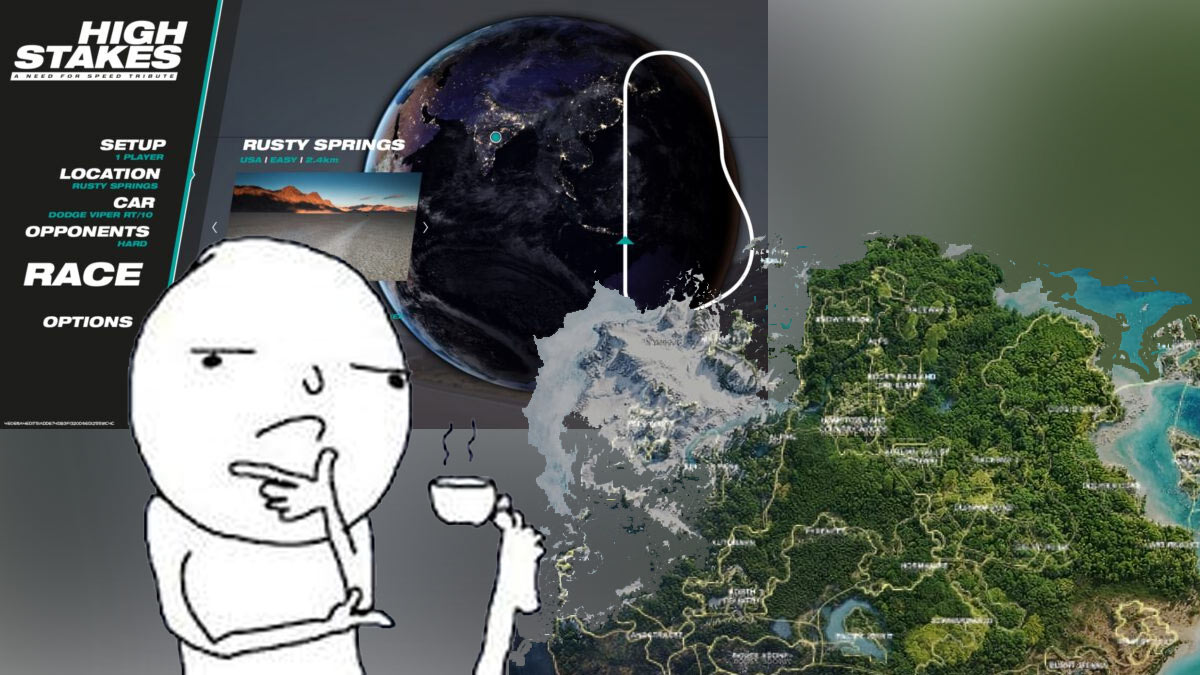
As it turned out, using already converted NFS1 tracks (e.g. NFS3, NFS4 or Assetto versions) being highly inaccurate (e.g. NFS3 “Rusty Springs” is actually a reskinned “Oasis Springs”) I got deeper into getting the original geometry exported.
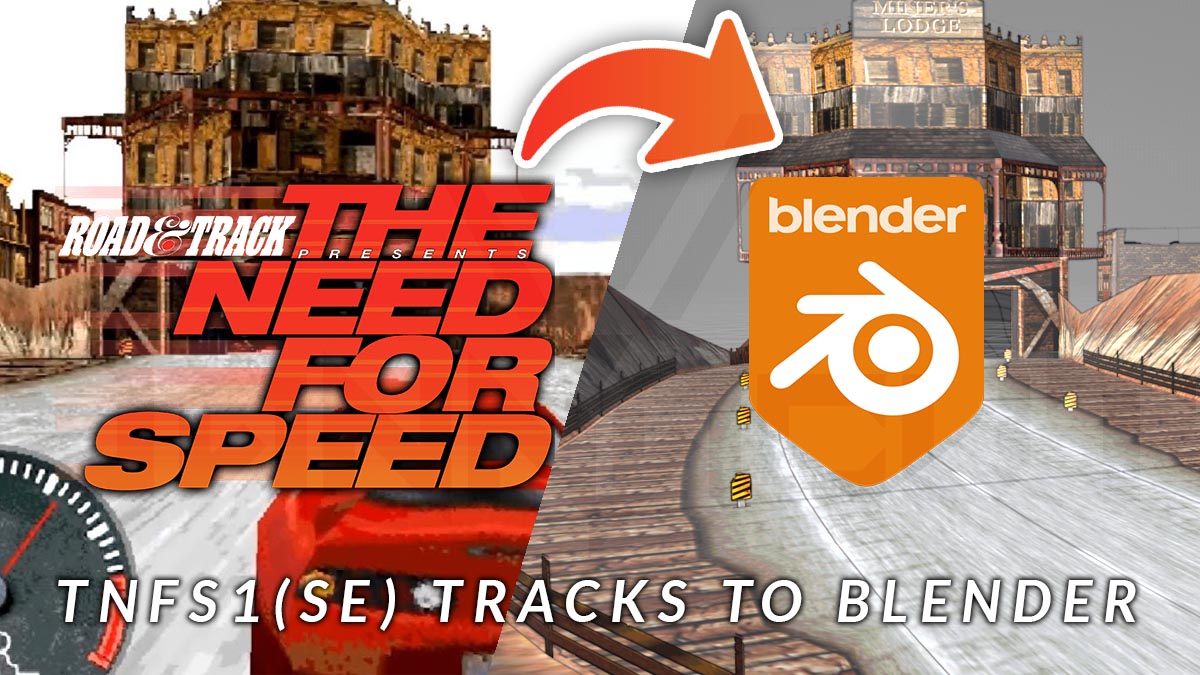
Upon research I discovered the mighty tools of Andrew Gura (andrew_gura) within the discord community of RENFS. I got into contact with him and he managed to fix some problems I discovered, yet me being able to convert all NFS1(SE) tracks fluently to blender.
Once you have downloaded the NFS resource toolkit by Andrew Gura from above and got your TNFS files dumped from your original copy, open your terminal (cmd) and navigate to the folder where you unzipped the nfsrc toolkit to, e.g. d:\NFSToolkit\, or in my case D:\_HighStakes\nfs-resources-converter-main.
For the most fluent experience make sure you have no other python version active and/or installed. I tend to use a specific unix WSL for it or a virtual windows machine.
Make sure that blender and ffmpeg commands work in terminal (cmd). If not, either fix your system environment variable PATH, or reboot your system if software was just installed, or set an absolute path to executables in settings.py
Then just enter
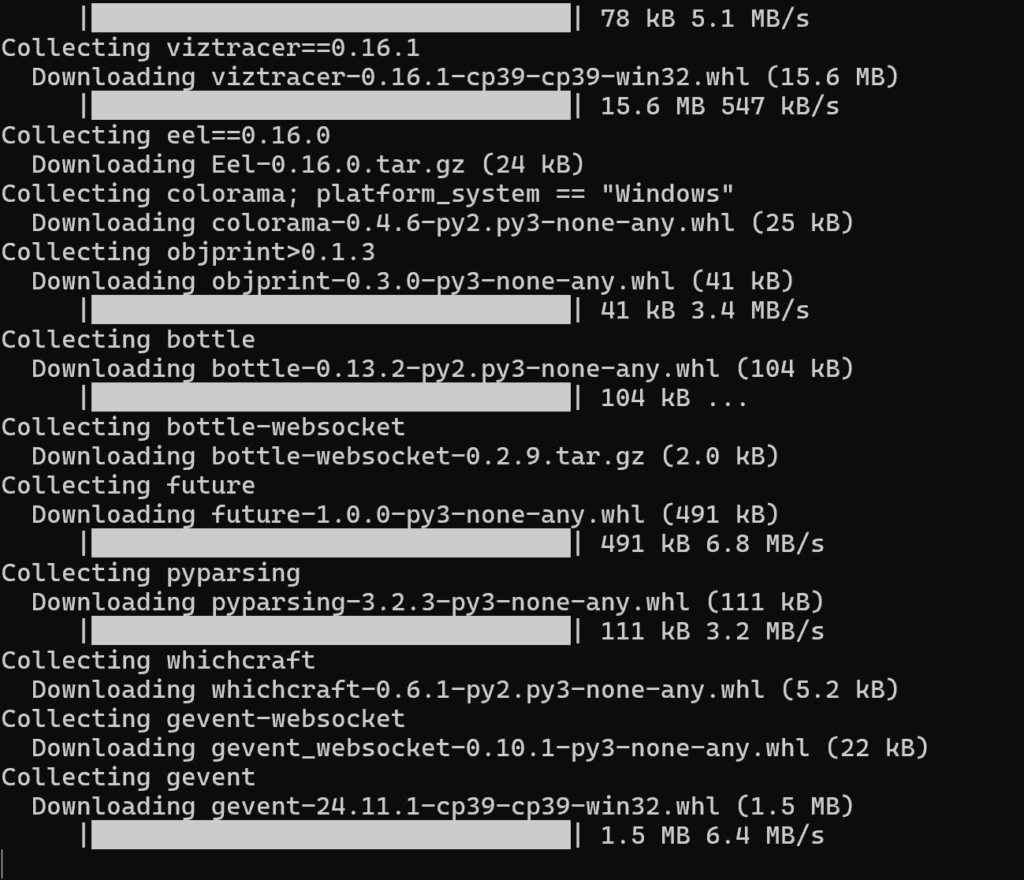
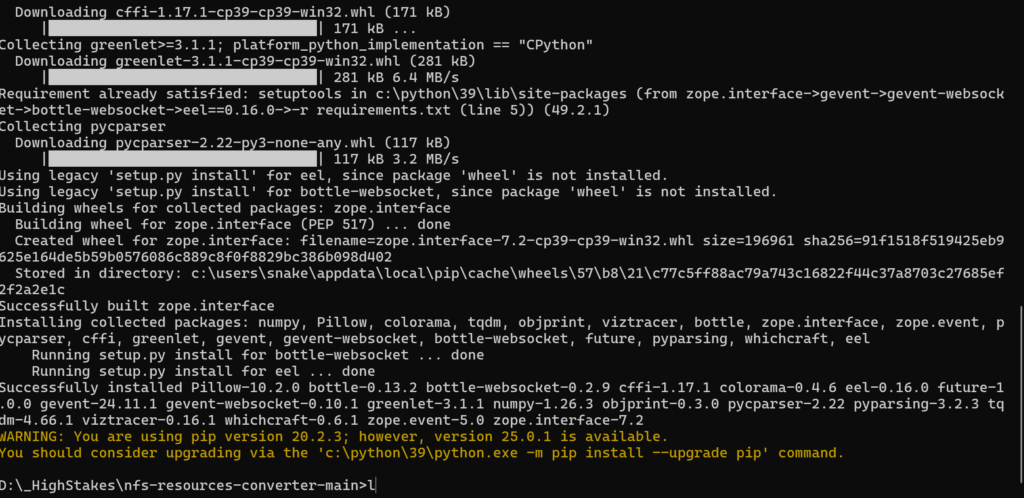
pip install -r requirements.txt
This will download a bunch of other libs and tools
just sit back and relax until everything is finished, it will take some time.
For the next step I recommend copying all neccessary data to your working nfsrc-directory.
My directories are, as “nfs-resources-converter-main” is the root:
you maybe need to adjust your pathes to your local configuration. Bare in mind not to use “/” at the very beginning of your pathes.
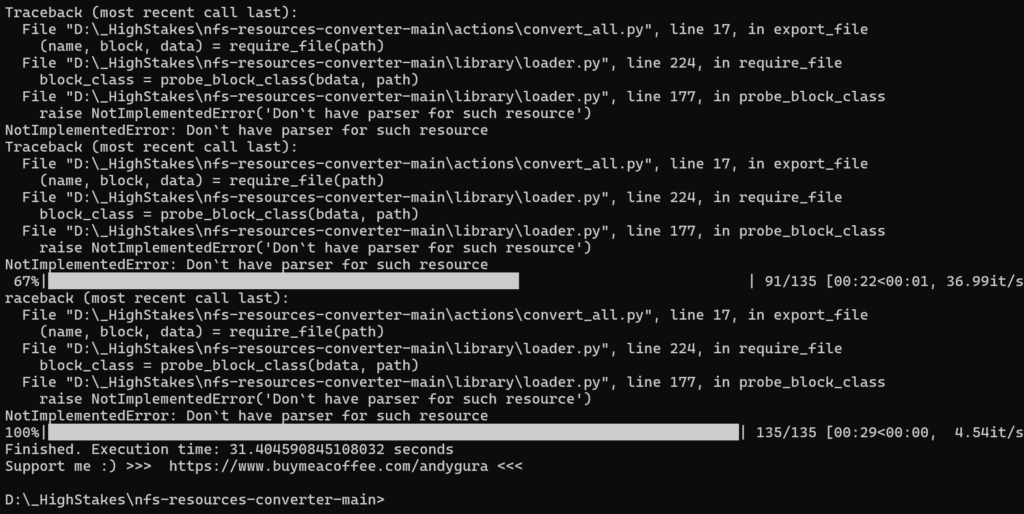
once this process is completed (I have error printing enabled if you wonder) – you will find all converted ressources in the spcified folder:
\media\out\SIMDATA\MISC
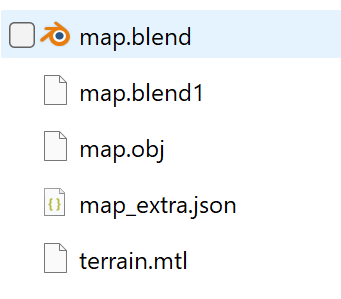
This is where you will find the converted track files. Let’s take a look at Burnt Sienna as this is one of my favorite tracks of Need For Speed 1.
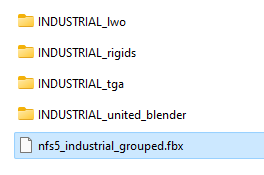
Burnt Sienna is TR6, this is the folder contents:
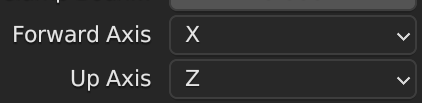
For me opening the .blend file does work, yet I cannot get the texture getting displayed. Instead I am importing the .obj-file into 3D Studio Max. Importing into blender does also work like a charm, yet the axis’ are somewhat flipped as you will surely notice. So make sure your import axis’ settings are as follows:
Forward Axis: X
Up Axis: Z
And then you will see the imported original track “Burnt Sienna” in all of it’s glory inside blender, 3dsmax or any other 3d software capable of handling .obj-files.
Further processing
As you now have a blender-compatible version of all the nfs1se-tracks you are free to use them for your projects. Bare in mind that the original tracks do have specific rights to the owners and may not be used in any public project.
For my use, I united all track and object parts to one each for better replacing and recreating in the unreal engine 5 for my High Stakes Racing project.
Hidden Tracks
As the nfs-fans of you might know, there are two hidden versions of “Rusty Springs” included in the PSX (Playstation) version of the game. Yet those two tracks (Oasis Springs and Lunar Springs) are indeed included but not playable in the game. Together with Andrew Gura I did manage to get them into blender.
Oasis Springs
Oasis Springs is available as “normal” bonus track and is therefor directly being exported during the process above. You will find it in the download section.
Lunar Springs
For Lunar Springs, as this is – beside the objects – just a reskinned Oasis Springs. To get access to the correctly exported textures and objects, we need to modify the following data before converting it.
Renaming TR8_R01.FAM inside NTRACKFM folder to TR5_001.FAM inside ETRACKFM folder.
After that you need to run the whole conversion process again as all dependencies are baked during conversion.
After running the conversion again just copy all content of NTRACKFM/TR8_R01.FAM over NTRACKFM/TR5_M01.FAM and re-run the conversion command.
Alternatively you can launch the gui and switch manually to NTRACKFM/TR8_R01.FAM
Although some objects are odd as there are just some remains of this track beside the full version. But as I am recreating all tracks by myself I just needed the placement and textures as reference.
Troubleshooting
I do not have any objects (trees, signs, houses) in my track
This is related to a setting in the settings.py file and as fixed in newer versions of the nfsrc toolkit – so you should consider getting the newest build from the git repo, or manually adjust the setting to “true”.
maps__add_props_to_obj = True
Blender file is not being generated
If you face the issue that you do not find any .blend file once the conversion process is complete this is most likely related due to wrong executable file specification within the settings.py
If you did noit modify the settings.py the script will require you to have blender set as system variable, otherwise you need to fix the path, e.g:
If you see that there are no textures being generated – this will be related to a problem with correctly replacing the placeholder backslashes within the bitmap.py script.
If you have error printing enabled, you will see an error like this
File "\serializers\bitmaps.py", line 52, in serialize
Image.frombytes('RGBA',
File "C:\Python\39\lib\site-packages\PIL\Image.py", line 2436, in save
fp = builtins.open(filename, "w+b")
FileNotFoundError: [Errno 2] No such file or directory: 'media--bs--out/--bs--SIMDATA--bs--ETRACKFM--bs--TR2_001.FAM--bs--props--bs--1--bs--0--bs--assets/side.png'
Answer
download my fixed bitmap.py script and overwrite the existing one ine /serializers/.
ERROR: Could not install packages due to an EnvironmentError: [WinError 5]
Zugriff verweigert: ‘c:\python38\lib\site-packages\pip-20.1.1.dist-info\entry_points.txt’ Consider using the –user option or check the permissions.
WARNING: You are using pip version 20.1.1; however, version 25.0.1 is available. You should consider upgrading via the ‘c:\python38\python.exe -m pip install –upgrade pip’ command.
Answer
The classic Windows WinError 5 — it means permission denied when pip tries to write to a system-wide folder. Here’s how to fix it 👇
✅ Option 1: Use --user to install in your user directory
Just add --user to your install command:
python -m pip install --upgrade pip --user
Or for any package:
python -m pip install <package-name> --user
This installs to your user-level site-packages (no admin needed).
✅ Option 2: Run as Administrator (if you need system-wide install)
Open the Start Menu
Search for Command Prompt
Right-click → Run as administrator
Then run: python -m pip install --upgrade pip
This gives pip the permissions it needs to update itself or install globally.
⚠️ Optional: Use Python 3.9 instead
If you’ve already installed Python 3.9 and want to upgrade pip there:
python3.9 -m pip install --upgrade pip --user
(or replace python3.9 with the exact path, e.g. C:\Python39\python.exe if needed)
The tutorial explains how to import a Need for Speed 5: Porsche Unleashed track into Unreal Engine 5 using Blender for 3D modeling and UE5 tools for rendering and lighting adjustments. It details processes such as extracting the original game files, converting track elements to usable formats, and adapting the materials for modern graphics engines. The article provides step-by-step guidance on managing textures, lighting, and Unreal Engine 5’s capabilities to breathe new life into classic tracks, making them playable within UE5.
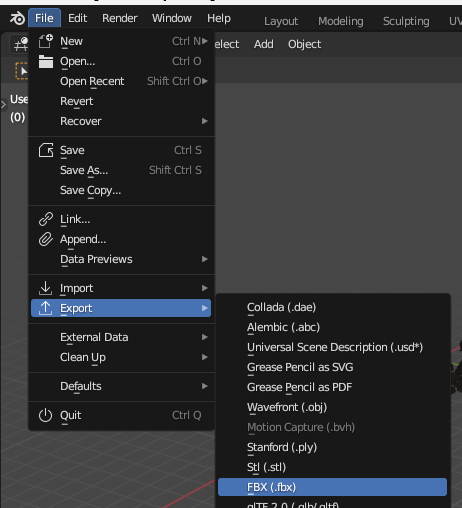
Adjust the settings to your needs and export the track.
Step 2 – Importing into UE5
I already have setup up a basic vehicle game template I am using, if you don’t have any you can use the one shipped with the unreal engine or google up some tutorials, there are plenty.
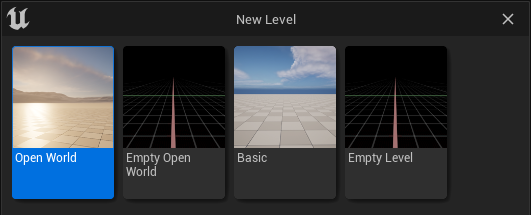
First a new level should be created, I suggest to select “Open World” or “Basic” – I used “basic” for the following steps.
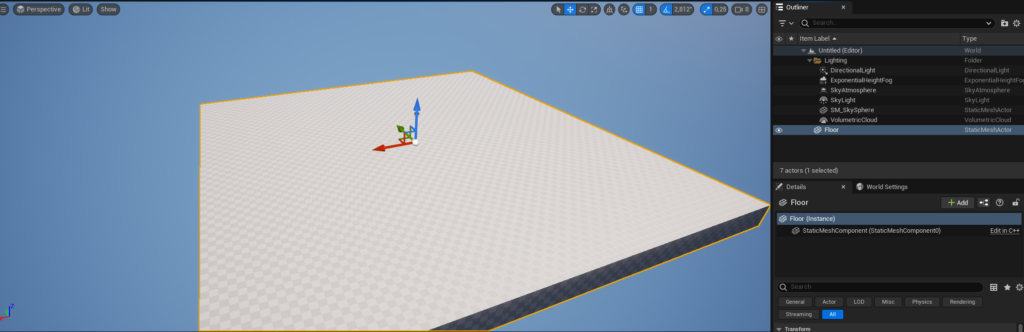
First of the floor static mesh (SM) can be removed as it is not needed.
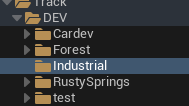
Second a new folder, according to your track, should be created – I chose “industrial”
Navigate inside that newly created folder and click on “Import” right above the content browser
Navigate to the folder where you exported the .fbx-file to and select the correct .fbx-file, then hit “open”
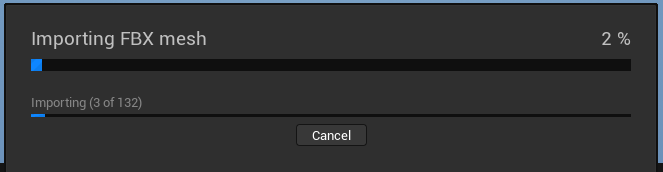
In the following dialog window make sure you have selected “Create New Materials” within the “Material Import Method” so that the engine is creating the materials for you. Then simply hit “import” and sit back and wait.
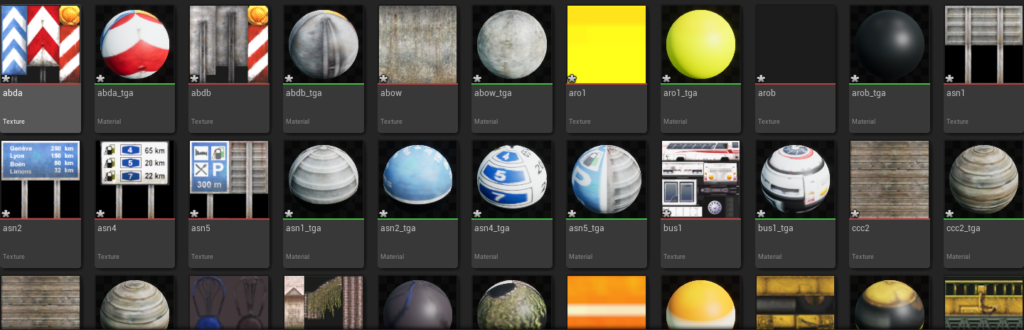
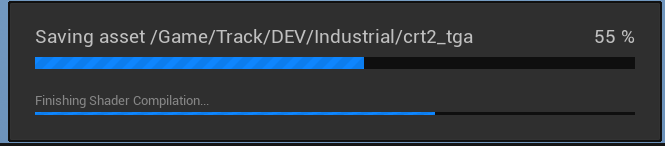
This may take a while depending on how many objects your imported track has. Once its done you will find the imported geometry (static meshes), textures and materials in your content browser
First, now you should hit the “Save all” button to save the level and all imported assets, that will make alot of perfomance difference.
Once the saving process is done you surely want to have the track in your level, right? Okay, gotcha.
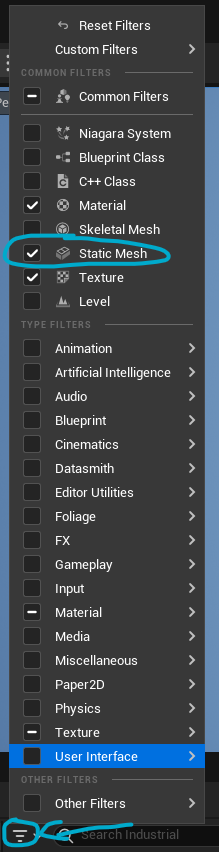
The easiest way is to apply a filter to your working folder, filtering for “static meshes” because within the whole texture-material-static-mesh-mess you simply don’t want to search for the SMs right?
Step 2 – Getting the track to play
As mentioned before, set a filter by clicking the filter-icon and selecting “static mesh”.
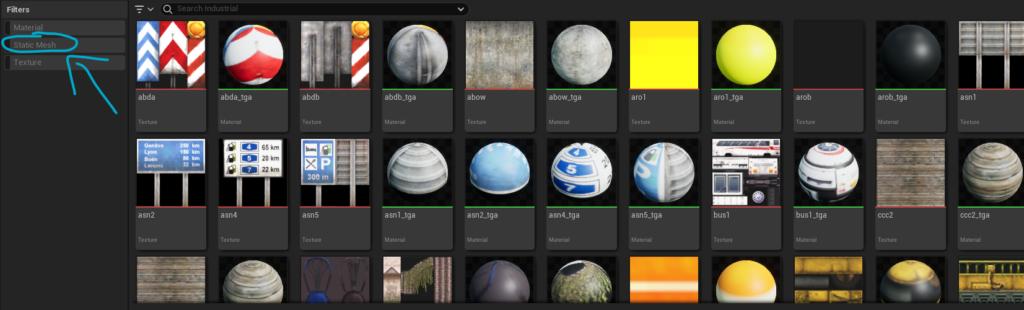
then apply the filter by simply clicking it on the left hand side (depending on your layout) of the content browser:
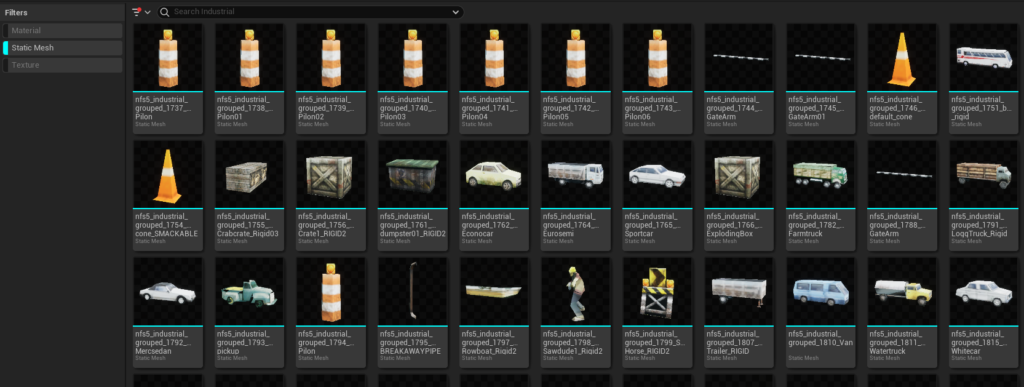
And all off a sudden you will see all the beautiful meshes you freshly imported, all textured and ready to use (the view might differ from mine as I sorted, grouped and united the track’s objects before to fit my needs)
Then all you need to do is press CTRL+A (to select all static meshes) and drag&drop it into the viewport above
And you have successfully imported the track to the unreal engine 5.
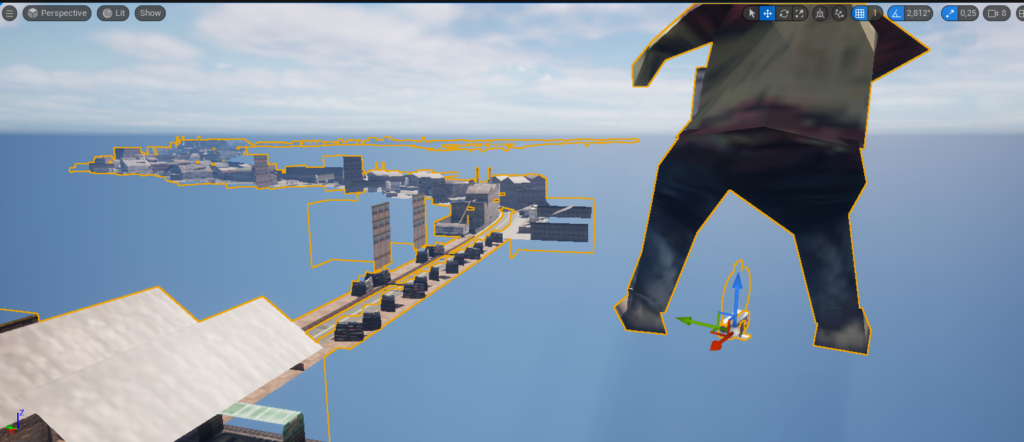
Step 3 – adjusting the collision
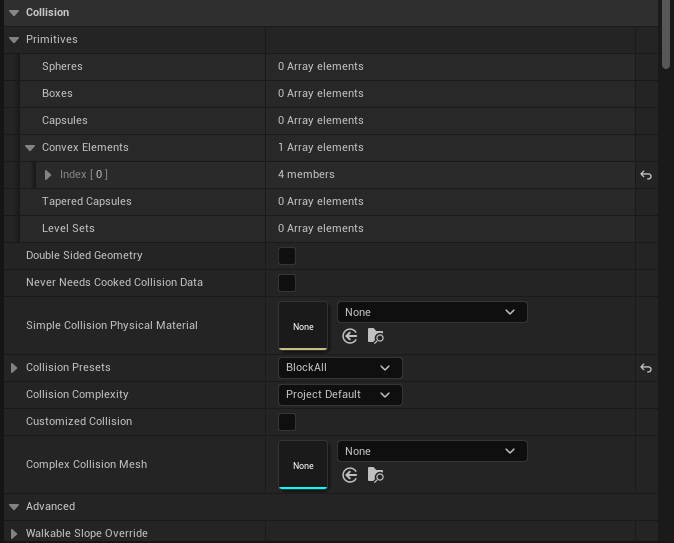
per default you would not be able to “race” the track right now as the collision settings would block you to do so. So the easiest way to adjust this is – as I do know you simply want to RACE THE TRACK – open the static mesh’s properties (one by one, by simply double-clicking it) and go to the collision settings:
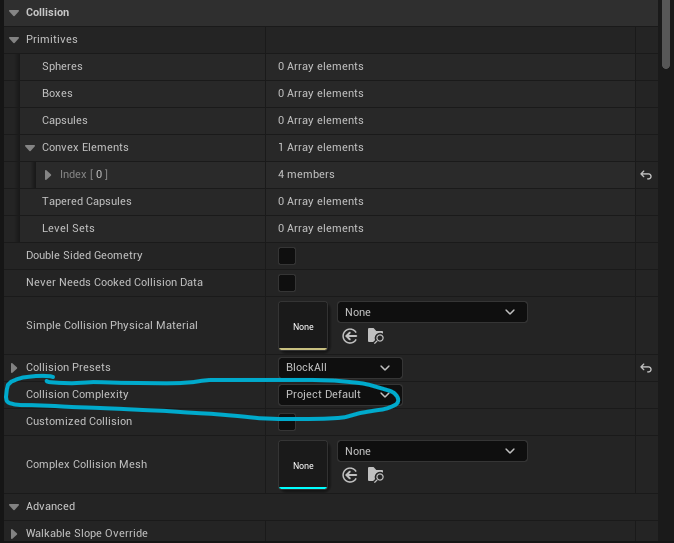
In there you will find the setting “Collision Complexity” – just set this to “use Complex Collision as simple”
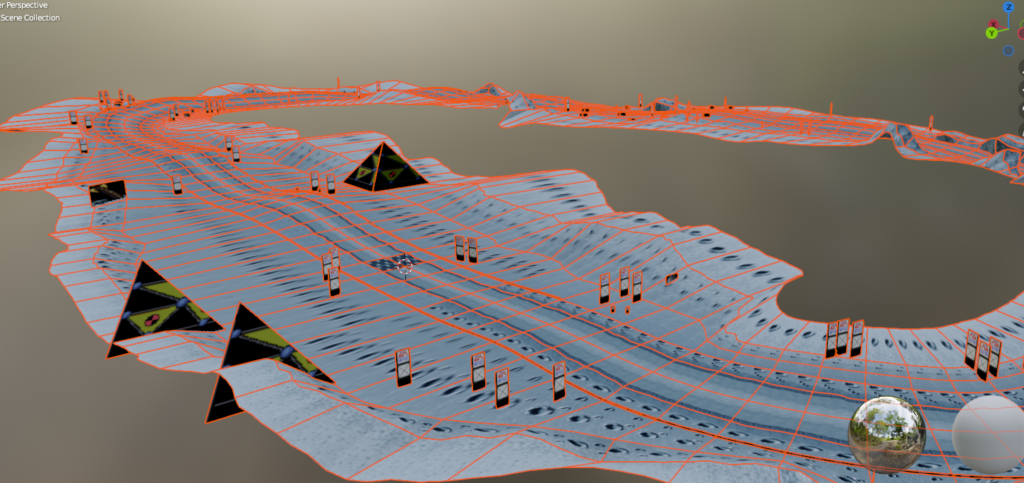
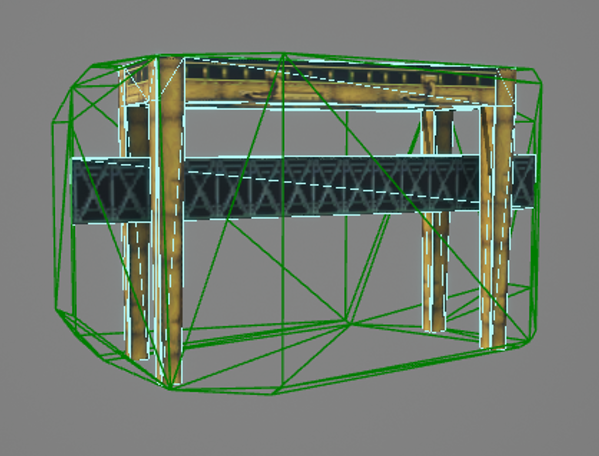
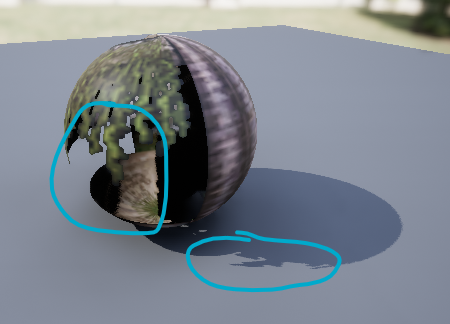
This will force the engine to use the mesh of the static mesh as a collision instead of creating a basic box around it – to make the difference clear on a smaller mesh you will see both, simple and complex collision on the following mesh:
green being the simple collision, turquise being the complex collision. In this case using simple collision would lead to not being able to drive through the crane.
Make sure to hit the save button as changing the collision preset is not saved automatically!
Repeat this step for all needed objects (depending on how many you have)
Step 4 – adjusting the size
This step can be very frustrating, but is mandatory. You need to get any reference point from the old game and transfer it to the new one to adjust the sizes – more or less, depending on how accurate you want it to be.
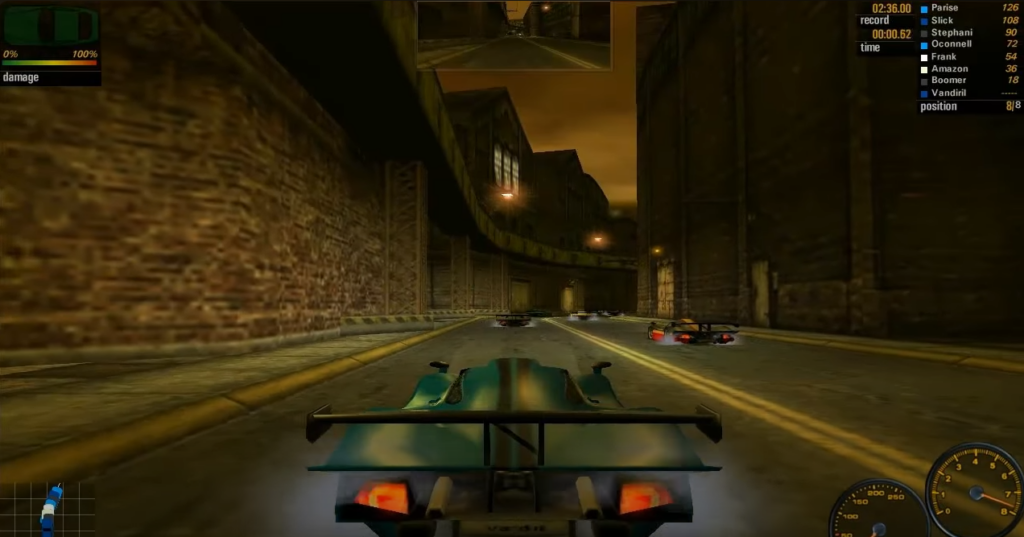
As I do not have yet a Porsche model ingame I am using the existing McLaren F1 as reference as well as some ingame shots from the original game.
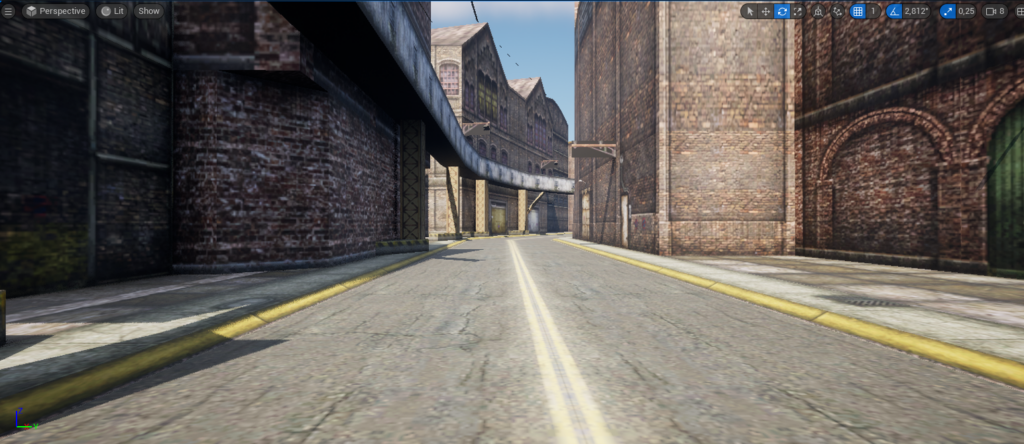
First we take a screenshot of the starting lane and find the same spot in the unreal engine project
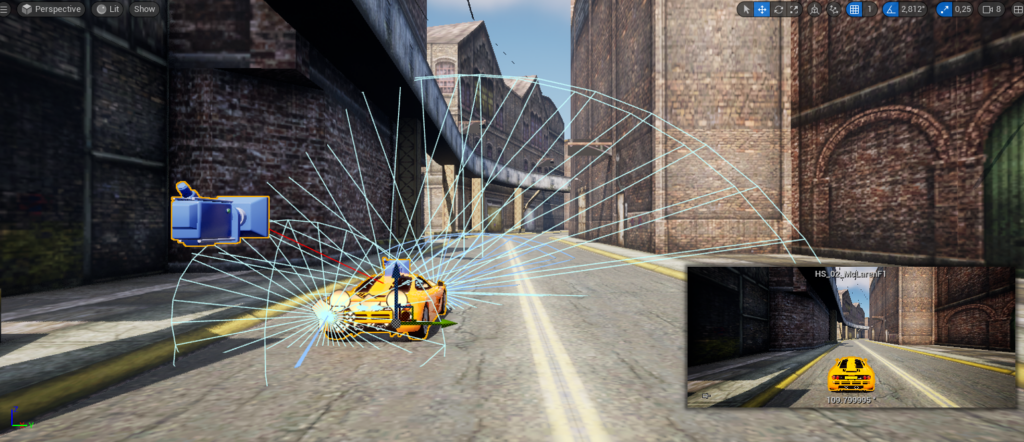
Once we found the spot we add our car as reference object
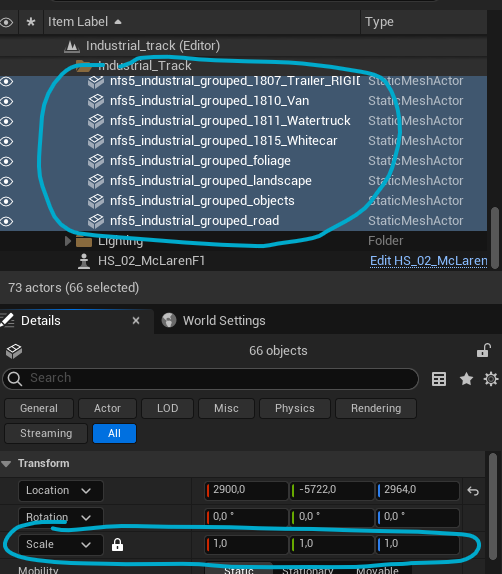
Now, for my good, it seems to be pretty well scaled. If you are not the lucky one to find the scaling right, just select all track objects in the level outliner (top right in the default layout) and adjust the scaling accordingly – attention, some math can be required (e.g. the original game screenshot car (911 GT-1 ) is 1990mm width, McLaren F1 is 1820mm width), so you could measure the actual ingame road lane width and transfer it to unreal engine using simple math.
Step 4 – adjusting materials
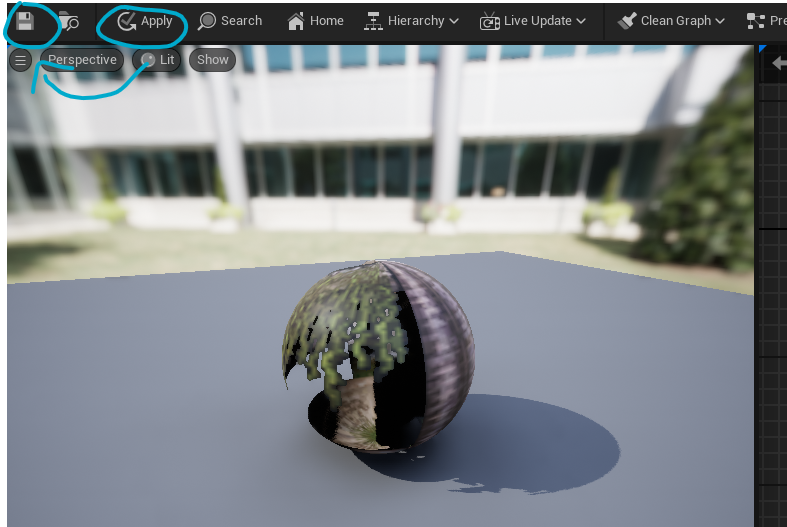
Gladly we have all needed materials ready, sadly they are all missing the alpha channel and, as the NFS5-Engine is dealing a lot of objects as two-sided, this setting is also missing and needs to be adjusted.
This is how to do it
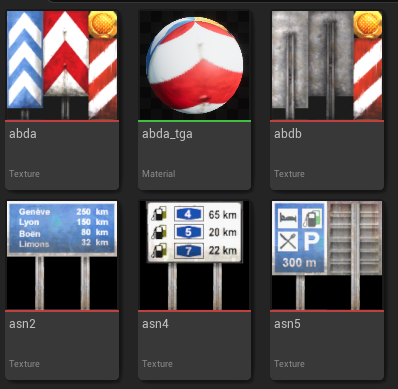
First, detect the materials/textures that have an alpha channel and/or are two sided, e.g. signs, trees etc.
those for example are pretty sure having an alpha channel
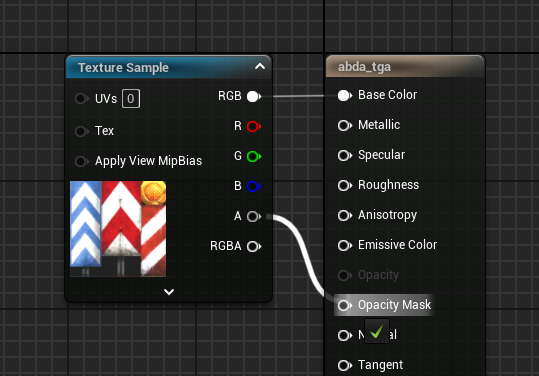
Once you find the texture/material, double click the material (NOT the texture). The editor will open a new window, looking like this
In here, left hand side, change the “Blend mode” to “Masked” and check “Two Sided”
Then in the notes view you can now drag the A (for alpha) channel note to the opacity mask note
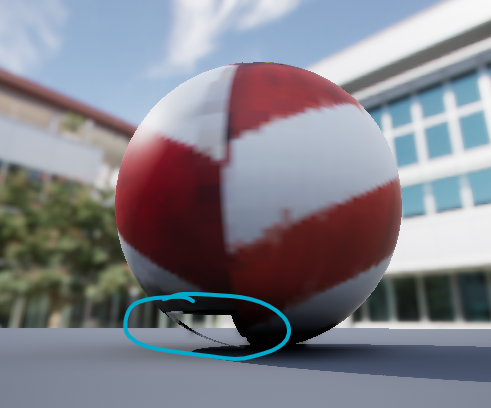
You will notice (depending on the texture) that there now will be transparent parts and the shadow will be calculated accordingly
Afterwards always hit APPLY first, then SAVE
repeat this step for all needed textures/materials. Knowing the original track/textures does help as well as flying through the track in the engine.
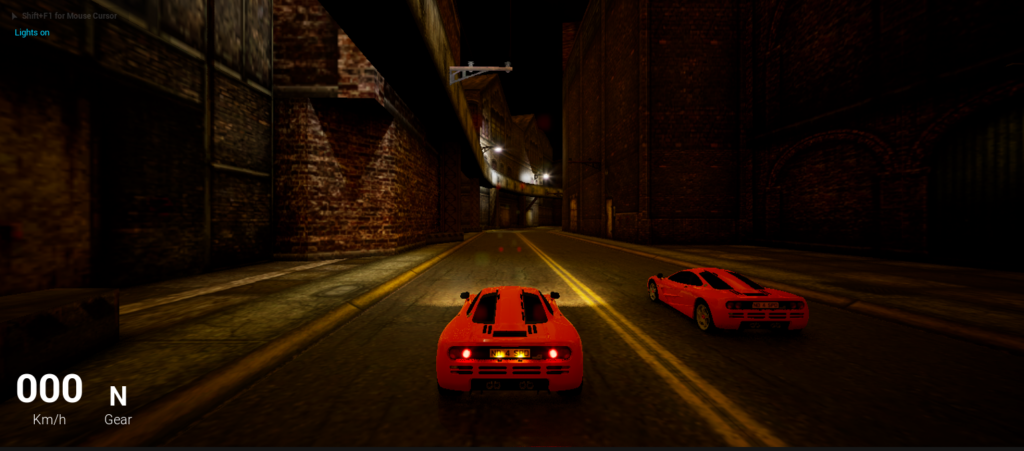
Step 5 – adjusting lightning
Of couse you could race now, but as you are tend to get the atmosphere right we should adjust the lightning and atmosphere – using – again – old ingame references.
In this tutorial I show you the (for me, yet) best way to convert a track from NFS5 aka Porsche / Porsche Unleashed to a blender-compatible format.
First of all you obviously need a original copy from nfs5 pu for your pc. I will target the PSX version in another tutorial.
Futhermore you need the NFSPU CRP Track Converter (Credits to Denis Auroux, Bonne, Krom, Nikko, The Born, Addict) which you can download right here – and of course blender.
Note: yet I discovered some errors causing to blender force close on some converted lwo blocks, such as the two "waterfall" blocks on the "forest"-track.
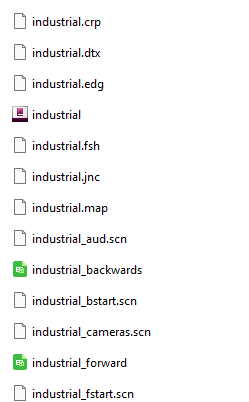
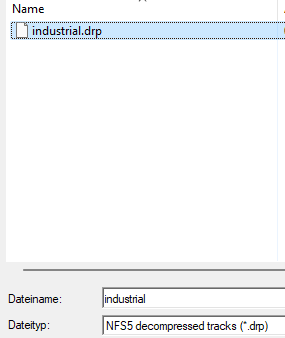
First of all you need to locate the desired track for conversion – in my case I chose “Zone Indutrielle”.
The trackdata can be found under \GameData\Track
To keep a better eye on the converted tracks and data I always copy the files to another location where I can better sort and store the track data, but that is totally up to you.
Step 1 – CRP2DRP
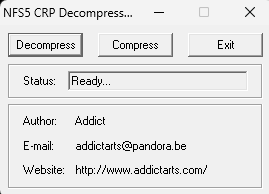
Shipped with the NFSPU CRP Track Converter Tool you find the crp2drp.exe in the main directory.
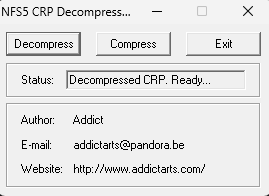
Once started you might want to select “decompress” and then select the corresponding .crp-file of your track.
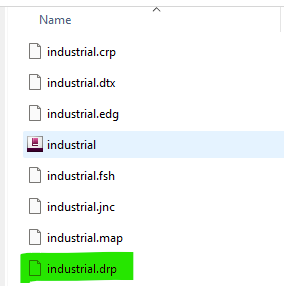
This will create a new .drp-file within the folder of which you started:
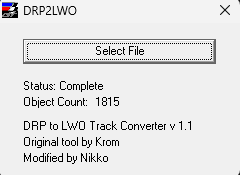
Step 2: DRP2LWO
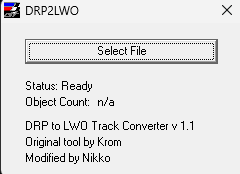
Once we got the .drp-file of the selected track from the step above we now can convert it to .lwo file format. Again, shipped with the toolset you find the drp2lwo.exe in the main folder.
As easy as it could be you now just have to select the just created .drp-file
And need to wait a bit until it states “complete”
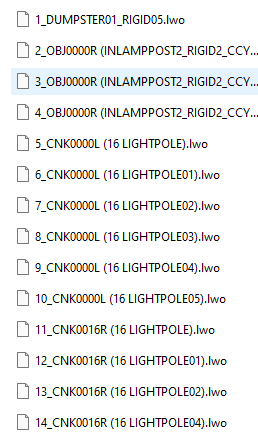
Then you will find a new folder, named after the .drp-file in the root folder where your track files are located. Inside you will find a bunch of .lwo-files:
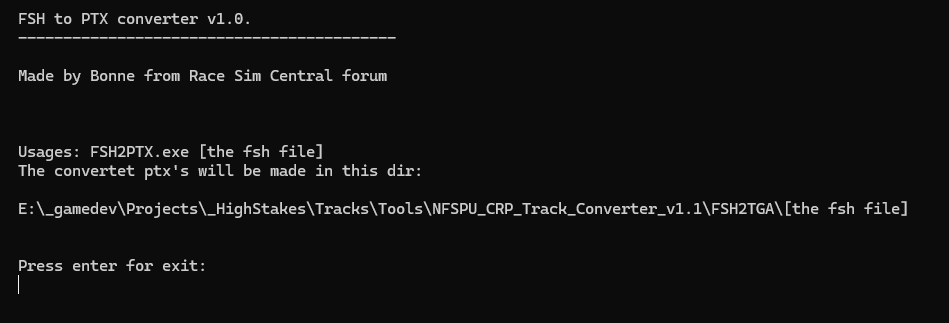
Step 3: Converting the textures
Before heading into blender – according to the guide shipped with the toolset – we need to convert our textures.
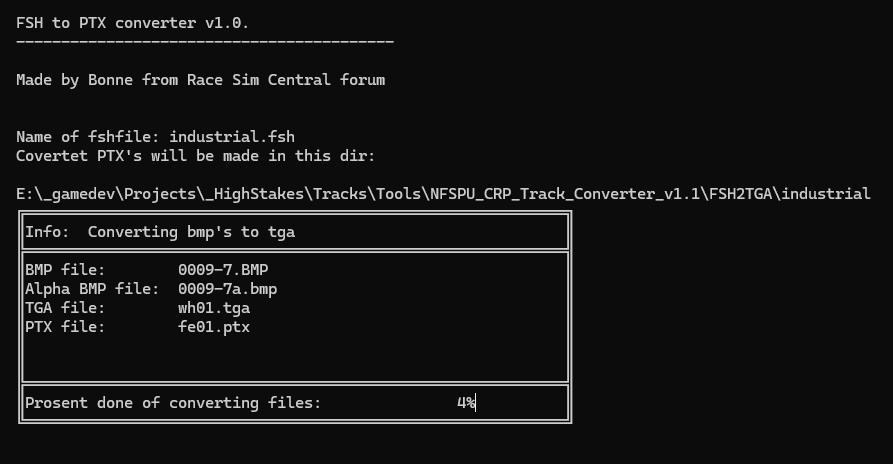
For this we find the tool “FSH2PTX” in the “FSH2TGA” subfolder of the toolset. This needs to be run via CLI/command line.
Also I recommend to copy the track’s .fsh-file (e.g. industrial.fsh) to the same folder of the fsh2ptx.exe
So the prompt would be
fsh2ptx industrial.fsh
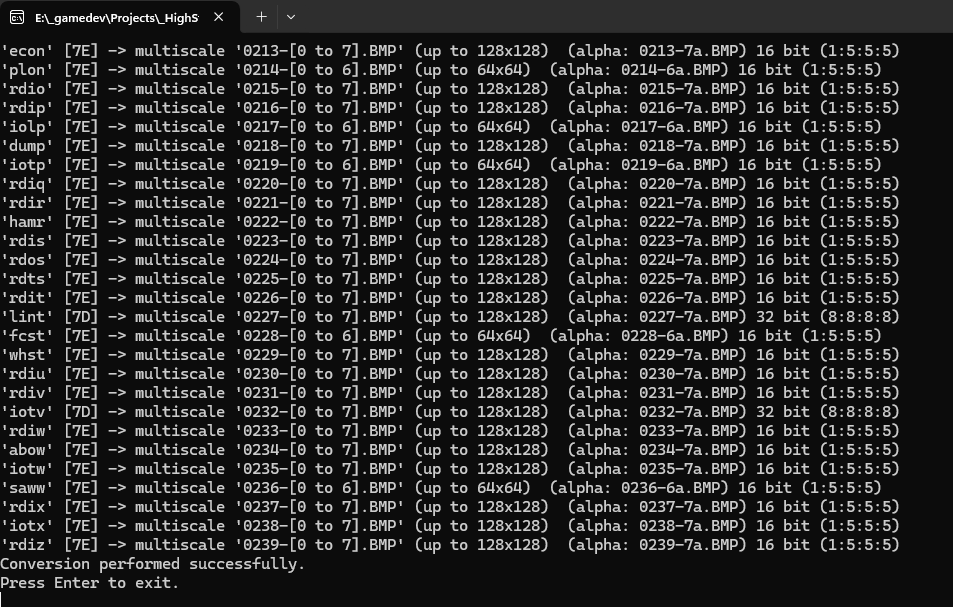
After pressing “Enter” the final conversion starts. This might take a while as there will be a bunch of textures converted.
Important: You need the .tga files - for me, for reasons I do not know, the .tga-files have been deleted once the process was done and only the .ptx files where left. So what I did was to wait until the very last image is successfully converted and then simply duplicate the folder
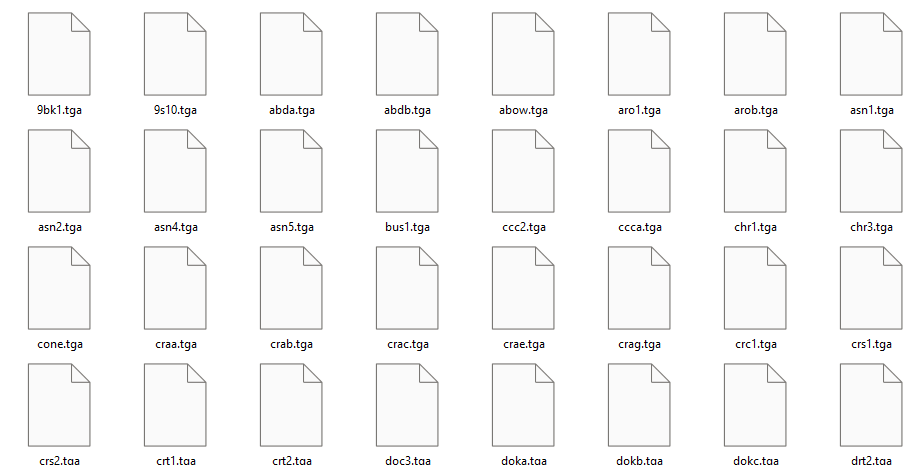
Once completed (and duplicated the folder at a 100% state), you can remove all .ptx-files as they are not needed, and that results in a folder full of .tga-files:
Again, following the guide, now you need to copy the “Unknown.tga” from the root folder of the toolset to the other track’s tga-files.
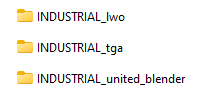
Step 4: Merging the folders
This step can differ as it depends on your working structure. As I, as stated before, work with separate folders for the converted track .lwo-files and the .tga-files I now need to join them in one single folder. I tend to call those folders TRACKNAME_united_blender for better identification.
Step 5: Installing the Plugin for blender
Now you need to install the “io_scene_lwo” Plugin into blender.
Step 6: Importing the files
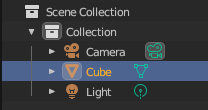
After launching blender, at first I recommend to remove the default objects from the scene at first so we have a clean start.
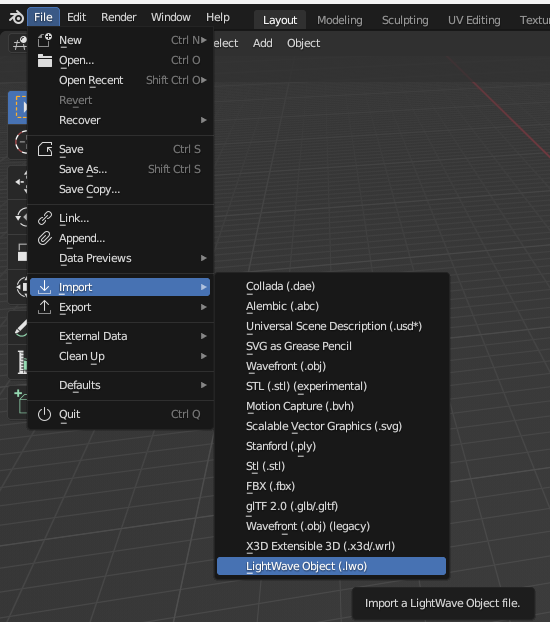
If you have successfully and correctly installed the “io_scene_lwo” plugin you can now find the lwo-import option from the menu under file > import > LightWave Object
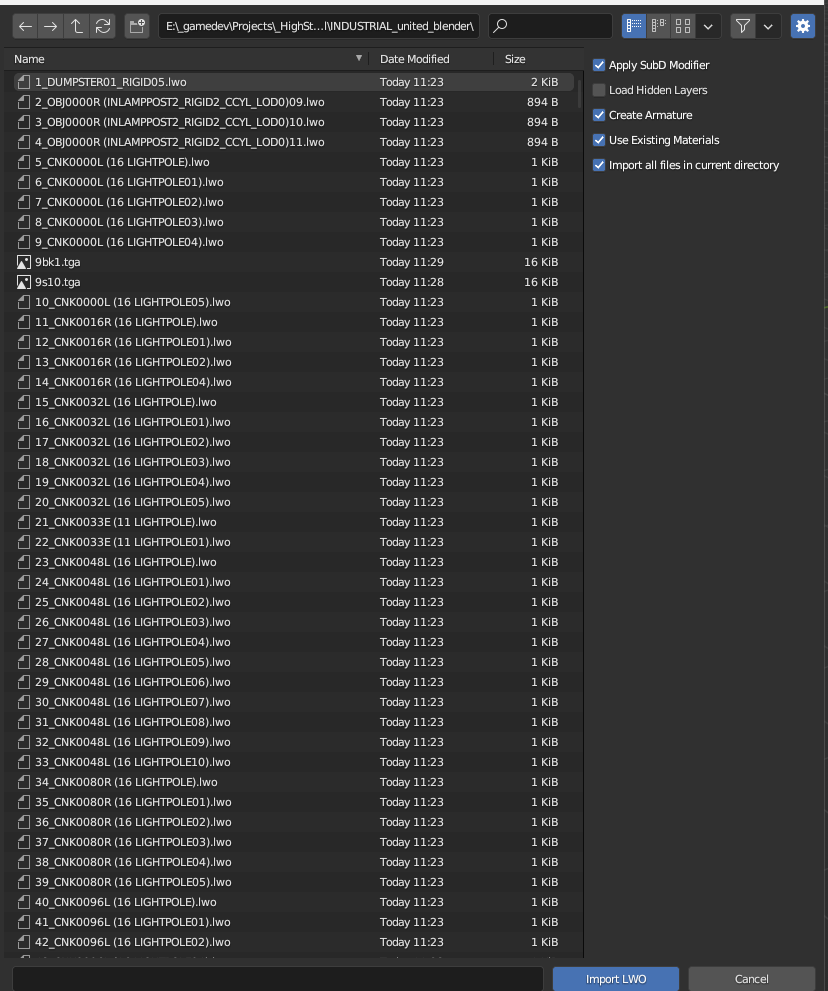
Then navigate to the tracks’s folder you just created
I personally recommend to check these settings
Breakdown of settings:
Use Existing Materials– as in the NFS universe a Block/LWO-File will have multiple textures assigned blender otherwise tends to create materials for each texture for each object imported, leading to easily over 5.000 materials for the scene. I tried cleaning them up, it was a pure mess.
Import all files in current directory – simply a pure time saver if you want to import the whole track at once. If you just want specific blocks this setting should be off.
Important: within the process I discovered some force closings of blender within the import process - yet I could strip this down to the following .lwo-blocks of tracks - removing (or leaving them out from import) prevented the force close to happen, yet it seems that animated water is tend to cause the problems here:
If you encounter a force close this will be caused by a single or multiple faulty blocks - I then start to import 100 files at once, save, and keep doing this until I reach the 100-block-set causing a force close and strip it down until I find the block(s) that cause the trouble. Mostly those blocks are only one or two, but finding them is kind of hard. Maybe you can reach out to the reNFS5 Project via Discord:
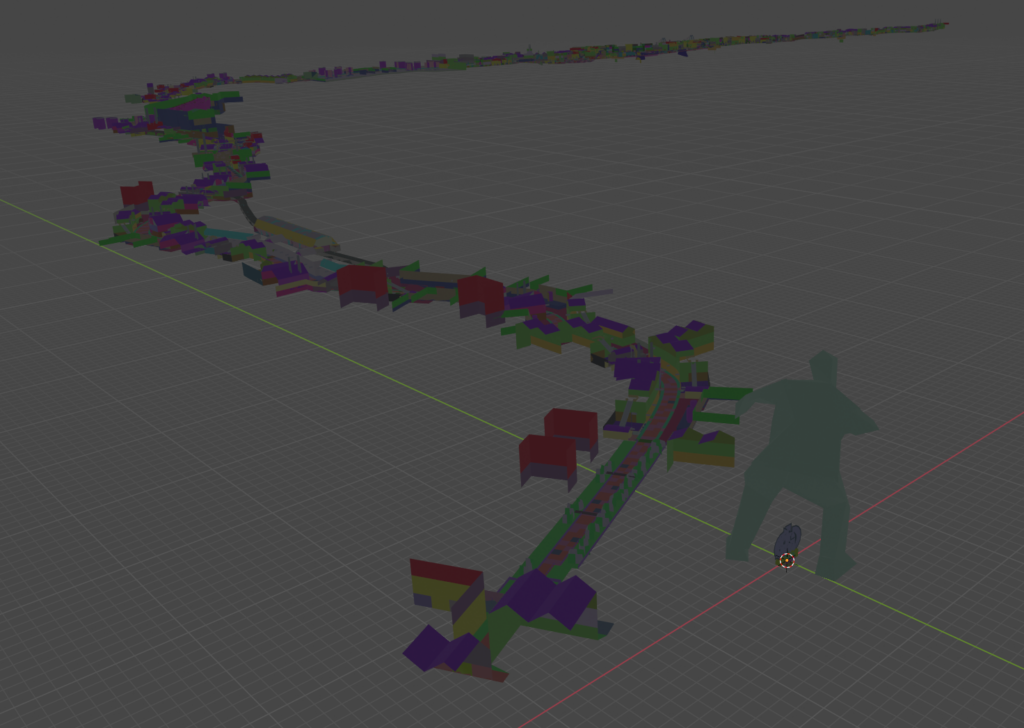
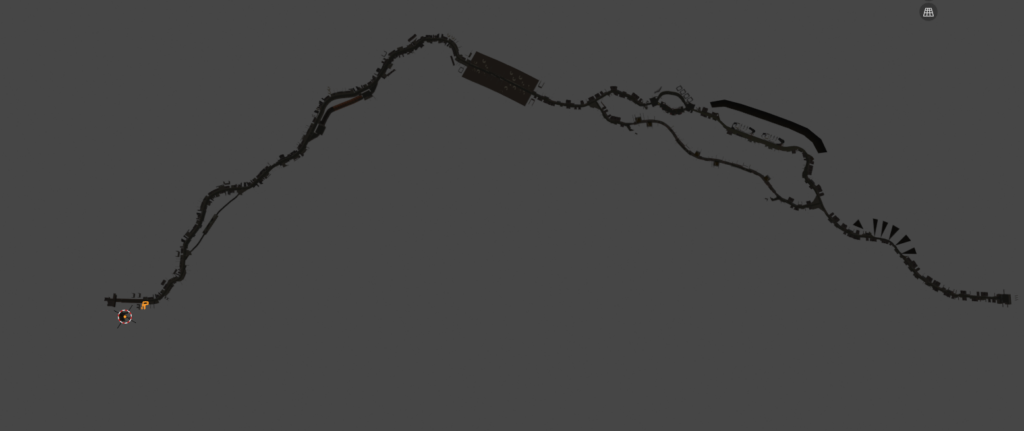
Once the import has successfully completed you will find the track inside blender – even if you switch to textured view there wont be any textures:
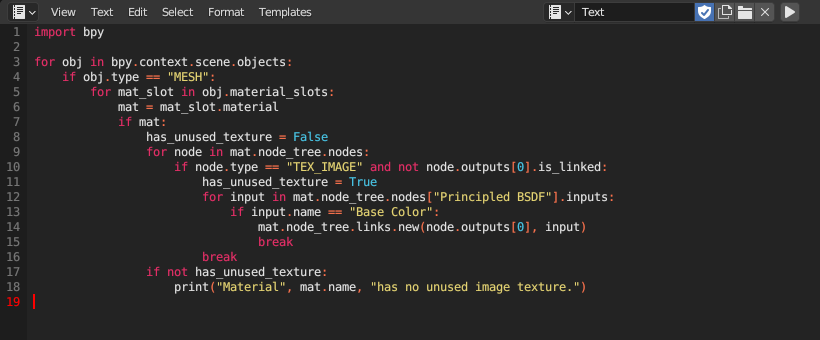
Step 7: Run the texture script
Inside the toolbox you will find a readme containing a script. Don’t bother, here is the script for you:
import bpy
import bpy

for obj in bpy.context.scene.objects:
    if obj.type == "MESH":
        for mat_slot in obj.material_slots:
            mat = mat_slot.material
            if mat:
                has_unused_texture = False
                for node in mat.node_tree.nodes:
                    if node.type == "TEX_IMAGE" and not node.outputs[0].is_linked:
                        has_unused_texture = True
                        for input in mat.node_tree.nodes["Principled BSDF"].inputs:
                            if input.name == "Base Color":
                                mat.node_tree.links.new(node.outputs[0], input)
                                break
                        break
                if not has_unused_texture:
                    print("Material", mat.name, "has no unused image texture.")
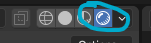
Copy this script and run it in the script window of blender. Please make sure that during the import AND before running the script the corresponding .tga-files have been in the same folder (not any subfolder) of your imported .lwo-files!
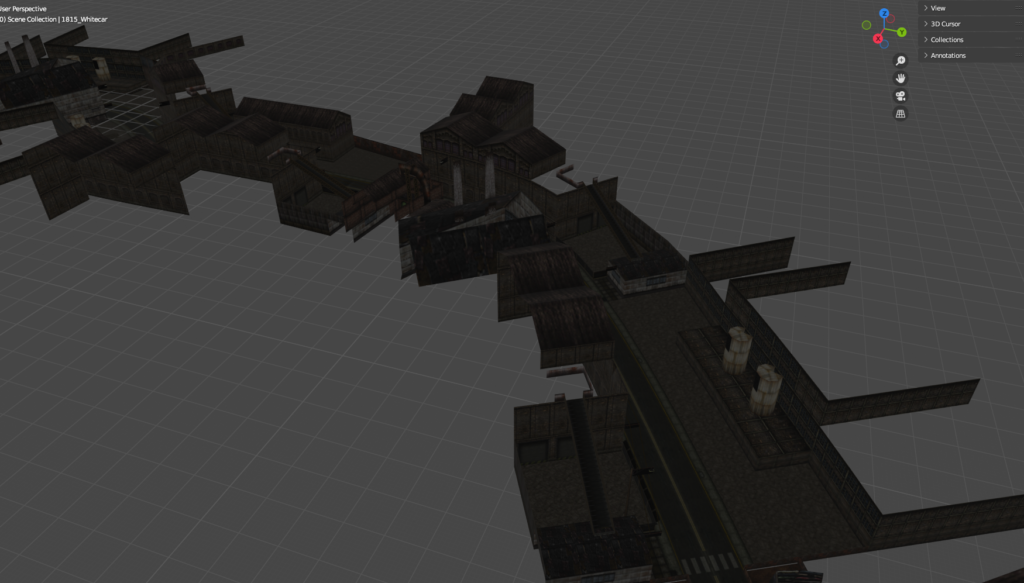
Insert the script and click “play” – wait a bit and your viewport will turn back to default shading, if you switch now back to textured view, you will see the track beautifully textured:
click this for textured view
Step 8 – optional – cleaning the object mess
As the track is now successfully imported you will find a pretty mess of easily over 1.000 single objects. For my further use that is totally useless, so I tend to sort the objects to
road
landscape
signs and other objects
foliage
movables
blockers
For this I simply create new collections and name them correspondingly
Once all sorting is done I can toggle all specific groups to check all objects are – more or less – properly sorted (I need this for the future rework of the track(s)).
After having them successfully sorted the objects are being united (except the movables). To do so just select all objects and press CTRL+J in object mode in the viewport.
Step 9 – further processing
As the track is now imported and saved you can do whatever your next steps are.
To provide the best experiences, we use technologies like cookies to store and/or access device information. Consenting to these technologies will allow us to process data such as browsing behavior or unique IDs on this site. Not consenting or withdrawing consent, may adversely affect certain features and functions.
Functional
Always active
The technical storage or access is strictly necessary for the legitimate purpose of enabling the use of a specific service explicitly requested by the subscriber or user, or for the sole purpose of carrying out the transmission of a communication over an electronic communications network.
Preferences
The technical storage or access is necessary for the legitimate purpose of storing preferences that are not requested by the subscriber or user.
Statistics
The technical storage or access that is used exclusively for statistical purposes.The technical storage or access that is used exclusively for anonymous statistical purposes. Without a subpoena, voluntary compliance on the part of your Internet Service Provider, or additional records from a third party, information stored or retrieved for this purpose alone cannot usually be used to identify you.
Marketing
The technical storage or access is required to create user profiles to send advertising, or to track the user on a website or across several websites for similar marketing purposes.